We all have a little man in our lives. Whether it’s your son, your nephew, or the neighbor, you probably know a little boy. Dressing little boys is sometimes a challenge. As the mother of three young boys, I feel like sometimes I go to the store and the girl’s clothes and accessories are fun and inexpensive, and everything I like in the boys department is overpriced or has puppies or words all over the front. Not my thing.
During Easter, I set out to find bow ties for my little guys. I wanted something that looked good but was inexpensive and easy to put on. To my dismay, everything I found was out of my price range, looked cheesy, or I didn’t like the way it clipped on. That’s when I took matters into my own hands. For the price of one men’s necktie I can make two bow ties! This is how I did it.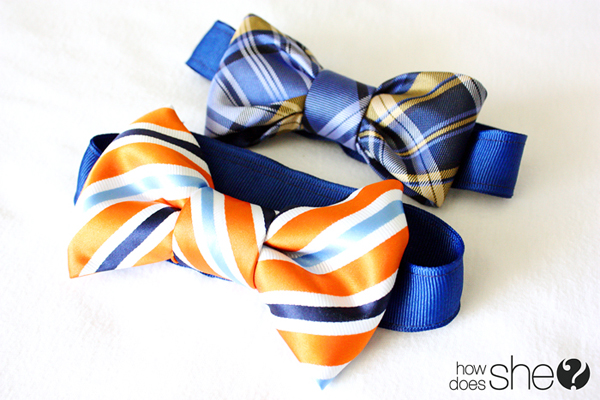
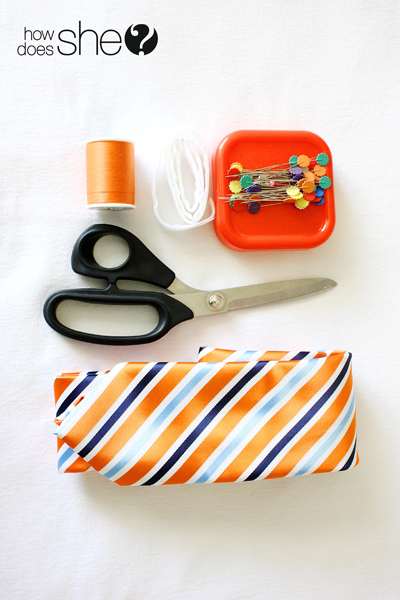
What you’ll need: One men’s necktie, scissors, pins, needle and thread, and velcro. A sewing machine is handy in this project but you can do it without as well.
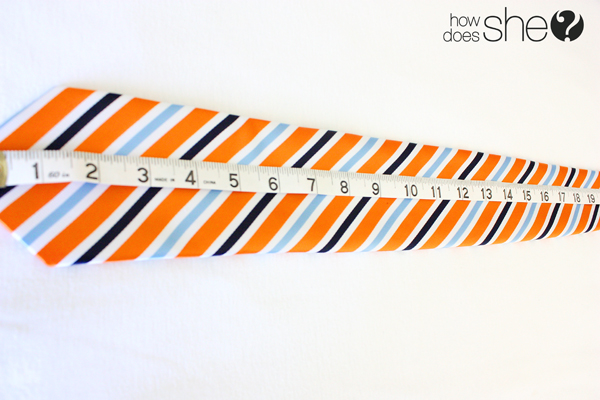
First, measure out 10-12 inches on the thicker end of the necktie. I like a large, fairly fat bow tie, but if you have a toddler or you like a slimmer bow tie, you can adjust accordingly. 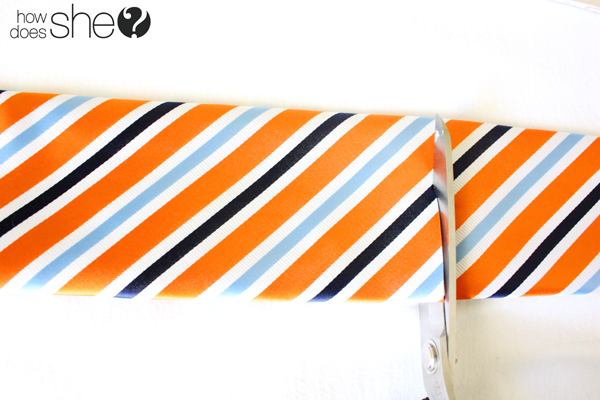
Cut the tie straight across. This might give you a little heart attack, but I promise it’s ok.
Now you’ll fold the cut portion into thirds, cut side under the finished side.
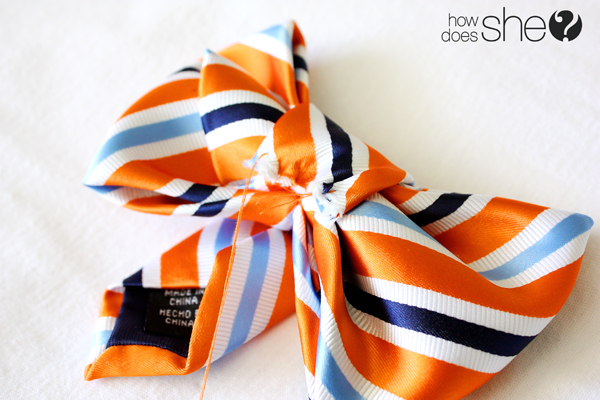
Pinch the bow tie with your fingers to create the look you’re going for. Take your needle and thread and push the needle up through the middle of the bow tie. Once you pull the thread all the way to the knot in the end of your thread, wrap the thread around the middle of the tie, cinching it tightly. Then, run the needle back through the middle and tie off.
Now measure and cut about 4-5 inches on the tail end of your men’s necktie. You’ll use this to cover the middle portion.
Take the small portion of the tie you just cut and rough stitch the cut side to the back portion of your bow tie. This doesn’t have to be pretty because you’re just going to cover it up, but make sure it’s secure.
Now wrap that portion around the middle of the bow tie and really pull it tight. This can be a little tricky, so get a good grip and turn the bow tie to make sure you like the way it looks. Fold under the excess tie and whip stitch it into place. Again, this doesn’t have to look pretty because no one will see it.
At this point you have a few options. For the part that goes around the neck you can either use pieces of the actual necktie, or some grosgrain ribbon. Since I was making two bow ties from one necktie, I used ribbon. I measured my son’s neck and decided 16 inches was good for a four-year-old. I cut long pieces of velcro so I had wiggle room with how tight I wanted the tie around his neck, and sewed the strips on using my machine. If you don’t have a sewing machine you can hand sew these pretty easily, or maybe even use some fabric glue. After the velcro was all sewn, I attached the ribbon to the center portion of the bow tie with four quick stitches in the middle of the bow tie.
Easy and quick and done in a flash. The boy can even put the bow tie on himself! The other good news is that if someone yanks on it, it comes right off and isn’t a choking hazard for your little buddy.
One necktie plus a little bit of time equals two bow ties for the little men in your life!






Missy says
These are ADORABLE! …and green – repurpose Dad’s ties with the little stains that won’t come out in stead of throwing them away. Looks easy to do as well. Thanks!
Emily Fonnesbeck says
The orange tie in the tutorial was one I bought for my husband and it had the teeeeenist tiniest black dot on it, so he said no way. Hello bow ties!
Sara says
I love this idea!
Cristi Dame says
My husband has WAY TOO MANY ties that he never wears…this is perfect!!! And so easy!! I can’t wait to do it!
Allison says
Oh I’m soooo excited! I was drooling over some of the cute bow ties at Easter but at $20+ a pop x 4 boys who would need matching ties I kept walking! Now with two ties I can get 4 ties! You ROCK! 🙂 Thanks for sharing! Can’t wait to try it!
Greta says
Love creative people. I have a 4 year old grandson and his mom looked for a nice tie for a wedding reception. Now this helps me. Thanks
Tara says
These are too cute! I’m having my first boy (after two girls) in September, and I’ve been a little bummed shopping for him. It seems like everything for boys either has sports balls or monkeys all over it, or like you said, is too expensive! But these are adorable, I’m definitely going to be whipping out some of these!
Emily Fonnesbeck says
Congrats! I have loved having boys, and it’s a trick to dress them inexpensively with my “champagne taste on a beer budget” style. I buy quite a few plain shirts from Walmart and do a lot of freezer paper stenciling with cheap acrylic paint. It’s awesome!
Angela says
Love it! This is the best and easiest bow tie tutorial I’ve seen yet! Excited to get started on some! Now, if you can tell me where to find short sleeved, white dress shirts for little boys you’ll be my new best friend! I can never find nice ones for my 3 year old.
Emily Fonnesbeck says
Angela,
I know it! Of course while I was scrambling to find new Easter outfits for my boys I couldn’t find the size I needed. Then, while shopping for chocolate at Walmart, I actually came across a short sleeved, button down collar white oxford for my four year old, and there were smaller sizes too! I snatched one of those and it has worn, washed, and ironed well.
Shelley says
Such a brilliant idea!!!
jennifer says
What a great idea, great pics, and actually acheivable. Did I miss how you made two from one, though? I only see how to use a whole necktie for one bowtie…
Thanks!
Emily Fonnesbeck says
Jennifer,
You didn’t miss it! I didn’t include the second bow tie in the post. Since you only use the end of the tie, you can make another bow tie from the middle section. It will be a bit slimmer, and you might have to unpick the necktie and adjust the width, but you can definitely get two. You’ll use the same method and again, use the tail end for the “wrap-around” middle section. Let me know if you have any questions!
Dougie Dad says
I am thrilled to find this, thank-you for sharing it.
Now me and my boy can wear matching ties to my wedding!
Felipe says
This is great!! How would you measure for a mens boetie??
Allison says
I did it, I finally did it! I pinned this so long ago and then just haven’t tried. I should have done this a long time ago! Thanks for the easy tutorial! I linked back to you in my post with my “brag pics”. 🙂
http://marcroftfam.blogspot.com/2013/09/my-sunday-afternoon-diy-bow-ties.html
Lydia says
Thank you!!! My son needed a bow tie to go with his “nerd” Halloween costume, but I couldn’t find a cheap one anywhere! Made this with an old Salvation Army tie in less than 1o minutes!
Amanda says
I have been looking for an easy hand-sew version since I do not machine sew! So glad I found this.
Macharia Vincent says
Wooow…!!! You are such a Fashion icon…!!! This tips of how to make a bowtie using a necktie is Brilliant. Thank you for your Creativity because am now the coolest dude in one of Kenyan University.
noell says
I LOVE THIS IDEAL, THANKS
Nikki R says
I can’t wait to try these!!!
Nona says
Can these bow ties be made for Men?
Corrie - Quilt Taffy says
Absolutely adorable. Both the boy & the ties. Emily, thanks for sharing directions & your tips!
Tavette says
Very nice. My question is the same as Jennifer’s – how to get 2 bow ties from 1 tie. On the 1st tie you use both pointed ends, so what do you use on the 2nd one as you’ll only have the middle part of the tie left.? Thanks.
Tavette – S. Fla.
Julie says
Hi. I love your post and of all the diy bow ties I’ve seen this seems like the best. I can’t wait to try it out. I’m just a bit confused as to how you get two bow ties out of the one tie. Are you meaning one from the fat end and one from the skinny tie end? Then using the middle bit as the wrap around?
Sherri says
Out of all of my searching for childrens bowtie patterns, i have to say that this is the ALL TIME best!!! Thank you.
Jennifer says
I love this. I wanted bow ties for my 2 dogs for my wedding. A trip to good will for ties and new collars and I’m set. I am trying to figure out how to attached the bow to the collar. I don’t want it too permanent. Any ideas
Kristy says
before wrapping the little piece around the middle, lay an elastic hair tie across the length of the bow and use fabric glue to hold it in place or use a few whip stitches to hold it in place .. finish bow as described .. run the dog collar through the loops of the hair tie .. no ribbon collar needed
Glenda Sanders says
They are precious, I have been looking for tie ideas for my grandsons. Thank you for posting!
Kate says
Such a great idea. They turned out beautifully and it’s a great way to repurpose or save money thrifting. Love it!