I don’t know about you but I am ready to say goodbye to winter! I always start to itch for spring in March and long for the bright colors, sunshine, and warmer weather. Well this year I couldn’t wait any longer and decided to make spring come early.
My inspiration came to me while doing something that helps me brainstorm the best. Cleaning. My least favorite thing to do, but the house looks so nice afterwards and I come away with some fun ideas. As I dusted and changed the light bulbs, I was just about to throw out the old bulbs when, eureka! I had found the perfect little vase for my early spring flowers. 🙂
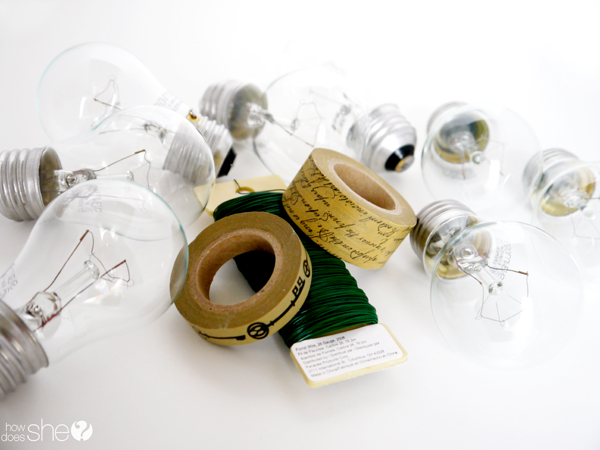
Here are the supplies you will need for your darling vases:
1. Crystal clear light bulbs (any shape or size)
2. Crafting tape
3. Florist wire (26 gauge)
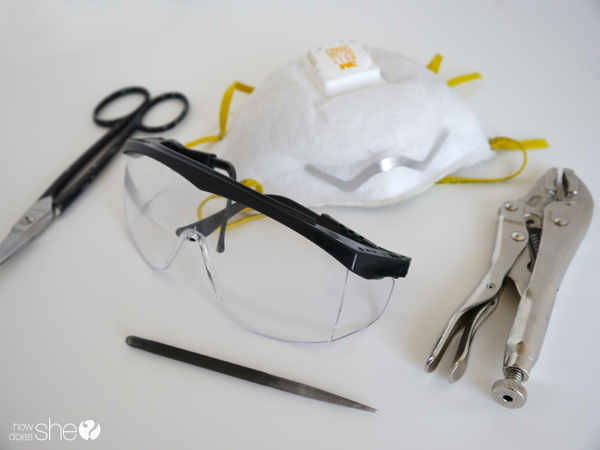
Here are the tools you will need:
1. Safety goggles
2. Mask
3. Locking pliers
4. Metal shears or a sturdy pair of scissors
5. Pick (a small screwdriver would work as well)
***While doing this craft, you will want to do it over a trash can. The trash can will catch all of the pieces you are removing from the light bulb. Also, make sure to wear the safety goggles and mask. I only had one bulb break on me and it was because I was trying to rush. So don’t rush, take your time and this will be a fun craft. I hope my warning doesn’t scare you from doing this project, I just want everyone to be safe!***
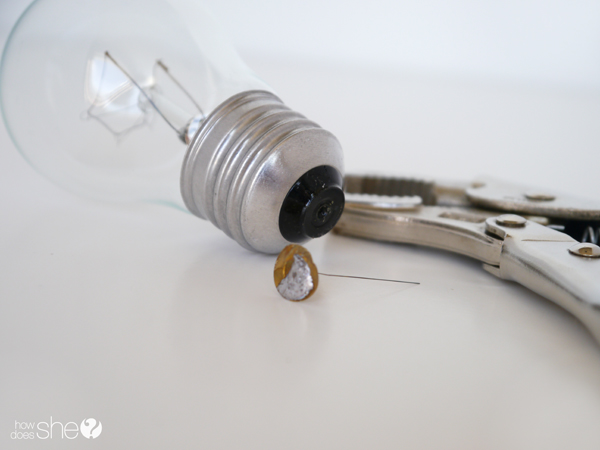
The first thing you will need to do is use your pliers to peel back and pull out the electrical contact on the bottom of the bulb.
When you remove the electrical contact you will see a small hole in the black glass. Take your pick, place the point in the hole and gently shift it back and forth. You will notice a crack begin to form and 99% of the time the black glass will split in half. Use your pick to slowly pop out one of the halves.
To remove the other half of the black glass, use your pliers to wiggle and pull it out.
This will probably be the trickiest part of the whole project. Take your pick and insert it inside the stem (glass mount). Slowly and gently start to push your pick to one side. You will be able to break the glass a little and will hear a small pop as the inert gases inside the bulb are released (also a good reason to wear your mask). Now once again, slowly and gently (key words for this project) break the glass mount all the way around until you can remove the stem, wires and filament. Make sure to tap all of the little pieces of glass out into the trash before you continue.
Yay! The hardest part is over! Now wrap the florist wire around the metal cap so you will be able to hang your light bulb vase. For each bulb I cut a 12″ and 24″ wire. I used the 12″ wire to make the loop and the 24″ to wrap and secure the loop.
Next, take your craft tape and wrap it around the metal cap to hide your wrapped wire.
Last but not least, you get to hang your cute little vase and put a lovely little flower in it. Doesn’t it just brighten the room and make you smile? Love it. 🙂
My 5 year old helped me pick out the flowers, didn’t he do a great job? He asked to have some in his room and I was more than happy to share.
I found this cute little decorative lattice at a thrift store for $5! I was so excited! I put a fresh coat of paint on, distressed it, and put in some moss. The whole project was very inexpensive and I love how it turned out. Recycling never looked so good.
Happy Spring!


Jen says
Super cute! Thanks for sharing the idea.
Missy says
I love repurposed things – this is so fun!
Nesleirbag says
What a clever idea, and it puts me in the mood for Spring! Great pics!
Ashley says
Such a great idea!!!
Alison says
Love this idea!!!