For a while, it seemed like everywhere I looked, I was seeing stars – the metal ones found in craft stores and home décor, even on the exterior of people’s houses! As a mad crafter, I can never leave well enough alone. I had to do more with them. Can anyone relate?
I started with scraps of fabric and decoupaged it to my first star, giving it a quilted effect.
Here’s the final star, hanging over a twin bed in a little girl’s room:
Though my first experiment was this large star, I started making smaller ones for baby gifts, kids bedrooms, and holiday gifts. I also switched from using fabric to using scrap book paper, which is much easier to cut and handle than fabric. The fabric is still awesome, especially if you want to match a quilt, pillow, or other piece of bedding (you can even use old sheets!). It simply takes a little more patience and time.
No matter what you choose for your materials, the tutorial is the same.
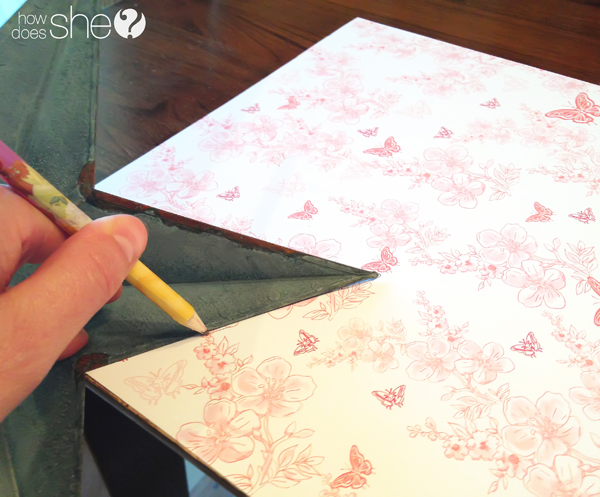
Take a piece of paper or fabric and line up one of its straight edges with the straight edge of a table.
Be sure that you place the pattern side that you want to use face down, and trace the points for the star on the back side. Trace both slanted faces of one point, so you have the two angled pieces seen here, below:
Then trace each of these pieces four more times.
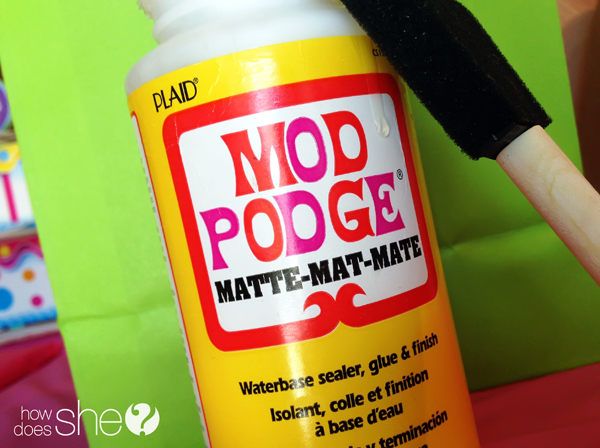
Use Mod Podge for your adhesive, along with a sponge brush to apply it.
If you have never decoupaged before, simply pour a little mod podge glue onto a paper plate and dip the sponge brush in enough of it to coat the surfaces of the backside of the paper and the surface part of the star you will adhere it too.
Smooth out the paper once it’s in place on the star by brushing over it with a final layer of the mod podge adhesive to press it down and seal it to the surface, and also to give it a protective layer. For more in depth instruction, check out Alison’s post on perfect Mod-Podging.
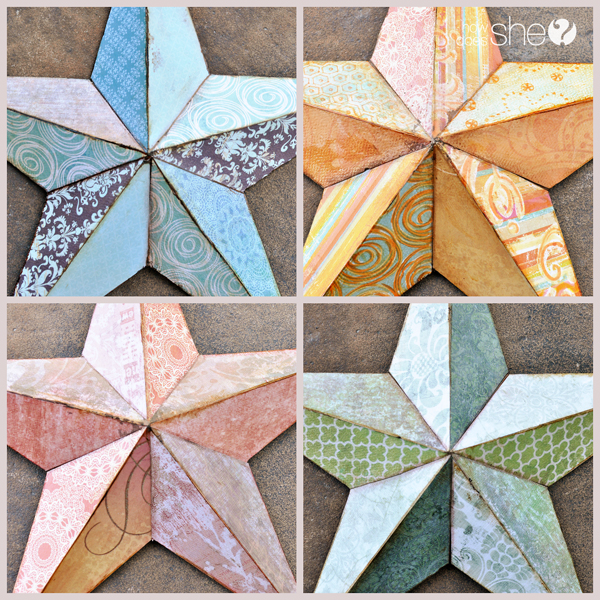
When the Mod Podge is completely dry (I’ll usually let it dry overnight), I use a brown scrapbook marker (or even a brown sharpie marker) to outline the edges and and every line on the star from the center outward to each point. When I do this over the dried, thin coated surface layer of mod podge, it allows me to rub over the marker lines with my finger, giving it a slightly antiqued effect. You can see the imperfect brown outlining details on these stars:
The star below already had a antique blue and rust patina on it, so I only decoupaged every other point.
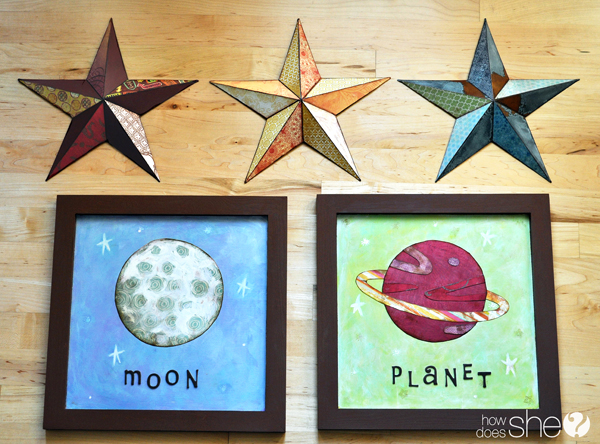
These stars make fun pieces to add to a gallery of framed art…
Or as décor for kids rooms.
For the planet art to go along with the stars, I decoupaged 12 x 12 scrapbook paper onto wood for the background (or you can paint a background), and cut circles out of scrapbook paper using a plastic lid as a template for tracing. I drew a “ring” for the red planet freehand. Once all pieces were glued into place and dry, I used stickers for the lettering.
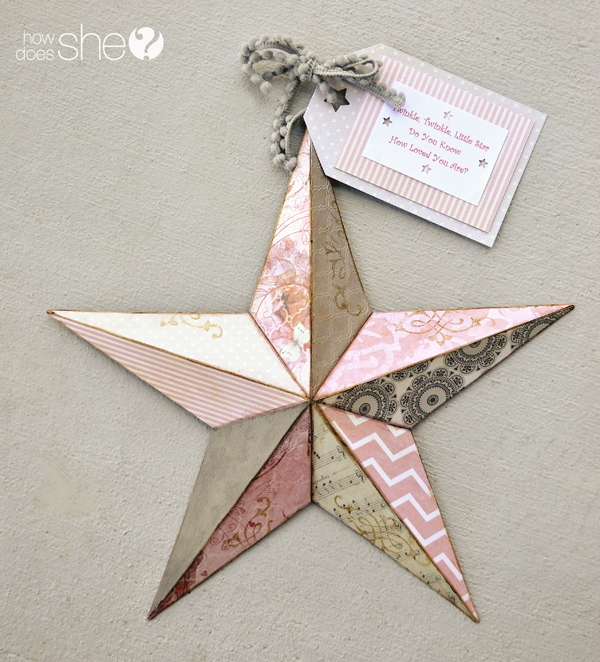
If I give a star as a baby gift, I’ll include a little sign like this one:
And tie it to a small hook on the back.
Another time, I gave one of these stars to my son’s teacher as a holiday gift with this little note attached:
“Because the brightness of his heart was something you could see.”
It was inspired by, and I also printed and gave her, the following poem with it (get out a tissue if you are sending your little one off to school for the first time this year!) :
———-
First Day of School
I wonder what you’re doing right now
and if everyone is treating you kind.
I hope there is a special person,
a nice friend that you can find.
I wonder if the teacher knows just
how special you are to me.
And if the brightness of your heart
is something she can see.
I wonder if you are thinking about
me and if you need a hug.
I already miss the sound of your voice
and how you give my leg a tug.
I wonder if you could possibly understand
how hard it is for me to let you grow.
On this day know that my heart breaks,
for this is the first step in letting my baby go.
by Wendy Silva
———-
That wraps up the decoupage star tutorial, and my final post for a while. I may be back to contribute from time to time but am taking some much needed time off. To all the loyal How Does She readers, thank you for your support!
Much love,








Tammy McCullars says
Love this! I do this with a combination of photos printed from the computer and scrapbook paper for weddig gifts.
Stephanie says
love the idea of incorporating photos – great tip!
Chelle Chapman says
Lovely stars but now I only see the Elephant in the room! What are we to do w/ out your posts Stephanie? You are wonderful in what you contribute to ‘how does she” & I hope & Pray you get the much needed rest you seek. Just know you are LOVED & WILL be missed!!!! I will be looking for posts from you ONLY if you can! God Bless!!!
Stephanie says
Wow Chelle, your words really touched my heart! I am thrilled to know that you’ve admired my contributions and absolutely hope to be back to contribute more, hopefully sooner than later. Your blessings are gratefully received and much appreciated! xo!
Nicolette says
You always have the cutest ideas Stephanie! I love your positive nature:)
Stephanie says
Awww – Thanks, Nicolette – I really appreciate your kind words!
Melissa says
I just love this idea as my daughters birthday is next week and this would be a great addition to redoing her room! Also the poem I love as my girls are getting ready for school in a couple weeks. The first couple of days I feel lost of what to do while they are at school but then I get back to business.
Stephanie Mullani says
We all find our rhythm after kids go back to school eventually but I agree – the adjustment can be just as hard for moms as it is for kids! I hope your daughter enjoys the new addition to her room ~ Thanks for taking the time to comment, Melissa!
BeQui says
I have a few baby showers coming up, and I never know what to get people. This is PERFECT!! Thank you so much! And it looks so easy!
Stephanie Mullani says
They’ve been a big hit with the people I’ve given them to & truly are easy to make. I’m glad you found the tutorial useful ~ happy gift giving!
Mellody says
Where do you find so many stars to put the paper on?
Thank you.
Stephanie Mullani says
Mellody – I purchased mine at a store called “Crafters Warehouse” but you can also try craft stores like Hobby Lobby. I’ve seen them in antique stores and in Amish shops. Here’s one website that has metal stars in 12 sizes and 30 colors:
http://www.jollieprimitives.com/metal-barn-stars-painted.aspx?gclid=CNvbh_2z37gCFWJqMgodLF8AGg
I typically use a 7 or 10 inch star for gifts.
You can also search google for “metal stars” ,”barn stars”, “wall stars”, or “tin stars”. Finally, if you search google or pinterest for cardboard stars, I’ve seen people make their own dimensional stars from cereal boxes!
Sherry W says
The poems are just as gorgeous as the stars themselves, yes tears come to my eyes and this isn’t our first year sending our “baby” to school but it still breaks my heart.
Thanks for the fantastic idea to make a nice gift into something really special!
Stephanie Mullani says
You’re welcome, Sherry ~ The poetry about sending your baby to school choked me up when I first read it, and many times since! Thoughtful words paired with a thoughtful, homemade gift really do make an impact and touch the heart.
Shelley says
Oh my gosh!! I LOVE that big star over the girl’s bed. So on my to do list. Thanks for the great idea!
Stephanie Mullani says
My pleasure! They’re so simple to make and always turn out so cute – you can’t go wrong!