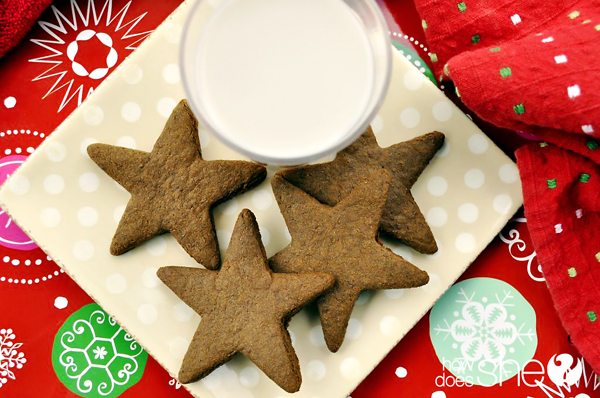
One of my favorite things about the holiday season is baking festive treats with my kids. I have sensitivities to certain foods like wheat and dairy but that doesn’t mean I’m going to allow any of us to miss out! Holiday baking simply brings us all too much joy. There are others who have egg allergies or nut allergies. For this reason, I try to keep enough recipes in my arsenal to accomodate and please all kinds of bellies. The good news is that you can enjoy these recipes even if you don’t have any food sensitivites.
I’ll be sharing 2 recipes in this post. The first is for gluten free gingerbread cookies (or ginger snaps) and the second is for “Snowball” bites.
Here’s a peek at the star ingredients of this recipe:
My gluten-free choice for baking is Arrowhead Mills All Purpose Baking Mix. The shortening I use is Spectrum organic, and I use it because it’s non-hydrogenated! The milk I use is almond. Of course, you can use regular milk in this recipe and regular flour if you don’t have any sensitivities. You could also use brown sugar in this recipe, but I chose coconut palm sugar. Why? Because coconut palm sugar is one of the lowest glycemic index sweeteners on the market (low glycemic is very important for diabetics and pre-diabetics). It also contains potassium, zinc, iron, and vitamins B1, B2, B3, and B6. So at this point I should probably confess…. I have OCD when it comes to the need to make a recipe healthier!
Ingredients:
2 & 1/2 cups plus 1 & 1/4 tsp. gluten free baking mix (or flour)
1 cup coconut palm sugar (or light brown sugar)
2 teaspoons ground cinnamon
1 teaspoon ground ginger
1/4 teaspoon ground nutmeg
1/4 teaspoon ground cloves
1/4 teaspoon fine sea salt
1 teaspoon baking soda
1/2 cup Spectrum Organic shortening
1/4 cup unsulphured molasses
5 Tablespoons milk of choice
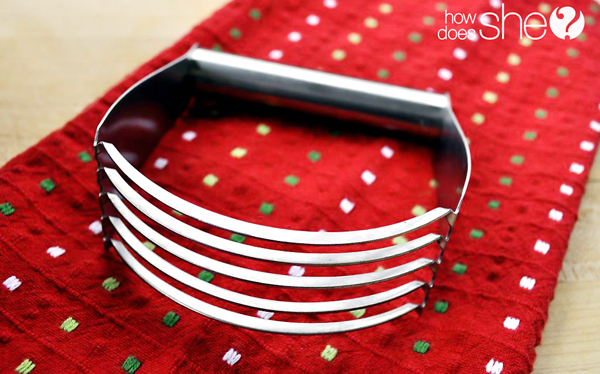
Begin by preheating the oven to 350 degrees F. Next, mix all dry ingredients together. Be generous when measuring your spices – I make sure my spice measurements are heaping! Get your pastry cutter, also called a pastry blender, ready.
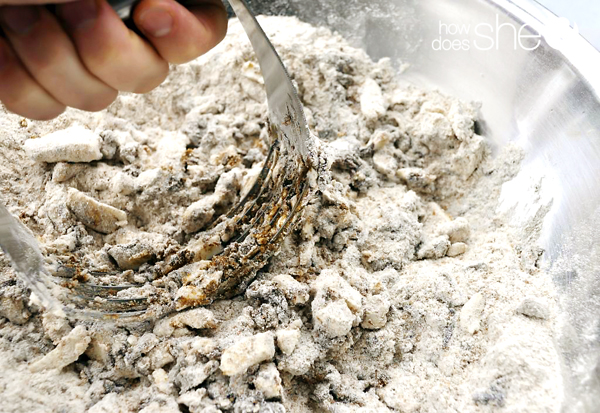
Add shortening and molasses. If you don’t have a pastry cutter, use butter knives in each hand and move them in opposite directions, until the shortening is cut into smaller and smaller chunks. You can also use forks in a similar manner. It’ll look like this in the beginning:
But as you continue to cut the ingredients into each other for a couple minutes, you’re mixture will end up looking like this:
When it looks like the photo above, it’s time to add the milk. Start with 5 Tablespoons and stir mixture with a large spoon. If it still seems too dry, add more milk, one Tablespoon at at a time. I only stir it for 30 seconds or so, until dough is beginning to stick together a little but is still somewhat crumbly. Then I roll up my sleeves and mix thoroughly with my (very clean and pre-washed!) hands. When you have an actual dough, divide it in two like this:
Now place a baking mat, a sheet of parchment, or baking paper on a counter or large cutting board. Place one ball of dough in the center of it and place plastic wrap on top so that your rolling pin doesn’t stick to it. Now roll out the dough until it’s about 1/4 inch thick. Peel off the plastic wrap and save it for the rest of the dough.
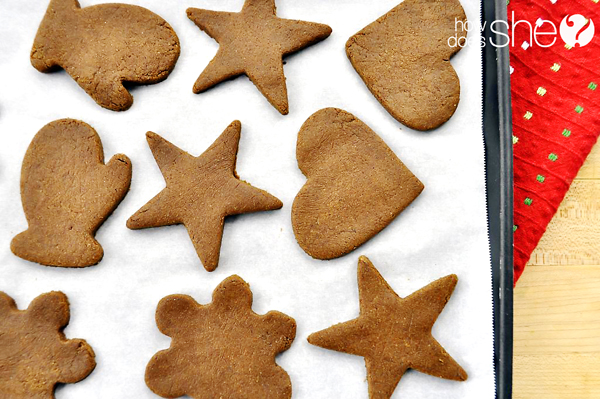
I did one batch on a SILPAT baking mat (seen above) and another on parchment paper. The parchment paper worked better since the dough didn’t stick to the surface quite as much. This is important for cutting out the shapes and peeling away the excess dough, because you’ll be doing the rolling and cutting directly on the surface of the parchment (or baking mat) and want the dough around the shapes to peel away cleanly. Once the shapes are cut and excess dough is peeled away, lift the baking mat or parchment off the counter top or cutting board and place onto a cookie sheet like so:
Pop them into the preheated oven for about 6 to 8 minutes. In my oven, 6 and a half minutes is perfect for a moist and chewy cookie. If you like a little more “snap” to your cookie, then go for 8 minutes. But, because everyone’s oven is different, it’s a good idea to keep an eye on them from 6 minutes on. When they’re done, allow them to cool for about 10 minutes before serving.
Be sure to enjoy them with a some Christmas music and a yummy serving of cocoa like this one from Cristi or make a batch in your crock pot with this recipe from Nicolette.
[amd-zlrecipe-recipe:11]
———————————
Ready for Recipe #2? Let’s make some Snowballs!
These tasty morsels resemble a lemony cheescake and may convince even picky eaters that healthy can be yummy too!
In a food processor or blender, blend on high:
1 & 1/2 cups cashews,
1/2 cup rolled oats
2 Tablespoons honey (or agave nectar)
3 tsp. lemon juice & 1/2 tsp. lemon zest
Measure 1 rounded Tablespoon coconut oil and melt over low heat in a saucepan then add to above mixture and blend again. You may need to add a little extra oats and keep blending until the consistency is dough-like and will hold its shape. Also, taste the mixture at this point to see if it needs a little more lemon flavor. Add lemon juice to taste. Using a spatula, scrape mixture into a small bowl or plastic container. Refrigerate or feeze for 10 -20 minutes. When mixture is chilled, use a melon baller, teaspoon or other small scoop and make 1 inch balls.
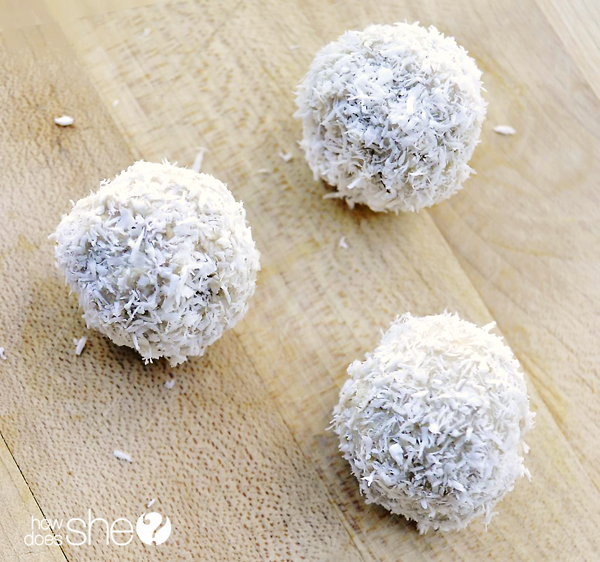
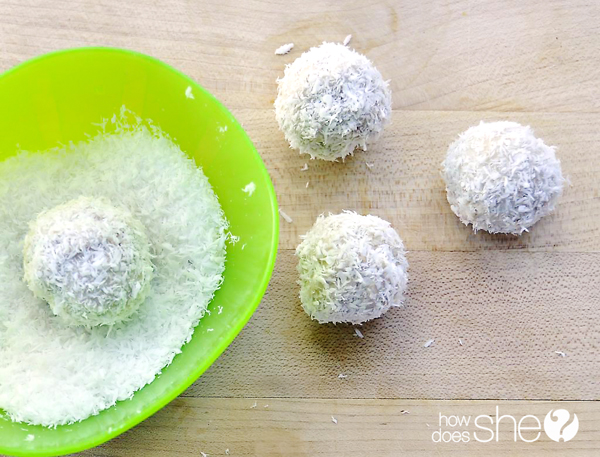
Now, roll each ball in coconut flakes until they are completely covered.
They can be eaten immediately or stored in the refrigerator or freezer until ready to eat.
For another super simple, no-bake, gluten free filling (peanut butter flavor), try this recipe for nut butter nuggets.
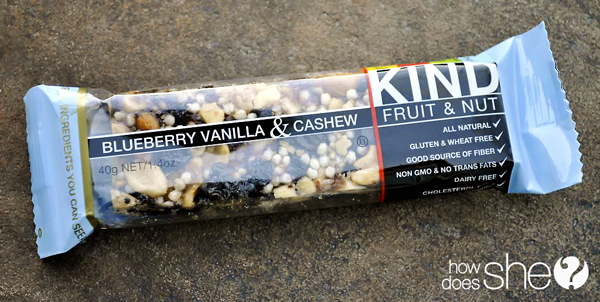
And for the simplest filling of all… Check this out:
You can use a KIND bar or a LARA bar. A KIND bar has large chunks of dried fruit and nuts while a LARA bar combines its ingredients finely to create a smoother texture. What I like about both is they are all natural PLUS gluten, wheat, and dairy free.
Take a single bar and cut it into thirds.
With clean hands, take one square at a time and mold it into a ball shape like this:
I then cover these fruit and nut clusters in melted chocolate.
Finally, before the chocolate is set I roll the clusters in a dried nut and berry mixture that is red, green, and white. Finely chop (or pulse) the following in a blender: Goji berries (you can use dried cranberries), pistachios and cashews. A small handful of each will suffice.
Pulse until they break down into pieces about like this:
Of course you can leave the fruit and nut clusters as square shapes, but when you make a combination of the recipes above into a ball shape and plate them all together, it’s like an edible holiday ornament display!
FOR THE PRINTABLE RECIPE FOR THESE GLUTEN FREE BALLS, CLICK HERE!
When you make two or three different recipes, there’s a surprise element to each one. What flavors will you try?
I hope these recipes help you indulge in festivities of the season with less worry and increased health!
In the spirit of holiday giving, check out the Food 101 section on my website to learn how to get a FREE (Dec 6-8 only) eBook about gluten. The eBook answers some of the most common questions about gluten and provides natural ways to reduce symptoms of intolerance and rebuild the digestive system. If you know anyone who could use information for gluten-free living, feel free to pay the information forward and tell them you found it at HowDoesShe!









Jordan says
I was wondering if it’d be okay to use a stand mixer instead of a pastry cutter for the gingerbread cookies? My soon to be mother-in-law eats gluten free and I wanted to surprise her with the gingerbread cookies!
Stephanie says
I would try the cutting in method using forks if you don’t have a pastry cutter – since cutting in produces a different result than mixing – but you could always experiment and see what happens if you’re up for it!?
Corinna says
I cannot wait to make these snowballs! So yummy.
Stephanie says
I’m happy to hear that, Corinna! Don’t be shy to tweak the flavors to your taste, adding more lemon juice if necessary, etc… Of course if you go with one of the ready made granola bar fillings you won’t have to play around with ingredients – you’re all set!
Shelley says
These photos are drool worthy!!!! Thanks for sharing. My best friend’s little boy has to eat gluten free and I am definitely passing this one to her!
Stephanie says
Thank you, Shelley – I’m working on improving the photos with each shoot! I’m also thrilled to hear that the recipes may be helpful for your friend’s son. It’s a joy to help the little ones partake in festive treats even if they have a certain food sensitivity or allergy. Nobody wants to be left out!
Dacia says
Just make sure if you make them that you use gluten free oats. Also check the labels well. I think most Lara bars are gluten free but I thought there were a couple that weren’t. They are so super yummy though! Yummy recipes!
Stephanie says
Thanks Dacia, for the extra info! Every little bit helps when people are trying to navigate and stick to a new dietary plan. I’m also glad you can testify to how super yummy the Lara bar flavors are. They can be used directly or mimicked very easily!
Missy says
These look delicious! I love the cute ball ornament snacks – so pretty and healthy. What great ideas and your e-book is fantastic!
Stephanie says
Thank you so much, Missy! I’m very happy to hear that you like the e-book!