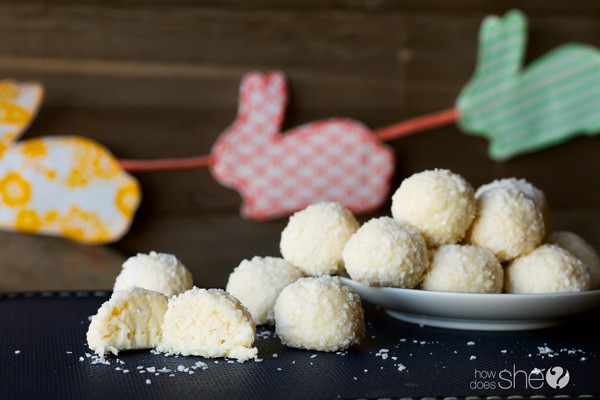
This easy-to-follow tutorial will show you exactly how to make coconut cream truffles. They make perfect little Easter bunny tails and are delicious all year long.
Sometimes you have a love affair with food that leaves you daydreaming for months.
That is exactly what happened to me with these coconut cream truffles. They are creamy, smooth, buttery, sweet… You take a bite and sort of melt into a pile of Jello. My friend made these during the Christmas baking season. Even with the hoards of treats available, I was still thinking about these truffles months later. Whenever I asked for the recipe I was met with a Mr. Miyagi-like look, this recipe was not to be handed out lightly. I would need the training of my candy-making Sensei before it was time. It’s not that this recipe is complicated, it’s not. It’s just that you have to be precise.
These coconut cream truffles are made with an old-fashioned candy making process not so common anymore.
These are not a mash-up of grocery store frosting and processed cookies. No, no, my little karate kid. These coconut cream truffles will replace the sugar plums of your dreams and they take a wee bit of training.
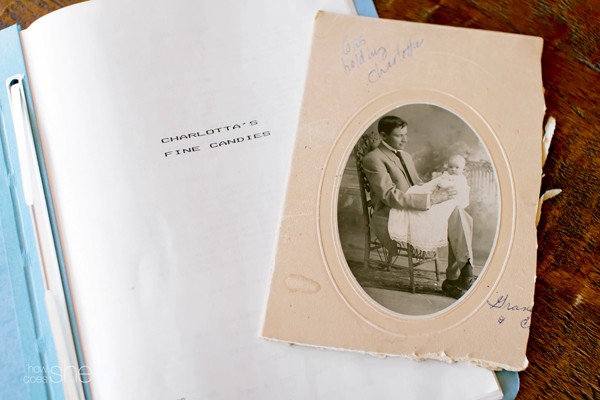
The recipe comes from a little book made with a type-writer and copy machine. Charlotta is the baby in the photograph and this book is a history of her lifetime of candy-making. How to make coconut cream truffles:
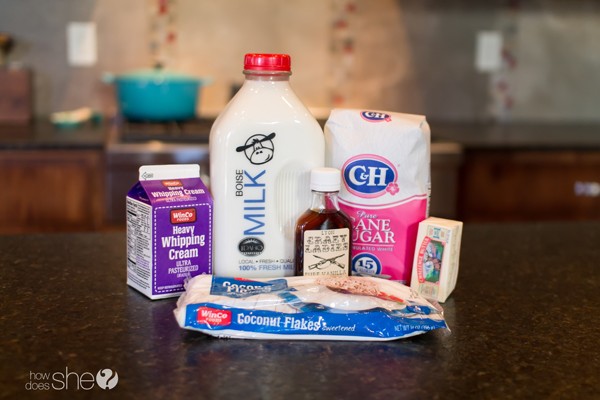
The ingredients are super simple: cream, milk, sugar, butter, vanilla and coconut.
There are three main tools you will need for the truffles.
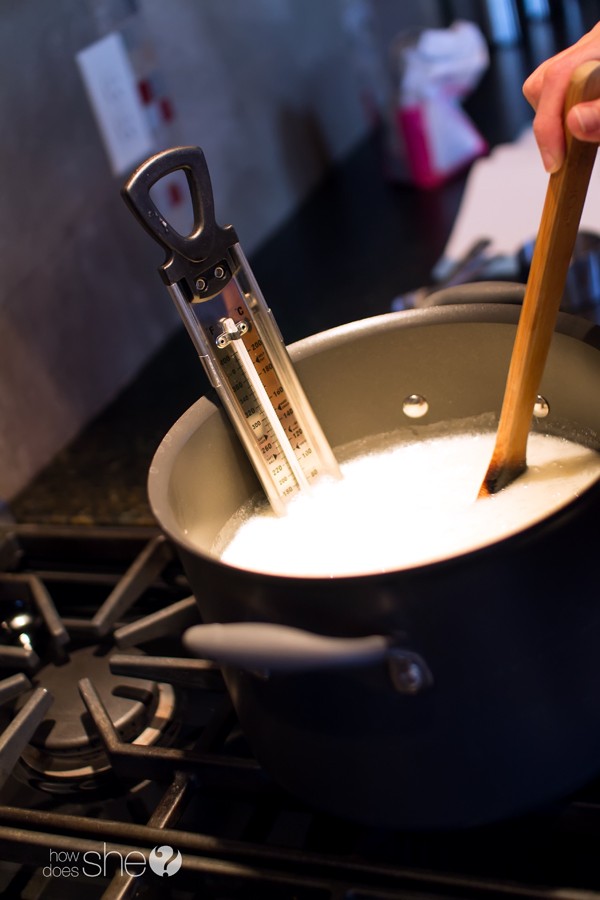
First, a candy thermometer.
It is very important to test the temperature reading of your thermometer. Thermometers are all different and so is your altitude. There can be a 10 degree difference based on where you live just in North America alone. The easiest thing to do it to put your thermometer in a pan of cold water and bring it to a boil. Then note the temperature on the thermometer. Recipes are based on water boiling at 212 degrees. Subtract your boiling number from 212 degrees. For example, my water is boiling at 204 degrees, 8 degrees lower than 212. So when I make the truffles, I’ll subtract 8 degrees from the temperature in the recipe and I’ll have my perfect mark.
Second, a candy scraper.
The second tool is a candy scraper, wall scraper or anything with a good straight edge. (I used the edge of a small cutting board, a spatula and butter knife with my niece once and it worked just fine.)
Third, a solid surface.
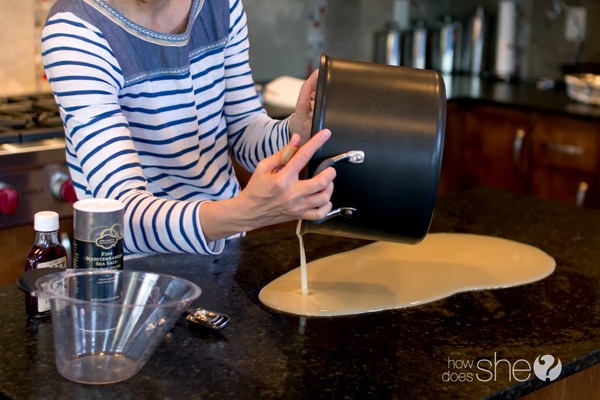
The third thing you need is a solid surface like a granite or quartz countertop or slab. If you don’t have one then find a friend that does. It’s a fun project to make with a buddy.
Cooking the candy.
Using a large pot combine the cream, sugar, milk and butter and bring to a boil. Boil until the thermometer reads 236 to 238 degrees (or the adjusted temp based on your altitude). If you accidentally go over the temperature you need, just add a little water and bring it back to where you need it. Never stir above the surface of the mixture. Just keep your spoon circling around the bottom and you’ll be just fine.
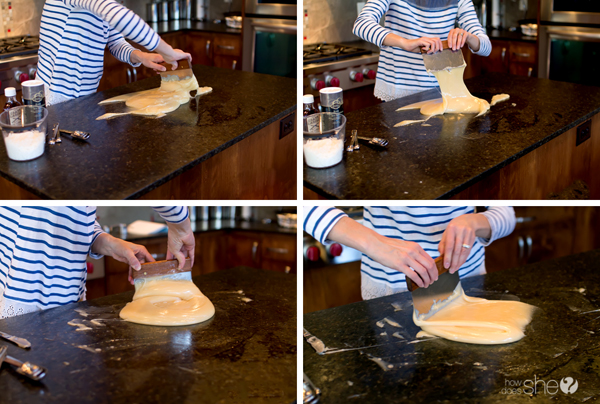
Once it reaches the perfect temperature, put your hands up and walk away. Just like on the competitive baking shows. You don’t want to mix in the sugar crystals that may have formed around the top of the pot. Let it cool in the pot for 8-10 minutes then pour onto a moistened slab. Do not scrape the pot. Leave it for the kids to eat.
Next you’ll begin to “cream” the mixture. Take your scraper and work the mixture around on the slab for a few minutes until it loses it’s gloss and thickens up. You kind of scrap up a section and fold it over, then pick up another section working in over and over. This process goes pretty quick.
Putting it all together.
Once you see it thicken up add the coconut, vanilla and a little sea salt. Then work it all together. You may need to knead it together with your hands a bit as it crumbles up. Put it in a plastic bag and leave it on your counter to “ripen”. Those are Charlotta’s words. I have no idea what it’s really doing in that bag but it works. I suppose it helps the mixture soften and come together a bit more.
Let your kids lick the counter or do it yourself. Seriously, you’ll die when you taste the goodness.
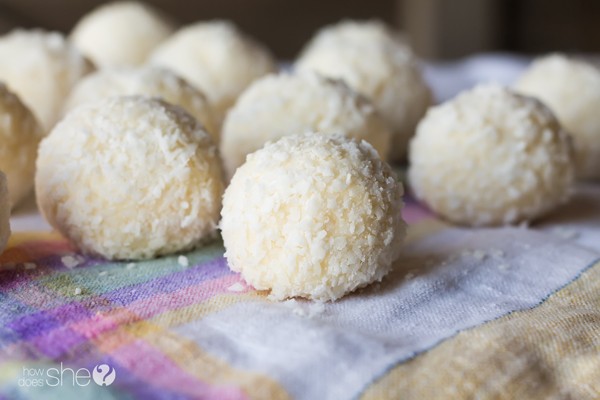
After ripening for six hours or so the mixture will be ready. Roll out a ball, roll in the coconut and set aside to dry. These make a perfect little Easter treat because they look just like little Easter bunny tails. Share a few with your friends and they’ll be begging for more!
How to make coconut cream truffles:
Coconut Cream Truffles "Bunny Tails"

Ingredients
Instructions
Which Easter treats do you like to make each year?
Candy making is easier than you might think! Give these other recipes a try:











Sharon Davis says
These are AMAZING!
Juliann Bradish says
These are absolutely amazing!!! Ours taste fantastic but don’t seem as firm as we expected. We were having a bit of difficulty getting the temperature to rise above 122 (our corrected ideal was 129-131) so we finally turned off the burner after a good 20 minutes. Do you think the lower temperature is likely why it didn’t get as solid as we could have expected? In any case, they are delicious and will not go to waste! We are storing them in the fridge (and even the freezer!) to enjoy them more firm. 🙂 Thank you for sharing!
Sarah says
It is the basic sweetened coconut from the grocery store. Nothing special.
Mary says
This recipe is great! Love it so much. Thank you. I used coconut oil named cocozia here. Got it from Amazon here: http://www.amazon.com/l/8924075011?channel=posts
Susan says
Can’t wait to try these! Question though: Ingredient list calls for 2 cups coconut divided, but the Instructions reference a total of 3 cups coconut. Which is correct?
Sarah says
Thanks for catching that! I’ll fix the recipe. 2 cups total is correct. 1 1/4 cups in the candy and 3/4 for rolling.
Joan says
Yum! Those look delicious! Thanks for the info on how to check your candy thermometer for accuracy.
Leslie says
Challenge accepted! Looks like I know what I’ll be doing this Easter…thanks for the recipe!