
Time for some DIY USA wall art!
I may have an obsession with maps and globes. It’s my hope that it creates curiosity and a sense of exploration with my children. This wooden DIY USA wall art is my new favorite wall decor and it was easy. I’m not just saying that…really. In fact, I had a friend do this project with me. A friend who had never picked up power tools before and she will agree, this is much more manageable than it looks.
You’ll need:
- A sheet of plywood
- Planks of wood; pallet wood or inexpensive fencing
- Wood Glue
- Nails
- Projector of some type
- Jig saw
Instructions:
Start by cutting a sheet of plywood roughly to the size of your desired map size. Home improvement stores will gladly cut this to size for you. Mine is almost 6 feet wide.
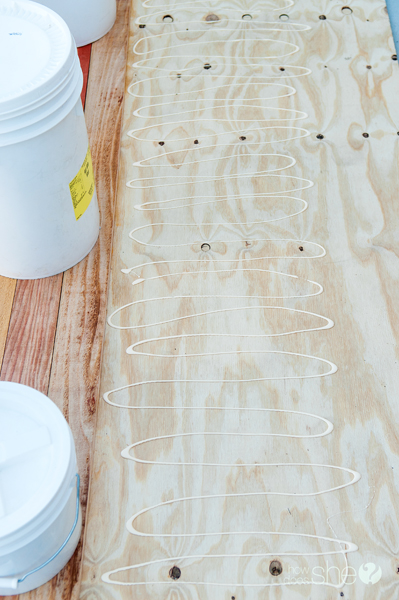
Lay out how your planks are going to sit on your plywood. I chose inexpensive cedar fencing with a horizontal pattern. Glue the planks to your plywood. I used heavy buckets of wheat to keep it flat while drying. You could just as easily throw some nails in the back to keep it in place as it dries.
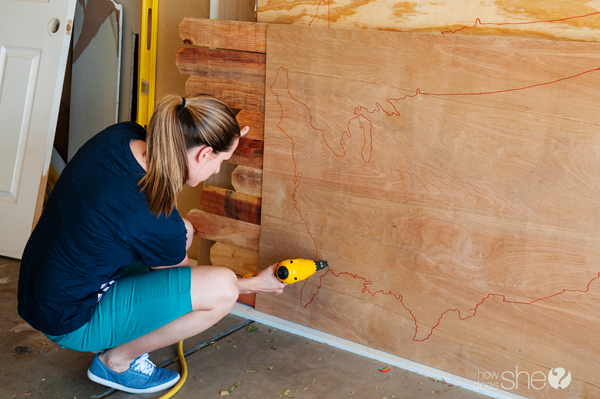
Once it’s completely dry, trace a backwards map on the plywood side using a sharpie marker. I used an LCD video projector, but an overhead projector would work with a transparency.
Once the map was traced, I reinforced the entire perimeter of the map (on the inside of my tracing) with nails from my nail gun. I knew that the jig saw would be reciprocating and may cause some of the smaller pieces to come unglued – this helped keep everything together.
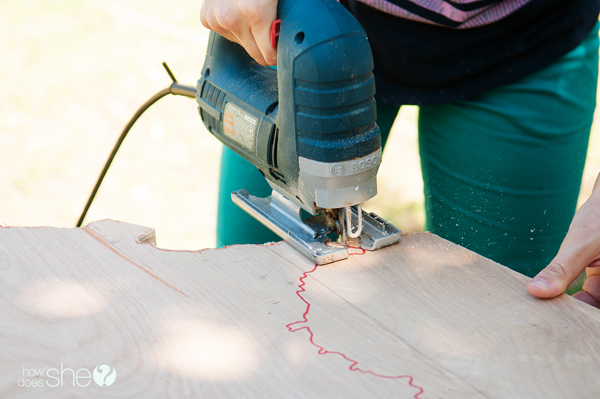
With the plywood side up, using a jigsaw, slowly cut along the marker line outlining the map. There are a lot of intricate pieces in the USA map and I didn’t cut every little piece, a jigsaw isn’t meant for fine cutting. Some cuts you’ll need to come at it from several angles in order for it to work, but be patient.
At first you’ll want to try and follow every little curve and line, only to realize you really don’t need to. Depending on your size of map, the cutting out may take an hour or two. Go slowly. Take breaks – or else your hand may fall off from the vibration of the saw!
Time to admire your work!
Flip it over and admire your work. You may see areas you want to clean up just a bit – or be more intricate on and if that’s that case, flip it over and keep cutting.
I decided to keep this piece a little rustic so I sanded just a few of the edges to make them nice, but I didn’t sand the entire piece. Don’t you love the rough wood? It had character and charm. I also chose not to stain it, because I liked the variations of color in the wood. But you can choose what fits your house and style – sand and stain if desired!
See more of my adventures and projects at www.lifewithfingerprints.com
Since you’ve got your rustic groove on, keep going by adding some of these rustic touches to your home decor:







Diane says
Nice job on the cutting board. My husband received one for retirement and it was SO nice, that I told him I would not use it as a cutting board. So Wall Art it be.
Linsey says
So what did you use to hang it? Seems like it would be really heavy with it being a layer of ply wood and planks and that large? Looks awesome. Can’t wait to try it!
Kara says
I used large D-rings with a heavy duty hanging wire to hang it from a heavy duty (up to 100 pounds) anchor on the wall. It is pretty heavy – but the 100 lbs wire and anchor are more than enough. Good luck!
Bobbi says
I completely love this!! It would be easy to adapt to any map, or any silhouette for that matter! LOVE!
Apryl Holland says
Yea, I want it and I want it now! Hmmm but can I really do the jigsaw thing?? I’ve got to try. Thanks for this awesome project idea 🙂
@paperplanelaneboutique
Kara says
The jigsaw, although may seem daunting, is completely within reach. It is much easier than it looks, give it a try!