
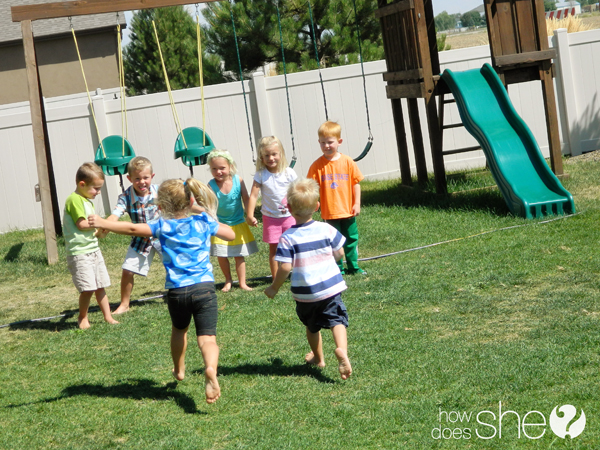
You’ve got a blog. You have worked hard to build it up, to make it interesting, and to get new readership. But somehow you just feel like it could be better. Let’s talk photography. If there is ONE thing that is sure to draw someone in and convince them to take a closer look at your blog, it will be a stunning photo. One thing we work hard at, at HowDoesShe, is producing some great photos for our posts – photos that are beautiful, tell a story, and keep you interested. I am here to be your new photography buddy and take you through 7 steps to getting better blog photos. These are things anyone can do to improve a photo and take it from average…to AWESOME!
1. Stage the photo
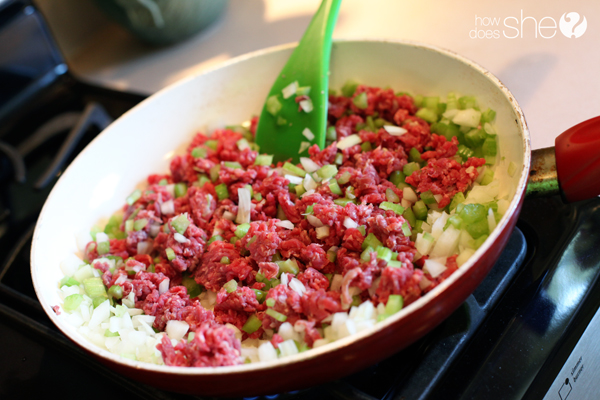
If you open any magazine, you will notice that the photos of food, fashion, people, furniture – everything – are almost always “staged”. Staging a photo means to construct a scene artificially to create interest or tell a story. This is something we may not even notice unless we are paying attention. Take some time looking through the best images on your favorite blogs and see how often that might be because they have staged a photo. You might be surprised!

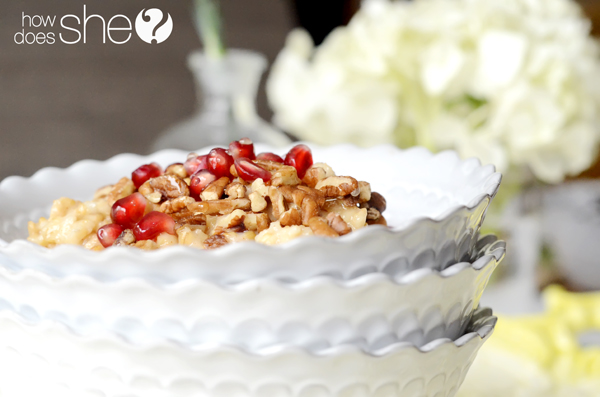
For example, a photo of a bowl of oatmeal is nice. But place that oatmeal in not one, but a stack of beautiful bowls with some flowers and vases in the background and suddenly that oatmeal looks AMAZING!!
You could take pictures of individual products you love, or you can combine the in a beautiful way, include a pretty cake stand, and stick a lemon slice in that glass of water to take your image to the next level!

Staging doesn’t have to be complicated. It can be as simple as hanging those necklaces on a tree branch instead of photographing them on your craft table. Staging adds interest!

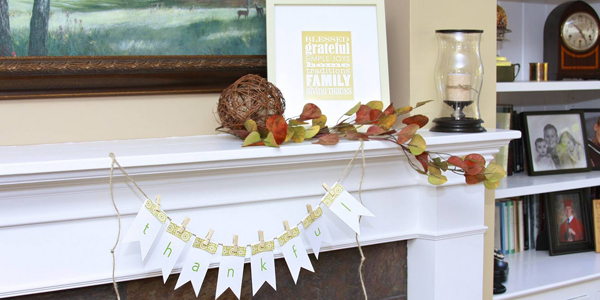
You can get elaborate and create mini stories like this image:

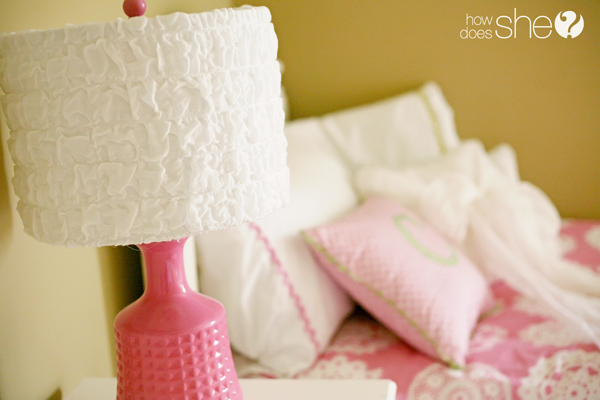
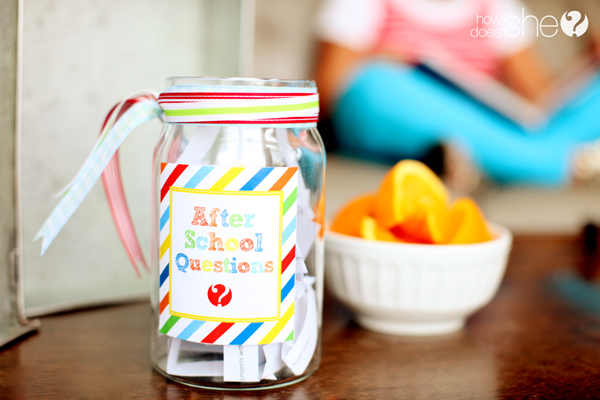
Or just use what is already in your home. Just place your subject in the right place:
Have fun getting creative with your photo staging. Think of using vibrant colors (as long as the colors don’t overpower the subject you are photographing), textures (surfaces with peeling paint or a layer of rust look so cool in images), layers (instead of one bowl, place the bowl on a charger in a tray with napkins and a small vase), or other ideas and I think you’ll find you love your blog photos SO MUCH MORE!
2. Natural Light
I can’t stress enough how important LIGHT is in your photos. Light can make or break an image. For standout photos, natural light is best. Yes, you can invest in expensive studio lighting if you’d like, but in my opinion, there is nothing like natural light. Natural light gives you the truest colors and softest tones.

For nice even lighting, indirect sun is best. Find a window, a doorway, a garage with the door open, or some open shade and place your subject there. Notice how the light falls on your subject. If photographing a person, look for a catch light in their eye (that spot of white or light that appears in their eyes near the pupil adding LIFE and POP to their faces.) Indirect light is softer and less harsh than direct lighting from straight-on sun, a camera flash, or those ugly florescent lights.

Shooting with natural light might mean you need to plan when you take your photos for your blog. Pay attention to when the light is best in each room, for every time of day. It might also mean being on the ball and not waiting until the sun sets to start photographing. If you want to photograph that new recipe you’ve been wanting to share, then don’t wait until 7pm to start baking. You may need to do a little more planning to photograph with natural light, but you will be SO much happier with the colors that you get and the soft, even look in your photos. And for a little more “drama” you can place the indirect light to one side of your subject for soft shadows to add dimension. Natural light can definitely be dramatic, if you want it to!

Always place your subject in their best light.

Taking the time to use natural lighting in lieu of on camera flash or florescent or tungsten lighting, will take your photos to the next level. I promise!
3. Work The Angles
We don’t see our own world straight-on, at eye level 24-7, do we? Why should our photos be that way? This is part of the creative process that is so much fun! Time to explore some different angles! Get down on your knees, or better yet – your stomach, and start snapping your subject. You might be surprised by how much you like the results!
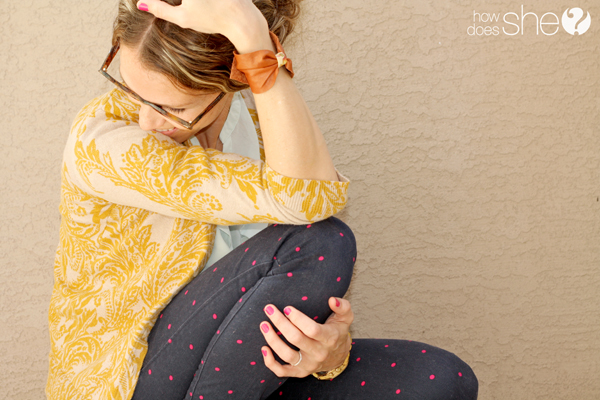
Try photographing your subject from above! It’s another point of view that will put your subject in a new light.


A slight tilt with your camera can add some nice interest to your images. Don’t go crazy with the tilts, though – a little goes a LONG way. We don’t want to cause vertigo for our readers 😉


The best part about the digital photography age is that you can try all kinds of unique angles and not be married to them. Experiment! I give you permission 😉 You might find some new angles that you just LOVE!
4. Look Out For Distractions
Nothing hurts a potentially AMAZING photo like distractions in the background. I know you’ve seen those photos, the gorgeous shot of Aunt Ida…..sitting in front of the tree….with the branch that appears to be growing out of her head…..and the bright red swing that is so hard NOT to look at….and the green garbage bins….and the blue recycling bin…and, is that the neighbor’s dog doing his business on the lawn? You’ve seen those images, I know you have! So, how do we solve the issue of distractions in photos? First, simply move your subject to a spot where there is a plain wall or open space as the background, paying attention to the light to make sure there will be enough.
Move a few things around or change the angle from which you are taking the shot. Easy peasy.
If you can’t move to a spot where there aren’t any distractions in the background (hello – in a house filled with children – empty, blank walls are hard to find) then you can minimize the distractions by creating a blurred background effect. This can be done by shooting with a wide open aperture (or a LOW f-stop, like f3.0 or lower), using the camera zoom feature, or getting closer to your subject. To achieve the BEST blurred background – do all three!
Don’t worry if you don’t have a fancy SLR camera. Take out your point and shoot camera and change the setting to “Portrait Mode”. Usually this is found by switching to the little icon that looks like a person’s head. Generally, this setting will use the camera’s widest aperture and give you the blurriest background your camera is capable of giving. Set it to Portrait mode, get closer to your subject, and zoom in (if you can – we don’t need to see any nostril hairs). You might be surprised by the blurry background you’ll start achieving!
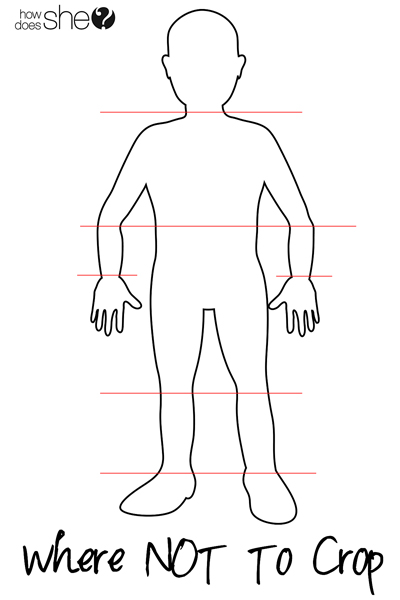
5. Crop Smart

Deciding what parts of your subject to include in the final image can be a daunting task. Do I crop in closer on Jane’s face, or should I leave her whole body in? Do I zoom in close to the bowl of cereal, or show the whole table? Part of creating a final composition is deciding how to crop an image. The first thing to ask yourself is: “What story am I trying to tell?” If you want a more intimate feel to your image, then get up close and personal with your cropping. It’s okay to crop out parts of the subject to focus more intently on a particular part.


If you want to tell a specific story with your photo – include more of the subject.

Stepping back farther tells an even broader story.
An easy rule of thumb when deciding where to crop (or not crop) a portrait image is to avoid cropping at any joints. Cropping at a person’s joints gives them a …disjointed feeling 🙂
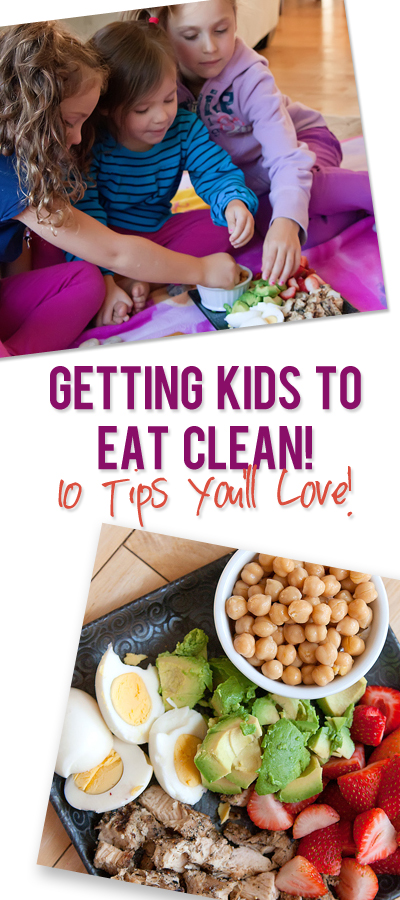
6. Create A Collage/Add Text
Okay, this is TWO tips in one. Aren’t you lucky? 😉 So, you want your blog photos to draw readers in and create interest at first glance, right? The easiest things you can do are to create a collage, and/or add text to your images! And if you are feeling super creative – do both!

Collages are especially great when you are showing a step-by-step tutorial and want to make a series of steps very clear in a visual way. Adding a succession of photos in a collage is easy on the eyes and your brain can easily comprehend the steps. Adding a bit of text on the images to indicate the order of the steps is even better!

Have you ever noticed which Pinterest images grab your attention most? Another great reason to create collages! Easy, pin-worthy images that will have even more readers on their way to visit your awesome blog!!
(Get some Pinterest Templates to make quick work of photo collages HERE)
Creating collages is easy using a photo editing program, like Photoshop. Or you can look into some free programs that create collages online. Even smart phones have apps where you can create collages and even add text to your photos! Easy!
7. Watermark Your Work
After going through all of that work to get amazing photos for your blog, you want credit where credit is due! Image theft is very real (trust me) and you’d be surprised how easily others will jump at the chance to use your images for their own benefit. Protect those fantastic images with a watermark of your very own. For a quick tutorial on how to create your own watermark, you can visit me at It Works For Bobbi!
Are you ready to take your blog photos to the next level? Start with these simple tips and go from there. Your creativity will kick in and help you ROCK those photos! Leave a link to your blog so we can all visit each other and see the awesome results of you rocking these tips!
Happy shooting!


nupinupi says
Love this! Thanks (:
Angela Parker says
These were such good tips. So helpful for a new blogger like me. Thank you so much for sharing.
Tanya Do says
wow these tips are so helpful. will work on it asap. thanks so much xx
Giusi says
Great Tips! Thank you so much! I run a blog about selfsewn products and it’s really hard to set them on the perfect stage. But in future I will reflect how to create a good background and edges. By the Way… Your Photos are all BAM!- Photos. I love them. Best Wishes from Germany. Giuseppina 🙂
Mel @ Trailing After God says
Great tips and you have beautiful photos! I need to work on this more.
Diana says
Brilliant advice.
Thank you so much for great tips.
Nash Khan says
This is a SUPER-AMAZING post, I totally agree with the first pic, it’s so overlooked! 🙂
shannon says
Really fabulous guide – thank you so much!
Brigette says
Thanks for the tips! I really enjoy photography, but optimizing photos for my blog is new to me, I’ll have to start working on the fancy collages!
http://babesindeutschland.com/
Serena @ Thrift Diving says
Wow, this is by far the best info I have found on improving my pics! I am someone that looooves taking pics (I have about 20,000 on my external HD! Lol). Most look good, but with these tips I can make them go from good to great! Thanks for that!
Serena
Thrift Diving
Bronwyn says
Wow! Great tips. Many I’d heard before and have tried to incorporate, but the idea of setting your camera to “portrait” to get a blurred background was new for me. Thank you so much!
Amanda says
I loved this- even as a photographer I was truly tested to get the right light on some recent work. Thanks for educating 🙂
Kim M. says
Great tips–and simple too! Thank you, Bobbi.
Chrystal M says
Lots of great tips! Watermarking is important more for marketing purposes than anything though. It lets people know who the photo belongs to. But tags and watermarks can easily be cropped and lifted by anyone with some basic Pic Monkey or Photoshop skills. It’s best to also invest in some digital photography programs and place your information in the meta data of the photo to really protect yourself – and your photo!
Danielle says
Looove this! I run a spirits/cocktail blog and recently bought a new camera (Pentax Q), so I’ve been looking for tips on how to improve my photography skills.
Nicolette says
Bobbi, this is a fabulous guide! I will be referring back to this a lot because I’m always learning when it comes to taking good photos. Thanks!