Now you can’t tell me that you’ve never had a problem with keeping your car clean. I feel like I am constantly embarrassed when people step in my car and there is trash on the floor, toys on the seats, empty cups in the doors. You know what I mean! Besides those three… (ok, maybe two) times a year that I give my car a real “deep cleaning”, I am always feeling a little ashamed of the inside of my car. Once the weather started warming up I got straight to cleaning my messy car! Don’t worry.. I won’t give you a list of everything I found under the seats and hidden in the pockets ;). The thing I found most surprising was how much trash had made it’s home in my car!
I needed a solution.. a trash bag!
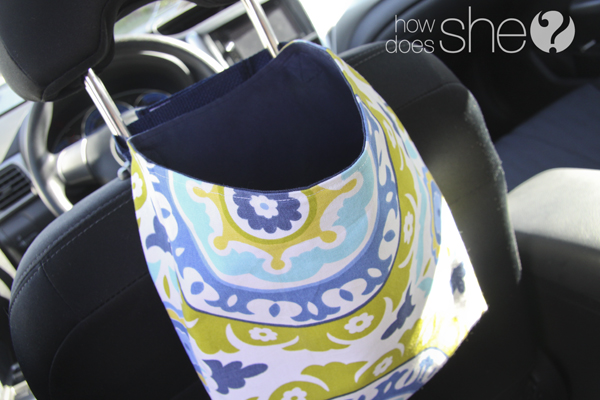 Not just any trash bag mind you.. a very, very cute trash bag 😉
This so simple and easy to make! If you can sew straight lines or squares (Shelley) you can definitely sew this!
Here’s the supplies you’ll need:
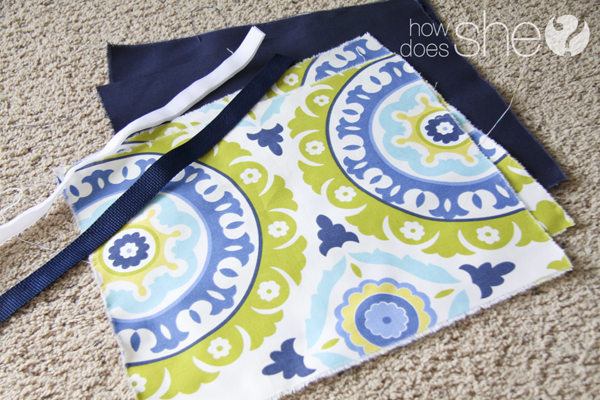
1/2 yard of home decor fabric (for the outside)
1/2 yard of home decor fabric (for the inside)
3/4 yard of 1″ webbing or ribbon
5 in. of velcro
matching thread
What to cut:
4 pieces – 10″ x 13″ (2 from the inside and 2 from the outside fabrics)
2 pieces – 9″ long of the webbing or ribbon
4″ of velcro
*NOTE: If you want a bigger or smaller bag it’s simple! I have made this bag in sizes 10 x 13, 12 x 15 and 8 x 11. Decide what your needs are and make a bag the size you want! ** The heavier weight fabric helps the bag to hold its shape and not “flop” while it’s hanging in your car, plus it’s more durable!
 Now for those of you who hate pinning.. I am right there with you. I understand how seriously important it can be, but when you’re sewing 2 small squares together… how much can you really mess up? I skipped the pinning for this part 😉 Line up the two “exterior” bag pieces and sew around 3 sides (2 long and 1 short side). Making it into a bag with an open top. Sew at 5/8″ and back stitch at each end. Go back to where you started and sew a line of zig-zag stitching (into the seam allowance) next to the straight line you just sewed. This is just to add stability to the seam, you can skip that step if you want. Repeat the process for the “interior” part of the bag.
 Trim the extra fabric off the three edges on both bags, cutting close to the zig-zag stitching. Then clip the corners to allow them to turn smoothly.
 Turn one of the bags right side out, it doesn’t matter which one. Stuff it inside the other bag so the right sides are facing each other.
Here’s where you have to pin {gag}. Line up each of the side seams and pin them together. Add a few more pins in between so you get a nice seam.
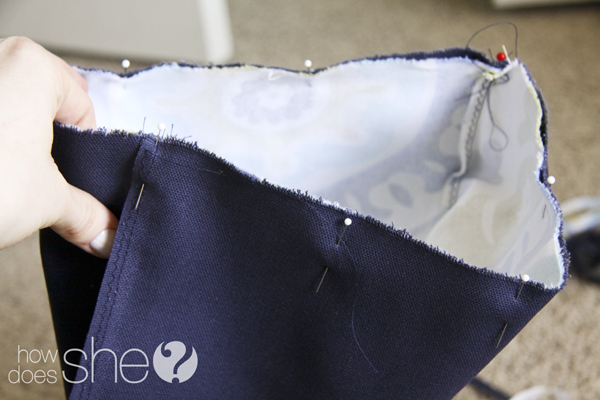 Sew the two bags together at 5/8″, don’t forget to back stitch! Leave a 2-3 inch opening so you can turn the bag right side out. Zig-zag stitch around the edge just like before (or you can skip that step). Then trim close to the zig zag stitching, DON’T trim where you leave the opening.
 Before attempting to turn the bags right side out, it helps to pull them apart from each other. Then turn one bag at a time. They will probably look really wrinkly so make sure you press them nice and smooth!
 Fold the “interior” bag so it becomes the lining. YAY! It’s starting to look good! Press the seam edge making sure to press the small opening so it matches the rest of the bag top.
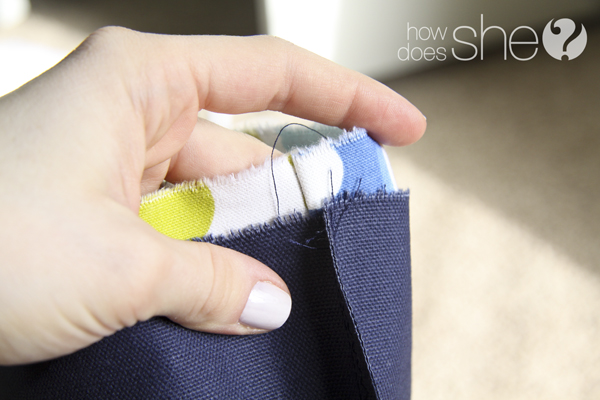
 Top stitch between 1/8″ and 1/4″. This will close the small opening you left and give a nice decorative edge.
*TIP: If you have 2 different colors of fabric for the inside and outside of the bag using one color of thread may show up looking funny on one side. In my case I had a white exterior and dark navy interior. Thread the bobbin with a thread color matching the interior of your bag. Then thread the machine with a thread color that matches the exterior of the bag.Then sew. Viola!
 You are done with the bag! Now for the straps.
With ribbon or webbing they tend to fray…. let me rephrase: They will fray. Unless you have a cotton webbing you need to seal the edge of your straps. Once they are cut take a lighter or match and gently melt the ends of each piece. This will keep them from fraying and give them a nice clean edge to work with.
 Fold under 1″ of each strap piece before pinning it to the bag. Pin them the same distance from the edge of the bag. I pinned mine about 2 1/2″ in on each side.
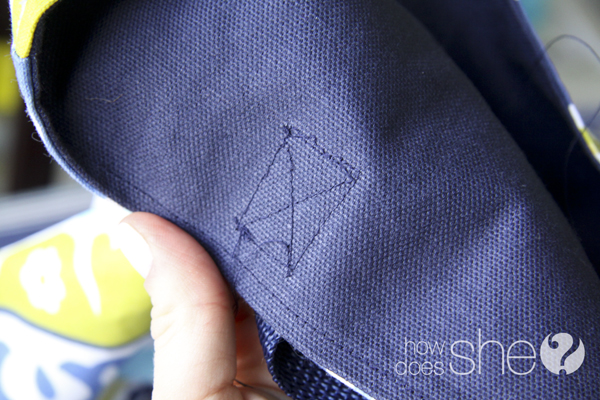
 Sew each strap on by sewing a square with an X in the middle. Sew on top of the ribbon or webbing, the picture below is just to show you the box and X pattern.
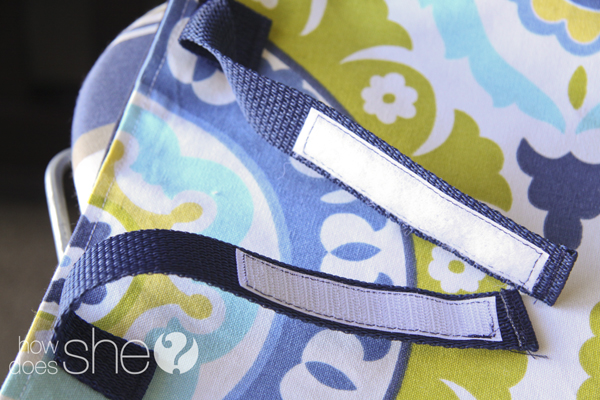
 Sew one strip of velcro to each strap. Sew them on opposite sides of the straps so they will fit together without needing to twist the strap. Sew close to the edge of the velcro and back stitch!
 AND….. you’re done! Now quick and run out the car to test out your new creation!
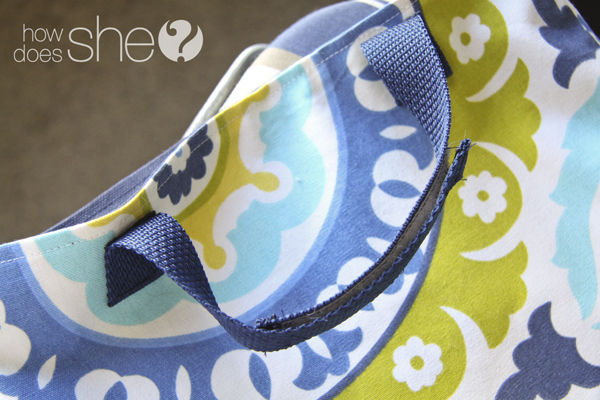 Hang it anywhere it fits. The gear shifter, headrest, middle console. I love having mine on the headrest where it is easy for my toddler to throw his trash.
 The best part about this bag is: It’s washable! So If you don’t want to put a plastic bag inside then it is no problem to throw it in the wash when it gets dirty. If you do want to add a plastic bag here’s my trick: thread the handles of a plastic grocery bag over the 2 straps then tie it in a knot behind the bag. It keeps it from falling down inside and it’s easy to take out the trash! You can even stuff a few extra bags in the bottom for replacing.
 It is really great for trash, BUT if you want to use it for something else I can think of some really great ways. It can be a place to store toys, books, magazines, maps, treats.. you name it! Unfortunately there are only so many headrests in a car… Otherwise I’d have dozen’s of these!
TIME TO GET CLEANING!



Kathy says
Very cute and practical. The instructions are great.
Jacque Charwood says
This is AWESOME!! I think I’m going to make one for a friend of mine who’s car is CONSTANTLY a state of emergency!! (As well as one for myself, and maybe even my other family members! :-D)
Heather Lynne says
This is totally awesome & it’s definitely going on my serious sewing to-do list! I have been having the exact problem you mentioned above and we have a fairly new car, so I hate it when it starts getting messy looking- it was so nice when we brought it home! I thought of getting those bag holder things you stick in the back pocket of the front seat, but I know my kids would kick it from their carseats- this bag you’ve made looks like it would sit high enough to avoid this & be sturdy enough to not get knocked off or pulled off when they squeeze by it to get in their seats. Yay! Thank you for sharing!
Alison says
So cute! I love the fabric. Thanks for posting Lara.
Missy says
Lara! This is genius! Cute garbage, I love it. I need lots of these in my car… they would be perfect to hold the kids’ earphones for the dvd player. We are always passing them up to the front to put in the glove compartment and most the time they end up on the floor and then somebody steps on them. This will solve my problem, thanks!
Rene @ Family Friendly Reads says
I am sooooooooooo gonna do this!
Jill Jackson says
This is such a great idea. I’m definitely making one for the trash and another for her toys!
Angie says
We are about to take a 15 hour road trip with our 4 and 2 year olds. I am going to make them each one of these ans stuff them with books, games, colors, all kinds of goodies! (Or maybe one for goodies and one for trash. Either way…I’m making 2! 🙂 ) Thank you for the great tutorial!
AgathaMChristie says
Love this idea and think it’d make fabulous gifts for friends.
Mindy says
This is such a cute way to hold garbage! Is that an oxymoron? Either way I love it.
Pennymck says
Love it Lara! I always feel like my car is a garbage can on wheels. Now it just may have a little more class!
Jayme says
LOVE it! 🙂
Jenn says
Oh, I definitely need to make one (or two!) for our car. For some reason, my hubby has a horrible habit of treating the car like a bachelor pad and I feel like I’m constantly having to clean up after him.
Celeste says
This is awesome! I just got a new van and want to keep it clean. Thanks for the great idea~!
Hilani says
Such a great product, I’ll have to give it a try.
FB: Handmadebyhilani
Lisa says
Love the fabric and the idea. Looks much better than the “shopping bags” hooked on the back of my headrests. Especially love the velcro. Yours is so pretty I would not want to use it as a garbage bag though.
Tiffany says
Seriously cute, where did u score the fabric?
Lara says
I snagged it off the sale rack at Jo-Anns! They have tons of cute home decor fabric!
stacy says
great idea!!!
Gina A. says
AWE-SOME! Thanks for the great idea…I’m like you, ashamed of the trash in my car but no time to clean it but 2 times a year. this will help a ton.
Nesleirbag says
Clever idea and a great post!
crafty grandma says
When I saw your beautiful bags, I knew I had to make some for my daughter’s van who is always a mess. I completed two – one for garbage and one for the dvd headphones (excellent idea!!) Unfortunately, on a recent trip to a friends house, the youngest one aged 2 1/2 got car sick and yes the bag did come in handy!!(very good ideato put in a plastic bag) luckily I had put a plastic bag inside when I gave it to her…..the next day the van got broken into and the thieves took the dvd player and the bag holding the headphones!!! So the bags certainly had a limited purpose!!!! Back to the sewing machine! LOL!
Shelley says
Yikes! Those bags have a story to tell! 😉 Glad they were ‘functional’ for the sick kids. 😉 –So sad they were stolen though. 🙁 Someone has a cute dvd player bag, I’m sure. 😉
Verity {Belle Bébés} says
We featured this today! http://bit.ly/otQO6G Fabulous idea, brilliant tutorial 🙂 Thanks!
Melanie says
LOVE this idea and the trash bag. My car is always a royal mess and I am also so incredibly ashamed of the inside of my car 🙂
Lisa says
Loved this idea sooo much! I’ve made a few already (one for my boyfriend’s car, my son’s car & my own car). I’ve also made a large one like this, with longer ribbon handles, for a friend to use as a diaper bag (lined with flannel & a velcro closure too)! Turned out adorable!!
Thanks SOOO Much! I think this is going to be a Christmas gift for everyone this year!
Brandy says
love this idea – I’m going to make one for each of my children for the car… I doubt they’ll want to put trash in them but I’ll suggest it!!
Lisa says
Me again…(2 posts above).
I did follow-through with making TONS of these! I made a total of right around 30 of them. Everyone that owns a car (family, friends, and even co-workers) picked one. All different colors and patterns of fabric (I’m awfully lucky to work at a craft store).
I made them this same way as described…but added 1 layer of flannel inside, just to sturdy it up a bit…since I just used basic cotton or poly/cotton blends for the fabrics. I also used 1″ coordinating colors of grossgrain ribbon for all the handles.
They turned out amazing!! Thanks so mich for a fantastic tutorial!
I think I may make more, just to always have on hand.
I also used this same concept but bigger, and 2 hanldes for my friends boys…for them to put toys or anything else in them. Loved ’em!
I would love to attach a photo of some of my bags, but don’t think its possible to do so. 🙁
Thanks again!!
Lisa 🙂
Shelley says
Lisa!! How fabulous. I would love LOVE to see your pictures. Will you send them to [email protected]? Thank you!
Mae says
Thanks so much for this tutorial. My van is in bad need of a couple of these. I love to sew so I am excited to do these.:)
Jenni says
My little brother made this for his first sewing project. You should see how proud he is of his garbage bag! lol 🙂
http://jennisrandomramblings.blogspot.com/2012/02/pinterest-boy.html
Shelley says
Ah!! I LOVE IT!!! Thanks so much for letting us know. Made my day.
Lara says
Oh my gosh! I am thoroughly impressed! He did a fantastic job!
Hilani - Handmade by Hilani says
This is great!!! Can’t wait to do it!
Kilara says
If you add velcro to the bottom front of the bag then you could attach another bag. Or if you have kids who pull on things you could always sew or button them together. That way you could have a couple per headrest.
Web Design Blackburn says
This is just adorable!
Kristina says
I made a bag like this awhile ago, and it makes a huge difference in how clean my car is. Anytime I’ve driven cars without them, I feel lost! A friend lent her car to me for two months, and I immediately had to make a trash bag for it 🙂 Then it was her thank-you gift when she got back.
Just a helpful tip on keeping a car clean, though it may be different because my car is small: clean as you go. When you get home, try to take in whatever you took with you, and ask your kids to help grab whatever shouldn’t be there and take it inside. I have two littles, but between this practice and the trash bag (which they know to use), my car actually stays pretty tidy.
Tania Lawrence says
I love this little car trash bag and linked to it on my new site/blog (http://sewprintmake.weebly.com/sewing-patterns.html). Thanks for providing this 🙂
Sheila Burgess says
I like the garbage bag that you made, very clever. Nice chose of fabric..
Jaime says
I love these bags, thank you so much for the tutorial. I’ve been using mine for 5 or 6 years (is that possible?!?!?), but they are so faded now and it’s time for some new ones. Off to JoAnn 🙂