Spring is just around the corner! Can you believe it? I am so excited for the warm weather to come and stay! I find myself itching to get that spring cleaning done and go crazy on cute projects. My husband tells me I’m just nesting with baby no. 2 on the way 😉 I think, I like doing projects all the time. Pregnant or Not.
This is such a fun and easy project that will add a little spice to any room around the house. I am always looking for places to hang things up around the house and a pin board is the perfect place! Think of all the possibilities. You could use this in your kitchen, bedroom, office… Or make it as a gift for a friend! It turns out adorable every time!
First things first. Here’s the supplies you’re going to need:
-Cork Squares (You can find them at most craft stores and wal-mart. They come in a pack of 4)
-Frame
-Fabric
-Hot Glue Gun
-Fabric Scissors
-Staple Gun
-Box knife
-Felt (optional)
To start out you will want to take either the glass or cardboard from the frame to cut around. Use a box knife to cut through 2 pieces of cork.
This is the point you would cut the felt. If you have a fabric that isn’t very heavy you can use a piece of felt between the cork and fabric to prevent the cork showing through. So cut your piece of felt the same size as the cork or skip that part if you don’t think you need it. Next lay the the cork on top of your piece of fabric. Make sure it lines up with whatever pattern or design! You don’t want the fabric to be crooked. Cut your fabric about 3 inches bigger than the cork on each side.
Now it’s time to work quickly! Squirt hot glue all over one of the pieces of cork, make sure you get close to the edges. Hurry and put the other piece of cork on top and match up the edges. Then press it into place until the glue is dried.
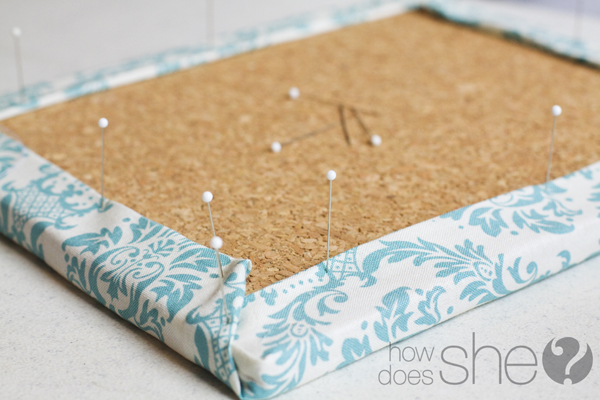
Place the felt on top of the cork, or skip it completely, then lay your cork centered on your fabric. Pull your fabric over the edges and fold the edge under for a nice clean finish. Pin it in place, it’s a lot less permanent 😉 Make sure it all looks the way you want it, flip it over to check the front. Make sure the fabric is nice and tight!
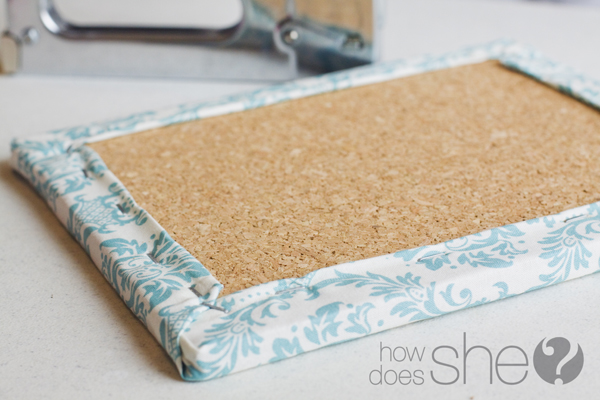
Here we go, now don’t be scared! Is anyone else scared of staple guns? I am terrified that I’ll to shoot myself in the foot! Just be careful ![]() On the outside of the pins staple the fabric to the cork. When you feel like you have enough staples remove all the pins and… Viola! It looks beautiful!
On the outside of the pins staple the fabric to the cork. When you feel like you have enough staples remove all the pins and… Viola! It looks beautiful!
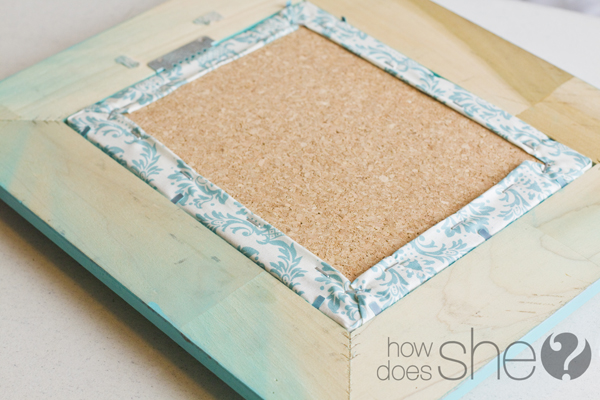
Take your new fabric covered cork and put it in your frame! This is the exciting part. Leave the back open or put the cardboard piece back on, whatever you have room for.
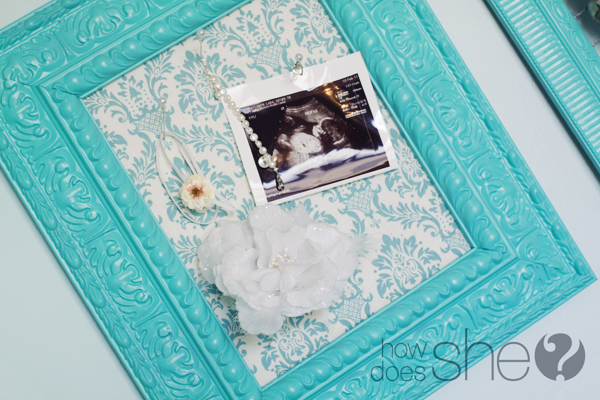
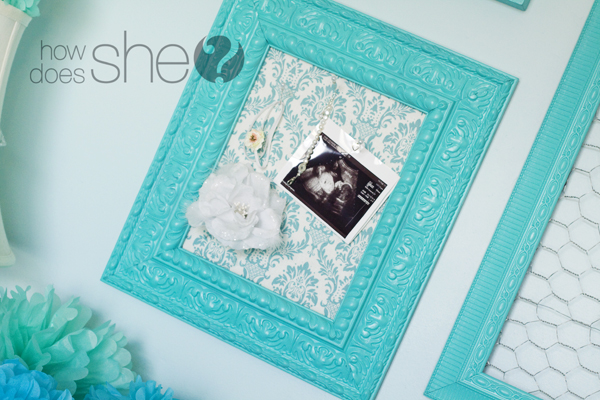
Flip it over and admire your beautiful work! I told you it was easy! Get going on pinning all sorts of cute things to your board! I chose to use corsage pins with white pearl heads. Pick a pin that will match the style you just created!
This is going in my nursery where we are getting ready for ‘baby girl’ to join us in a few months! An adorable addition and perfect place for hanging flowers and tiny bracelets.
How are you going to use yours?
We find most of our cutesy fabrics on Fabric.com. They have adorable fabrics at great prices.







Connie says
Very cute! I’m curious what’s hanging next to it in one photo—is that framed chicken wire? I hope that’s a project you’ll share soon!
pennymck says
I love it! What a great way to have a bulletin board that looks so ‘up-to-date’.
Jenny Whiting says
What a cute idea! And I agree, I’d like to know about the frame hanging next to it and how you’ll use it!
lauren@warmandfuzzy says
I love this. I want to do a rock n roll version for my son’s big boy room. I am linking up to my blog for inspiration 😉
lauren @ warmfuzzypurpleandgold.blogspot.com
Heather says
That is super cute! I love that paint color! Can you tell me the brand/name?
Lara says
This is “Poolside Blue” by Benjamin Moore. I love their paint!
teresa says
Lara~This is ADORABLE!
I love it!
Wanna make it!
Like today! ;o)
Can you tell me what color/brand the turquoise paint is!
LOVE it!
xo
Thanks for the inspiration.
Lara says
Thank you. Thank you! “Poolside Blue” by Benjamin Moore 🙂
Deb says
The frame with the chicken wire could hold earrings, cards with a clothes pin, notes, anything you could hang on it with hooks 🙂
Deb says
The frame with the chicken wire could hold earrings, cards with a clothes pin, notes, anything you could hang on it with hooks 🙂
Inde says
So cute and the color is great!
alysha says
What a cute way to dress up a plain ole cork board! Love it!! Thanks so much for sharing this!
jeanie says
How cheery and colorful — I can see a row of them to help subdivide the craziness! Thanks!
Carrie says
I love the great color – would love to see the whole wall – looks like there is more to it!!! PLEASE
Emily @ ReMarkable Home says
SOOO cute! Where did you get that awesome frame??
Lara says
I picked it up at tai pan trading 🙂 They have adorable frames!
Peggy says
What a great way to add color and spice up a corkboard. I saw the frame with chicken wire… do you use yours for earrings? It looks similar to the one I saw done w/ hardware cloth that my great aunt used in the 70’s/80’s to display her jewelry! I know when we were kids we loved going to her house… 1.) to look at all of her costume jewelry (bracelets, earrings, necklaces, you name it, she had it!) 2.) to listen to her “share the latest news” in the neighborhood, and 3.) to listen to her get all riled up. We thought she was the coolest adult especially for an “old” lady! (she was our grandmother’s younger sister.) Thanks for the trip down memory lane!
Alison says
I love the fabric and the color of paint is perfect! Cute Cute Cute and congrats on baby#2:) Picture perfect!
Kimberly says
Fab-U-Lous. I love it. This would be a perfect gift, and so easy to make!
Jessica Bennett says
I am in LOVE with this color right now. If I ever get to have a sewing room this is the color I want!! I will have to do this soon to hold orders!
Amy Kline says
I would also love to see what is hanging next to it with the chicken wire 🙂 And I love the color of the frame. What color is that?
Have a blessed week!!
Monica says
Congrats on your baby!! This is gorgeous and I can’t wait to see that nursery!! I’ve been wanting to make some of these and I am loving the colors and pattern you chose!
Erin @ Curled Up With a Good Book says
This is great! I love to peruse fabric stores, and I see so many fabrics that I like, but I’m not much of a seamstress yet. Now I know what I can do with it!
Liat Varsano says
Love it.
Madigan at madiganmade says
Fab tutorial and I LOVE the color and fabrics! So fun.
angie says
I love this project. Great choice in colors and fabrics. I’ve been needing to make something like this for my girls’ room. Now I have all the inspiration I need!
Kimberly says
Oh, so cute! Fabulous color!! What a fun baby’s room! I too would love to see how you framed the chicken wire. I have some chicken wire and was planning on doing that very thing, but wondered if there’s any tips or tricks you could share.
Ann says
Your project is truly wonderful! It is easy to make and I can craft it in any design that I like. I decided that on my wedding day, this will be my favor to my guests and colleagues. I know that they will surely like it. I will also put our picture here with a special message scribbled at the back.
Suzanne says
Love this, especially the colors, so bright and Spring like.
clare gould says
thank you, i had a go and now have a place to hang some necklaces that are making some of my friends sooooo envious
Sofia says
Love it!! I’m going to give this a try! My favorite part is the frame! Where did you get it?
Rachel says
Thanks for sharing! Going to go share this with my Facebook friends. LOVE the blue frame and fabric.
Victoria says
I love this! So pretty, what a perfect Mother’s Day gift! I linked this up on my blog today! vixenmade.blogspot.com/2011/05/quick-mothers-day-projects
Wendy and Courtney says
We do these over on our blog as well; http://www.shabbychicksofsugarland.blogspot.com but we use the contact paper roll of corkboard (found @ Target) and we wonder under the fabric on to the cork! Same results just easier, the roll of cork because its contact paper has paper on the back you peel off and stick! Super easy!! 🙂
I LOVE the colors of this one!!
carol says
I Love the fabric covered, but I would like to make a larger one. How would I do that? I would appreciate any suggestions. Thanks so much!!!!
carol says
Oops! I left out cork board in my previous comment. How would I make a larger one? Maybe an 11×14 ? Thanks so much!
Karen says
I too love the idea of chicken wire framed. I am hunting for organization ideas for my sewing room. I can see hanging my scissors, tape measure, etc from hooks on that! Thanks for ideas!
Debra says
Hi, what thickness cork do you use on this?
Lisa says
Hello,
Can you tell me where to got your ithe frame from?
Lindsey Warner says
Cute idea, what is the paint color on the wall, the light blue color? I am having a little girl and would love to do that color in her nursery:)
Thanks, Lindsey
Diana E says
I absolutely love the frame cork board idea and actually have the same fabric. My question is what color paint or spray paint did you use and in what color?
Dee says
Where did you get the picture frame from?
Lori says
I adore your color selection! This is such an adorable and classy-looking idea.
marketing online says
My brother suggested I may like this blog. He used to be totally right.
This post actually made my day. You can not imagine simply how a lot time I had spent for this information! Thank you!
Kathryn says
Thank you for this tutorial – fantastic! I just did my own version and am absolutely loving it. Thanks again! http://teamwhitaker.org/2015/02/inspiration-filled-office/
Andrea says
How do you clean the fabric, once it gets dusty?