Are you a nature lover?
Do you have children who love to explore?
Is your spouse “one” with the great outdoors?
I am. I do. And he is.
We love anything to do with nature – camping in it, photographing it, and even sketching what we see. Today I’m sharing the ultimate gift for the nature lover in your life – a reusable nature journal! Talk about eco-friendly, right?
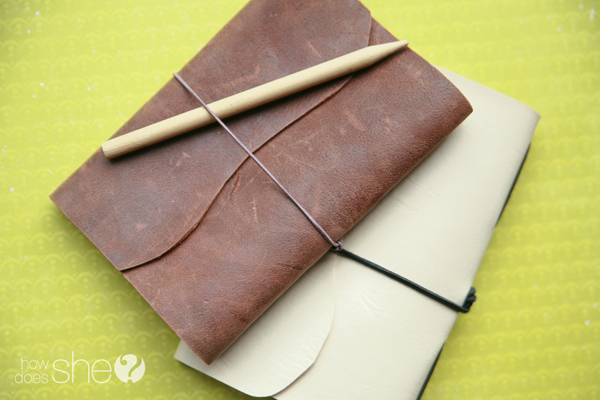 First of all – I think they look super duper cool. Very rustic. They make me imagine Indiana Jones carrying around one of these in his back pocket, to sketch the “leap of faith” or the “temple of doom”! What really sets these journals apart is the reusable covers! These are designed to switch out the booklets inside for new ones – reusing the covers over and over again. Cool? Cool! Let’s get started, shall we?
First, download your free Nature Journal Cover Pattern here:
FREE JOURNAL COVER PRINTABLE TEMPLATE
Next, gather your supplies:
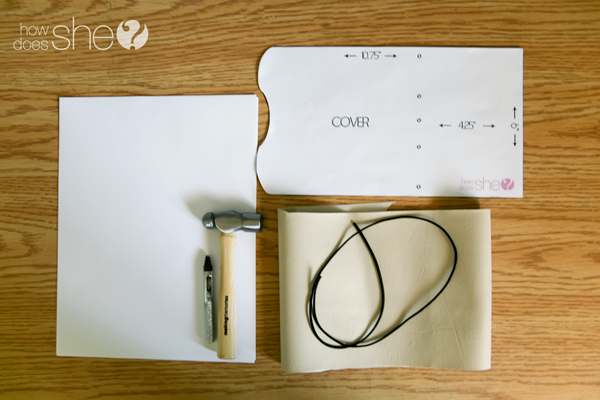
- 1 piece of fabric/vinyl/foam/leather (any firm/pliable material that won’t fray) cut to 8.5X11
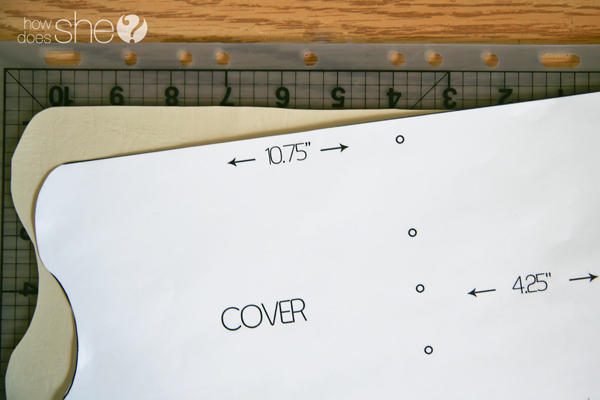
- Your FREE TEMPLATE, printed (borderless) on 8.5X11 paper, cut out
- about 24″ of elastic cord
- Some kind of hole puncher that can punch through fabric or leather
- papers to put in the journal (a bunch of 8.5X11 that we will trim down later
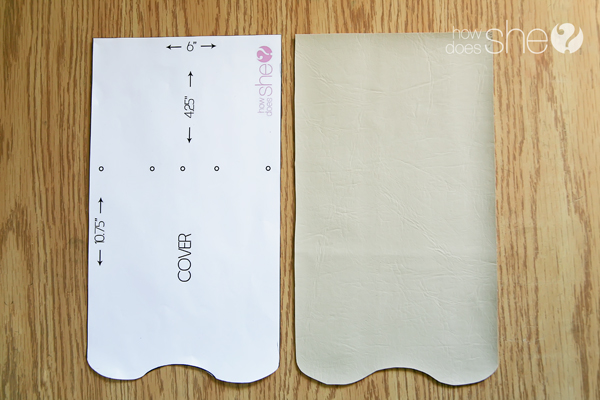
1. Print out your template and cut it out. Then lay the paper template over your piece of fabric, pin and cut it out. You should now have a piece of fabric that is the same shape as your template. Make sure to make long, even cuts as the edges will be left just as you cut them. I am using some vinyl fabric – the kind you might upholster a kitchen chair with or something. I found a HUGE piece of it at the fabric store for $4. Can’t beat that. I could probably make a dozen of these from that one piece.
2. Lay your paper template over top of your material, print side up so you can see where the little circles are. You can pin into place, or just hold the template into place so it won’t move.
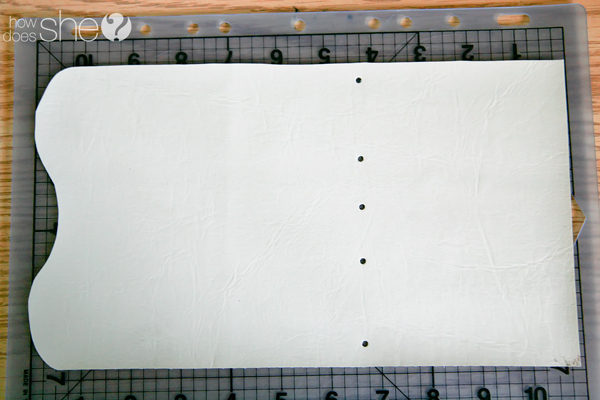
3. Use a punching tool or a cropodile (if it is the larger one that can reach farther) to punch a hole in every spot where there is a little circle on the template. Make sure you have a mat beneath or your table might become polka dotted!
4. Now you should have your cover material punched with several holes, all in a straight line – like this:
5. Now it is time to gather your elastic cord (it needs to be small enough to fit through the holes you punched – mine was something like 2mm thick) and you will thread it through following these steps:
Threading the Cord:
1. Working from the inside of the cover, thread the two ends of the cord through the two outer holes, the ones closest to the edge. There should be a long piece of cord running along the height of the inside cover from top to bottom, with the ends poking through to the front cover. Flip it over.
2. Thread the two ends through the next two holes, so they poke back through to the underside again. Flip it over so you are seeing the underside of the cover.
3. Thread both ends through the same middle hole so now they are poking through to the right side (outside) cover. Flip it over.
4. See? This is how the outside of the cover should look now.
5. Tie a knot right against the middle hole.
6. Tie a knot at the end of the cords.
Did that make sense? It is pretty simple when you are actually doing it, and you should end up with an elastic in the inside of the cover to hold your pages, and a loop on the outside to hold the book together. I’ll show you how to put it together in a second. First, let’s get our pages ready.
6. Trim a stack of white (or any color) paper to be 8″ by 5.5″. This means you should get two stacks out of one stack of 8.5X11 paper.
7. Now you will fold the smaller stacks in half:
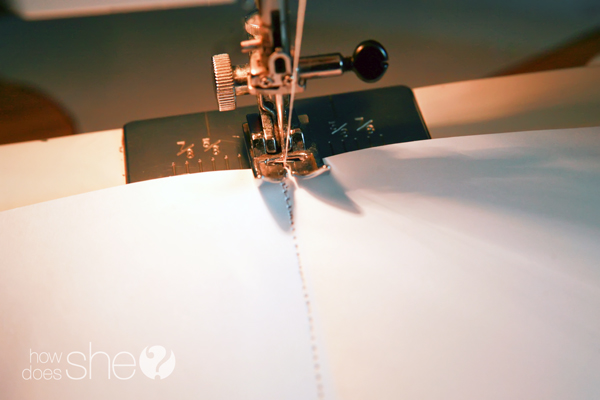
8. You can leave the booklet like this (no need to attach the pages together) or you can staple or sew along the seam to attach the pages together. I stitched my pages together – just set your stitch length to the longest it can be so the pages don’t end up ripping.
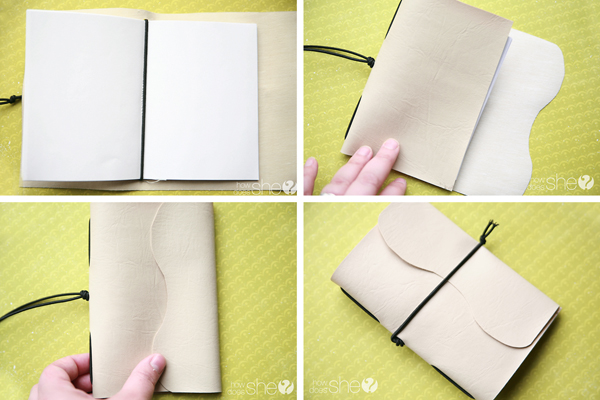
Yay! You are almost done! Now you just have to assemble the journal into the cover! It’s so simple. Slip the little booklet you just made under the inside elastic so it sits along the seam of the booklet. The elastic should be tight enough to hold the pages in place. If not – tighten up the knot you tied on the outside to adjust.
Fold the cover closed and slip the outside elastic loop over to hold closed! That’s it! You are done. Congrats! The best part about this? When you fill up the pages, you can simply slip them out and insert some new ones! Perfect for kids, am I right? Mine go through their pages like crazy.
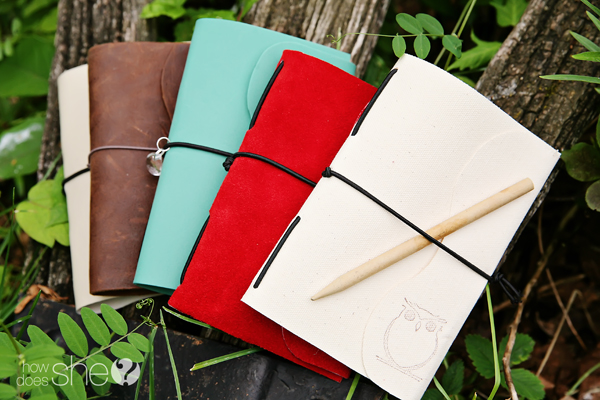
Try making a cover out of leather, canvas, even a sheet of craft foam! It can be anything you like, as long as it doesn’t fray. You could even try cutting the pattern out of patterned paper, then laminating it to use as a reusable cover – so many fun possibilities! Oh, and my kids discovered that they could decorate the covers and hang fun embellishments on the cord, too. Here are a few varieties I made – The bottom cream colored one is vinyl fabric, the dark brown one is leather (perfect for your rustic man), the turquoise one is craft foam, the red is suede, and the top cream colored one is canvas!
Happy nature hunting – and don’t forget your handy-dandy notebook to jot down what you see! I know you are going to have so much fun with these.
And if this has gotten you into a “journaling” mood, you should check out how to create your own “Art Journal” to really express yourself!







alysha says
These turned out great Bobbi! You’re so talented! 🙂
Caley says
These are beautiful Bobbi! They would be so fun for girls to make and then take to girls camp! Or as birthday gifts…they would be so easy to ship in the mail! Thank you so much for sharing! I can’t wait to make one!
Alison says
Bobbi…these are fantastic! Thanks for that amazing template too!!!
Cristi says
Amazing!! I never have even thought about making these books… great idea for Father’s Day too- my husband loves stuff like that! Thank you so much for sharing!
Kate C says
These are great and simple. Good tutorial. If you’re looking to get any kind of journal to buy instead of make (for whatever reason, because almost everyone I know who reads HDS is a terrific crafter), you should check out my shop in Etsy.
Rachel says
Awesome! Gonna do this as a first assignment with my high schoolers! Thanks for the tip, I’ll be sure to share some pics!
Nancy says
Hello,
This is a great tutorial! So sad I can’t use it, though: not everyone has 8,5×11 paper, nor the imperial system. How about translating it to metric system on A4 (21×29,7 cm) paper? This would made my day 🙂
Bobbi-Jo says
HI Nancy!
Sorry I don’t have a template that is compatible with international sizes. I would go ahead and print it out using the A4 size and see what happens., You might need to trim the papers slightly but it should be able to be used, if adjusted a bit., Good luck!