I made a goal in the wintertime to make a quilt for our family that we could use for picnics and other outings- something that I would feel fine about throwing on the ground and getting dirty 😉 So throughout the winter, I collected clothes that my youngest had grown out of or that had gotten a little worn out or stained. I am saving my favorite outfits for a “baby clothes quilt” (Have you seen those? They’re adorable!), but for this project, I wanted the old/stained/worn out clothes (the ones the thrift stores don’t even want) 😉
When I finally felt I had enough clothes (including a pair of plaid PJ bottoms of mine that shrunk and an old crib sheet), I got to work cutting out 6×6″ squares of fabric. Eventually, I had enough squares to make a quilt that was 12 by 12 squares.
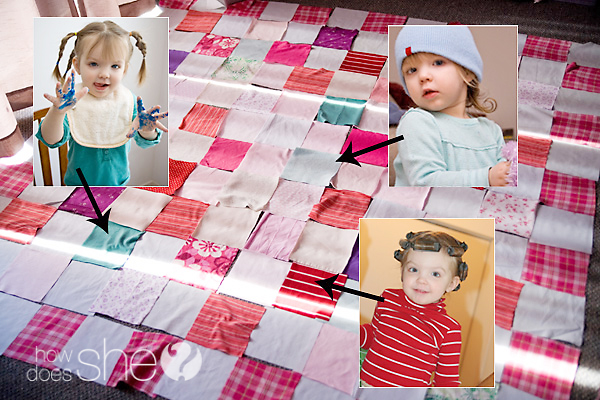
Below you can see a picture of the squares laid out on the floor, and I’ve added a few photos showing my oldest wearing the shirts that some of the squares are made from (my youngest also wore them, so they’ve been through a lot).
Once I figured out how I wanted to organize my squares, I sewed the squares into rows and then sewed the rows together until I had the front of the quilt done.
Then I called my mom before making a trip to the fabric store for the back piece and filling and was so happy to find a way to do that for free, too!
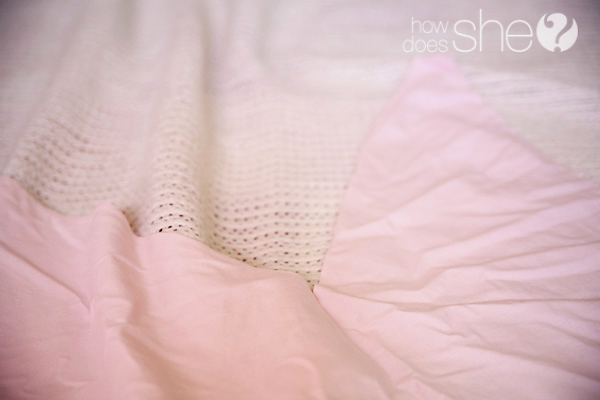
She had this old white blanket that I could use for the filling:
And a pink fitted sheet that we cut the elastic off of to use for the back of the quilt:
I sewed the three layers of the quilt together so that they would be inside out (but left a bit un-sewed so that I could flip it right side out). After flipping it, I hand stitched the hole closed. Then top stitched around the outside of the quilt:
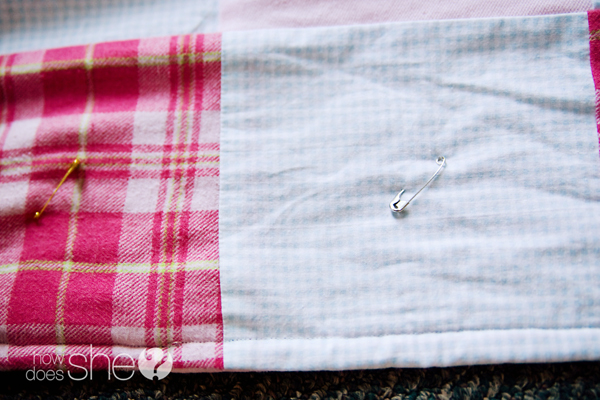
The next step was to “stitch in the ditch” by machine. First I pinned all of the squares because I wanted to make sure I didn’t end up with any bunched up bits of fabric in the middle of the quilt.
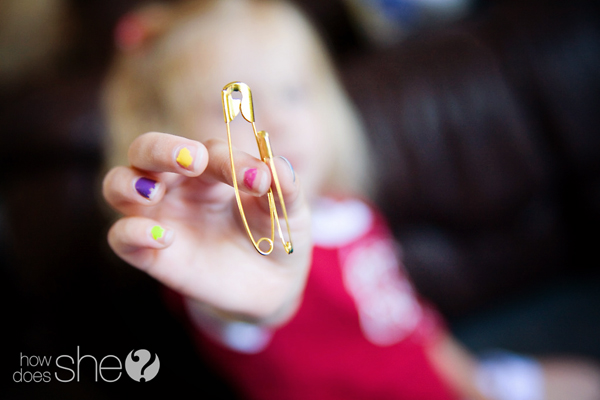
My 3 year old was an excellent helper for this stage- passing me safety pins 🙂
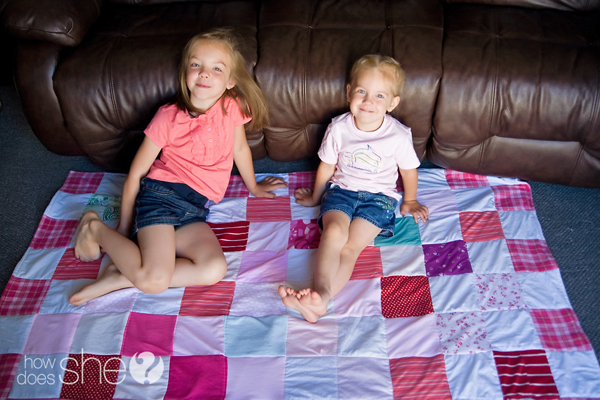
I was so happy when I got it finished! And what a bonus that it cost me nothing but time and the cost of thread! It is NOT a perfect quilt- you could find a bunch of mistakes in it. You can already see grass stains on it, and I think that’s PERFECT for what I want to use it for! I love that I don’t have to worry about it if it gets dirty, and that I know I can throw it in the wash as often as needed. I also love that it’s full of memories because I can just see my little girls in the clothes that the fabric came from!
I can’t wait to get some use out of it this summer! 🙂
If you enjoyed this post, you should hop over to my blog & see what other interesting sewing projects I’ve tried 😉






Patti G says
I made one of these for each of my sister’s for Christmas a few years ago with scraps from our parents clothes who had both passed away.
A cherished gift/memory that they both treasure & I so enjoyed making for them!
Heather Lynne says
That is SUCH a great idea! Thanks for sharing that!!
Gin Robinson says
Since My Precious Momma passed away October 29, 2012, my Sister & I are just now beginning the “Very Dreadful” and are going through and sorting Momma’s belongs (almost 62 years of “Stuff”)
I really WANT to make us a “Memorial Quilt” from all of her clothes. I have never began such a project and have NO CLUE where to start! I know this is possible if I set my mind to it because it’s something that means so very much to me!
I would LOVE to connect with some of you that has already tackled this project! (maybe hear some of your “do’s & dont’s”)
Anyone willing to share some info…..I will forever be GREATFUL!
Thank You All Again & Again!
~ginger
Marcia says
Mom passed away one year ago. I kept a few items of clothing along with her favorite neck pillow. I just began tonight taking apart her neck pillow and cutting the pink flowery material into four inch squares. I got about nine squares. Next I will cut her favorite nightgown into four inch squares and continue with her favorite pillowcases and her favorite Christmas sweatshirt. I must say I had a moment cutting up her neck rest pillow. I miss her so much. No matter how many mistakes I make, it doesn’t matter. I will be able to hold her close to me as I wrap up in her favorite clothes❤️
Jen says
I have wanted to try this for years and have piles of clothes waiting. Thanks ever so much for the tutorial!
Heather Lynne says
You’re welcome! It is worth the work/wait/time! 🙂
Jillian {Her Split Ends} says
Brilliant! I love having the memory of the old clothes and something that your little ones can use for years to come!!
Cheers
~ Jillian
http://www.hersplitends.com
[email protected] says
SOOO…cute. I did this, but mine turned into a pillow case because I couldn’t get it to line up correctly and had to stop early. Super fun idea!!
Heather Lynne says
🙂 I had some wonky squares because of all of the different fabric types- some of them were much stretchier than the others! But I decided in advance that I was going to embrace the imperfect for this project 😉 so I went for it. I like the idea of a pillow case, though! I do have more clothes I could use… 🙂
kelcey b says
My father recently got rid of a lot of his clothes that he no longer could wear so I have saved modt of then to make a quilt. Is it ok to use different fabrics? Do u think it woulf be ok to use different size squares as long as I have enough of the sane sizes?? Thanks for your help on this! I’ve just recently started learning to sew!!
Chris B. says
Thank you for this. My father passed away in March of 2012. I was looking for an idea to keep his memory. Thank you you were/ are inspired to published this blog post . Thank you.
Heather Lynne says
You are so welcome! Thanks for commenting, it is good to know that you will be able to use this idea!!
Tami says
I love everything about that last picture! What a great idea for an outdoor blanket – now I want one too!
Heather Lynne says
Thanks Tami! 🙂 My motivation was to get it done before Pageant! I’m so happy I pulled it off!
Sara says
I love this idea! I get attached to my little kids clothes so this would be a fun way to reuse them.
Missy says
Love this Heather! Fantastic idea. I have been wanting to make a child memory quilt as well but I didn’t think to make one from the scraps of the clothes that would be trash and use it outside for picnics – so fun.
Rachelle says
IT LOOKS SOO GREAT!!! Now you can help me make one. 🙂
Jody says
I have been saving my kids clothes for awhile to make one of these. For the back of the quilt, I saved their receiving blankets to patch together. The memories are incredible. Thanks for the post…I think I may FINALLY be able to begin this project this winter….seeing yours has really made me excited!
Paula says
I made a quilt for my brother for Christmas from our parents clothing the year after our father passed away. I put their wedding picture in the center and appliquéd their signatures beneath that. I’m also making one for each of my husband’s brothers children, from his clothing. I think this is an amazing way to remember someone.
Sandy says
I’m getting ready to make my 1st quilt from clothes, the clothes are thin and of knit. Question-should I reinforce the fabric?
Jennifer says
Wow.. Its really great.
But you can also sell your kids cloths online. I use some sites like dutchchoice.com and others to sell my kids designer cloths. Benefit is that designer cloths are costly and obviously no one wants to waste it. So its better to sell it so other kids can use it.
Yvonne Jackson says
My husband just passed away in June and this will be a great idea to make for the grand kids . Thank you