I move a lot… 9 times in 10 years! And, because of this, each year is different when it comes to holiday decorating. I’ve lived in homes that have had a fireplace and in homes that did not. This year, I have a fireplace!
Whatever your situation, these handy DIY decor items provide a simple, two-part solution for hanging stockings with, or without, a mantle.
First, a nifty little sign to announce the dedicated area where you will hang your stockings:
And next, some DIY knobs for each stocking:
#1. The Sign
What you’ll need:
- a piece of wood trim, a 2 x 4, or any other appropriately-sized piece of wood.
- paint in whatever color you want the background to be
- alphabet stickers
- colored ink stamp pad
- picture hanging hardware (I used eye screws)
For my sign, I happened to have a piece of pre-primed wood trim so I didn’t need to paint it first. I also had the very “Brady Bunch” looking alphabet stickers on hand and because I’m an avid crafter – yep, I had the stamp pad too. All I had to do was stick the letter stickers onto the board.
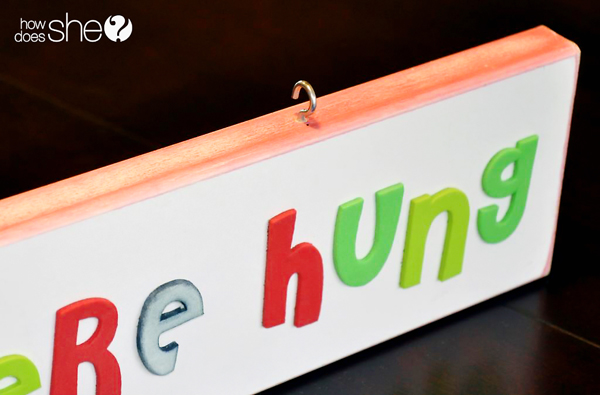
Next, I “painted” around the outer edge with a red ink pad by rubbing it onto the wood…
You can also use any craft paint, some washi tape, or you could glue some ribbon around the outer edges of the sign for extra love. Next, choose the appropriate picture hanging hardware. I chose eye screws and twisted them into the top of the sign, about 3 inches in from each outer edge.
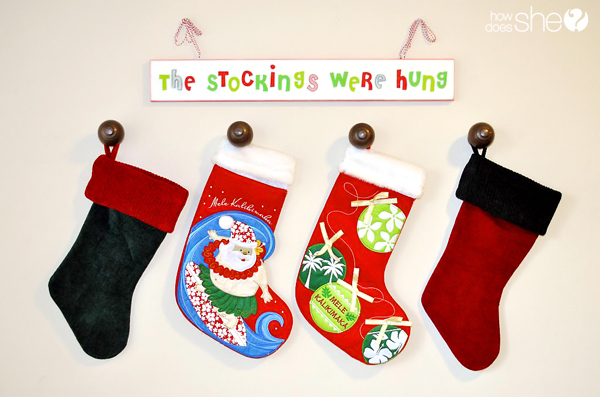
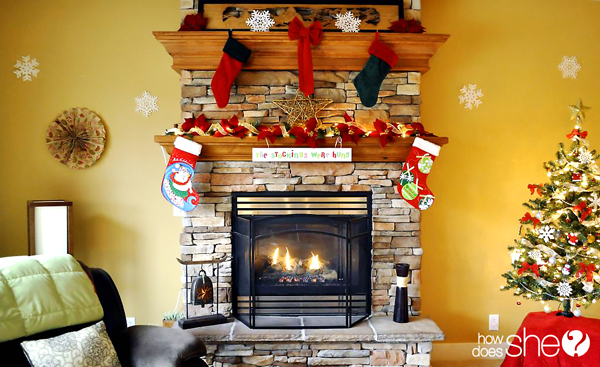
I chose red and white striped bakers twine to thread through the eye screws to hang the sign. Here it is completed and hanging from a mantle:
And here’s the “no mantle” option:
DIY #2. The Knobs
The “knobs” for each stocking are drapery rod finials. Mine started as unfinished wood pieces for just under $2 each at Lowe’s. Any local building supply warehouse that carries drapery hardware and supplies should carry them. You can purchase finished wood pieces as well, but they’re more expensive and unfinished hardware allows you to customize your color. Look for finials that have screws attached like this:
I wanted the look of bronzed metal so I spray painted them. It’s a quick and easy process with the right set up. Just screw each finial into a piece of styrofoam and place on top of an empty box to raise them high enough off the ground so you can walk around all sides and give them a good coat or two of paint. As you can see from the photo below, I had painted these a while back so I re-did the set up to give you an idea of the easiest way to get the painting job done.
I love the way the finials protrude from the wall and make a bigger statement than a drawer pull. They make the occasion a little more fancy, especially for the times I have lived in a rentals with plain white walls! I try to make things a little more special around the holidays no matter where we are. Below, I looped the stocking cord around the back side of the finial before screwing them into the wall. The loops weren’t large enough to fit over the front part of the finial. You can also tie a ribbon through the loop of the stocking and around the finial. (You will have to spackle the holes left from the screws after the holidays).
I have also used these finials as tie-backs for lightweight drapes and as design elements from which I hung framed pictures.
I included this final photo to encourage a few more last minute DIY’s. Paper snowflakes add some magic to the walls or can be hung from clear fishing line from the ceiling at varying heights to give a winter wonderland effect inside the house. To the left of the mantle, you’ll notice a paper fan “wreath” made from gift wrap. Use any of your favorite (or leftover) giftwrap and follow this GREAT how-to by Alysha for paper rosettes.
Have yourself a very DIY Christmas!
Happy Holidays,


Bobbi says
This is adorable! I didn’t think I could hang our stockings without a mantle, but this looks great! I thought those knobs were metal, at first. I love how it turned out!
Stephanie says
Thanks Bobbi 🙂 Necessity is the mother of invention!
KhaliaNicole says
I love this idea! I’m in the process of making something similar right now actually!!
Stephanie says
Cool! I’d love to know how it turns out!
Ashley says
Such a great idea! We don’t have a mantle in Vegas and this really helps me out. Can’t wait to try it.
Stephanie says
Awesome! I’m happy to know that you found this idea useful. Best of luck with your creation!
Sue says
What I’ve done for cheap decor:
* sprayed oak, maple, and elm leaves silver and gold
* strung cranberries (3 to a wire, hung vertically)
* dried slices meyers lemons, blood and regular oranges, as well as green apples.
* cranberry and popcorn strings
* used grapevines to make a single large star
What have I done with these? I hung everything on my Christmas tree, and the only thing that I purchased were a variety of small birds, and that was last year. Everything minus the birds, is recyclable. It’s not only an economic statement, but it’s an incredibly homey Christmas tree with charms that harken back to days when Christmas meant something well beyond rampant consumerism.
Stephanie says
Thanks for the list of great ideas, Sue! It would be so neat to invovle kids in creating everything for the tree and make it extra special. I also love the charming image I get in my mind’s eye when I think of those handmade and natural elements!