You guys, I am totally having an Anna (from Frozen) moment lately. “The sky’s awake, so I’m awake so we have to get up!” I totally feel your pain, Anna.
While the curtains in my bedroom are dark and don’t let much sunlight in, our pesky garage door is totally messing with me this summer. The sun comes up EARLY in the summertime and with the way the sun comes in, it only shines on my side of the bed. So while husband is snoozing away, I’m blinded by the sun and end up getting up as soon as the sun is up. On the weekends we like to sleep in…even our 5 year old and 3 year old sleep late. So, while I love sunlight, I don’t love it waking me up on the days when we can all sleep late.
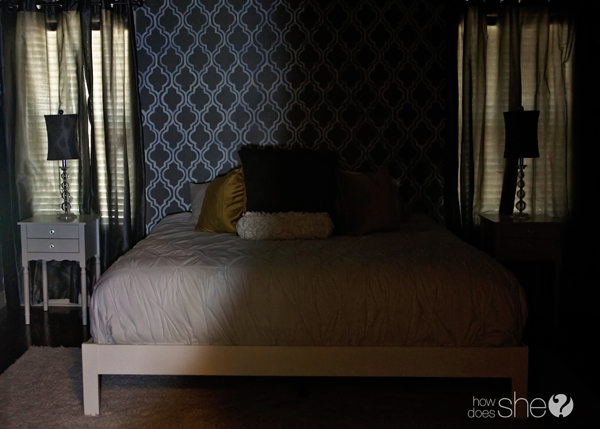
Here’s a pic of our room. Obviously, I picked the wrong side of the bed to sleep on…..
And, some of you might say just close your bedroom door and you won’t have to worry about the sunlight. But, if you have smaller kids at home, you know very good and well that’s not the solution to the problem. Small kids equals parent’s door is open…always.
I went online looking and looking for a solution to my dilemma and found nothing. I hate it when that happens, however it gives me a chance to be creative. It needed to be something I could remove easily as well as attach easily when I wanted to use it on the weekends. I can’t put holes in my metal door because my husband says NO! Which lead me to my light bulb moment of it’s a metal door! Magnets! Oh yeah!
This is an easy project and if you have a metal door that you would like to cover without having to drill a bunch of holes into your door.
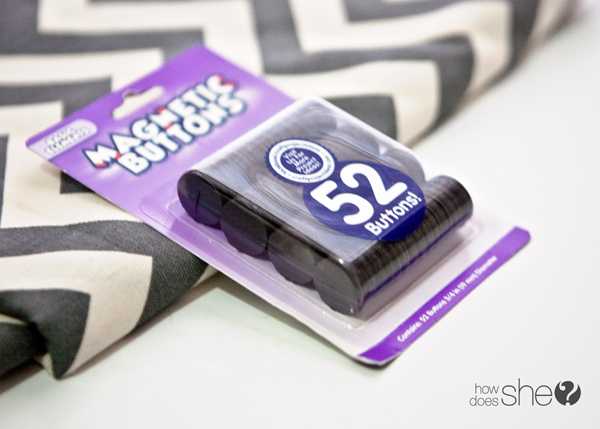
Probably, the only supply you will have to go buy is the round magnets. I found a pack of 52 magnets for less than $5. Score! And this project gave me a chance to use up some fabric that I had no clue what to do with. Double score!
Let’s get started! Grab a tape measure and measure the size of your window, including the trim around it. Mine was 24X38. I wanted the magnets to be on the outside of my window opening so I added 2 inches all the way around. Then, I added another 2 inches all the way around for my hem (your hem will be larger than usual because it will case the magnets). So, when it’s all said and done I added 8″ to my length and 8″ to my width. So, my fabric needed to be cut at 32″X46″.
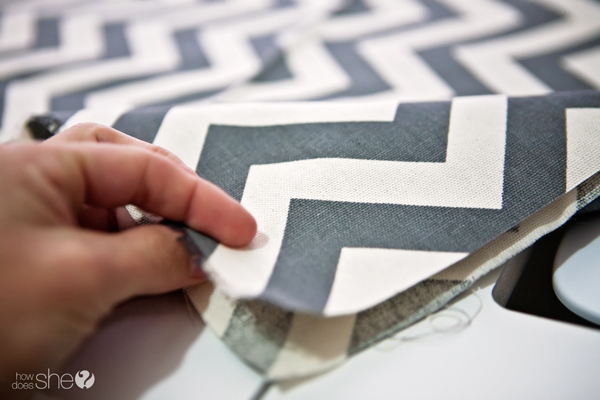
Grab your fabric and cut out 2 pieces. One will be a the front and the other will be the back of your curtain. Place them WRONG SIDES together and pin into place.
Sew all the way around, removing the pins as you sew. Your seam allowance should be 1/4″.
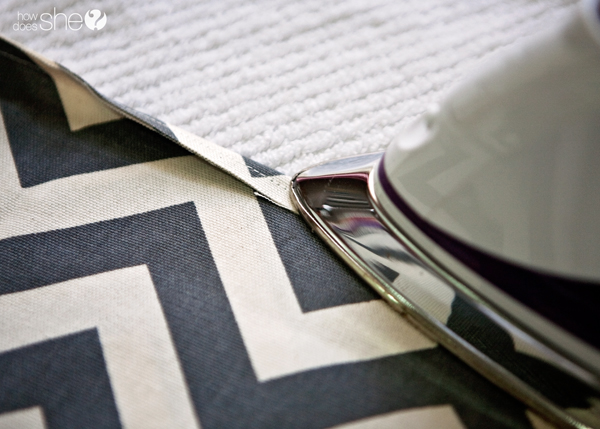
Now, we are going to start on the casing that will hold all the magnets. Start by ironing down about 1/2″ on one of the sides of your curtain.
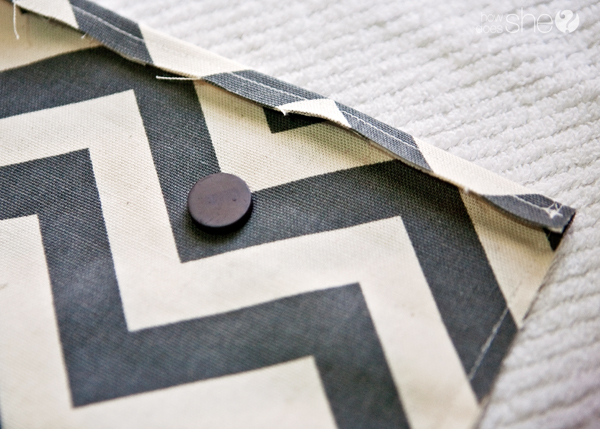
Grab one of your round magnets and place it on your fabric.
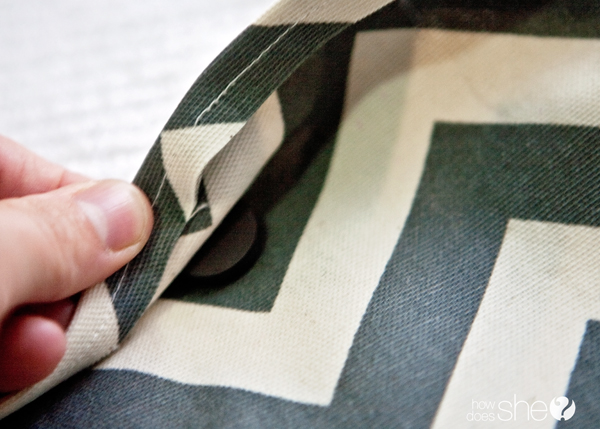
Fold your seam over the magnet to see how large you need to make your casing. You will want your magnet to fit snuggle while also allowing enough room to sew your casing closed with the magnet inside. It should be around a 1″ casing. Remove the magnet and iron your 1″ casing down.
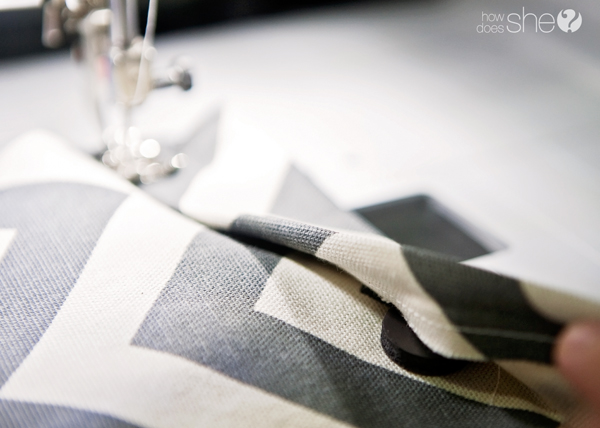
Now, you’re ready to start sewing your magnets into the casing. Start off by simply sewing down about 3-4″, then add your first magnet into your casing and sew carefully to enclose it. Watch out for your magnet wanting to stick to your foot when it gets close to it. I had that happen a couple times during this project. 😉
After you sew past your magnet, stop sewing and grab your tape measure and measure out 4″ from your magnet and place your next magnet into the casing.
Keep adding a magnet every 4″ until you get close to the end of your side. Don’t place any magnets within 3-4″ of the end – this will give you room to do your casing for the adjacent side.
Now, you will repeat the process above on each of the sides – ironing your casing, sewing the casing to enclose the magnets. Almost done!
The last step is to sew your casing closed on each of the 4 corners of your fabric. Simply, sew from your hem to the end of your curtain to close it up.
And there you go! Go attach it to your door! This has been so handy to have because it’s so easy to take off or put on plus no annoying holes in our door!






Stacey says
I love that someone else came up with this solution too! I have sliding glass doors with a wood frame. I wanted a removable curtain and thought- Magnets!!
I found extremely powerful magnets from a model train hobby store. The brand is Magcraft and they actually come with a warning label. I found a style that looks like a washer and I’m hand sewing them into the top lining of my fabric. For the wood frame I’m using a magnet the size of a pencil eraser and drilling a hole into the very top of the frame. I’ll glue the magnet into the drilled hole so it will be completely flush and out of site.
Demi says
How did you affix the magnet to the door?
Betsy Foster says
The door is metal therefore the magnet will stick to it
Nancy says
Yes, I too would like to know about washing these.
Kristi says
I’m curious about how you wash it. We live out in the country and come deer season my husband will remove whatever is in the way to see the deer (Ik, it’s redneck hunting out our back door lol but what can I say… MEN!). And it will more than likely hit the floor so I need something washable.
Jennifer says
I am also curious about the triangles on the wall. Is that paint? If so can you share how it the post? 🙂
Leslie says
Thank you so much for this post! I made this today and it’s brilliant! I can position the side magnets up as far as I want and it ends up looking like a roman shade. What an easy, inexpensive, absolutely awesome solution! Thank you!
Ann P says
What a great idea. We moved in with my aging Mother and turned her sun room into our bedroom.and I need something to cover 2 door with doors.
Riicky says
Brilliant idea… We have a. Frosted glass door that shows the lights of the cars leaving the driveway across the road…. This causes concern for my dog who decides it’s fun to bark loudly at the lights in the middle of the night. We don’t want to cover it completely, the front hall would be too dark otherwise, but this could be our solution to our problem!!!! Thank you!
deb c says
This is a GREAT idea! Just wanted to let you know that there are also magnetic curtain rods. We have one on our back door & it fits one kitchen-window sized panel. We found it online, not sure where, though. Thanks for the tutorial!
Susan says
OMG…………….what a great idea. I have a similar problem with a barn door in the dinning room. the top is glass and has a blind on it but the bottom is rough looking because the dogs keep jumping up and looking over so I have been contemplating on how to use fabric to just cover the bottom and still look nice. You did good when you came up with this solution…..
Thanks for sharing
Carina says
I love this! What a great idea! Now I am wishing I had a metal door with a window :).
Maria Elena Parascan says
What is on the wall behind your bed!? It looks gorgeous!!!! Did you paint or is it wallpaper?
Lindsay says
Did you know they have Magnetic Curtain Rod Holders? I have them on my back patio doors. BUT! This idea is pretty fantastic and my front door looks exactly like your door! I’ve been meaning to do something…and I think I will be doing this! Thanks!
Keitra says
I’m a complete novice with sewing, but, out of curiosity, what keeps the magnets from sliding around?
justine says
I’m curious how magnets don’t slide around ad well? It seems to me once they slide and stick to each other it would be quite a pain to get apart
Mary says
Maybe sew 2 vertically spaced rows between each magnet to keep in place
Lauren H says
Kerri,
Oddly enough I was Googling DIY Magnetic Curtains just this past week. Would you mind sharing the brand and where you got the magnets?
Thanks!
April @ illistyle says
Genius! Pinned.
Denise says
Awesome idea. I am trying to figure out how to make this work on the (wood) windows in my daughter’s bedroom. We currently have blankets hung with clothespins (soooo classy!!), and I’ve been trying to figure out a simple curtain solution that would kind of “seal” around the edges (like magnets on a metal door) and block out the light. Any ideas???
Theresa says
You could simply glue a little magnet above the window on the wall.
V. Moore says
Instead of magnets you can use a dowel rod and 3m hooks to hang on a non magnetic surface ..
Krystle says
Velcro
Micki says
Do you know that they sell magnetic curtain rods in Target & WalMart?
Janie says
Yes, but they are more costly than this solution.
peg says
I used the store bought magnetic curtain and it ALWAYS falls of. I am going to try more magnets in the top of the curtain. Much used door
Mandy K says
Brilliant! I’ve been trying to find a way to add another layer of blinds/curtains to my sliding glass door. It lets in the afternoon sun (and heat), even through the shades. I think this is the solution I’ve been looking for!
colette says
That is a really good idea and super cute.
However I disagree with you about small children and door open always. I have always closed their bedroom door and mine and never had a problem. I know i’m one of the few that is this way, but never say never.
Maureen Toms says
I agree Colette. Unless you have an infant or a sick child, I t’s better for your marriage and the sexual of the family to have a closed door and children sleeping in their own beds.
alison@howdoesshe says
I love this idea! Easy up and easy down. Thanks Kerri