Give your sweetheart a melt- in- your- mouth kiss this Valentine’s Day, a MERINGUE KISS that is.
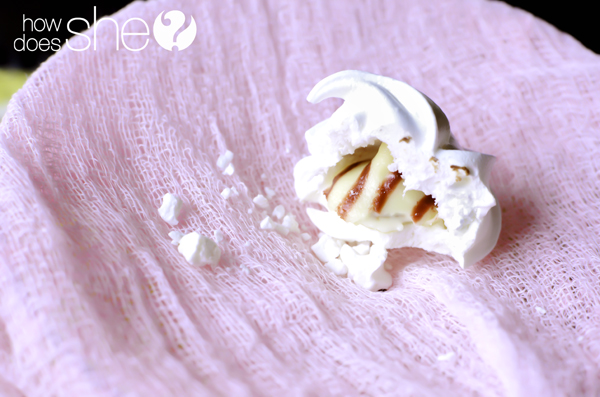
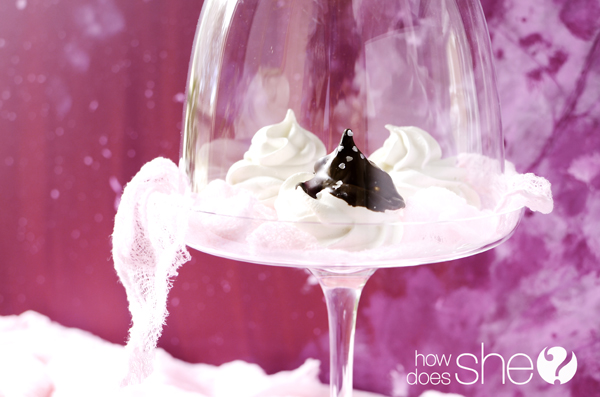
These little darlings are cloud-like perfection with an air of elegance, leaning toward sweet decadence with a hidden chocolate kiss inside for a smooth, delightful finish.
Valentine Meringue Kiss
Time to mix, including warming up the egg whites: 50 minutes
Time to assemble Meringue Kisses : 15 minutes
Time for baking & cooling: 90 minutes + 60 minutes or more for cooling…
Makes: 16-20, depending on the size of your meringues
Ingredients
4 large egg whites, room temperature
¼ teaspoon cream of tartar
1 cup superfine sugar, sifted to remove any clumping
½ teaspoon almond extract
¼ teaspoon vanilla extract
16 Hershey’s© hugs and kisses, try the new Raspberry Hug kind, too (my favorite)!
2 cups semi-sweet or bittersweet chocolate chips or chop specialty chocolate into slivers for melting (optional)
Directions
Preheat the oven to 200°F. Line two baking sheets with parchment paper.
Grab your mixer with the stainless steel bowl and fit it with the whisk attachment,
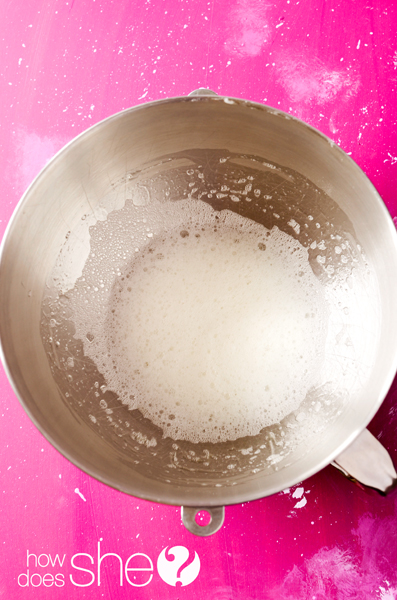
beat the egg whites and cream of tartar on medium speed through the “foamy” stage,
and continue to beat on medium speed until “soft peaks” stage.
At the “soft peaks” stage, add sugar gradually to the mixture a Tablespoon or two at a time; allowing time for the sugar to dissolve
before adding more because any undissolved sugar will melt to make your meringues sticky, soggy or worse, collapse!
Gently scrape down the sides of the bowl periodically if the sugar isn’t being incorporated.
Continue to add the sugar a little at a time until it all has been absorbed.
You can tell when it has been fully absorbed by rubbing a little of the meringue between your fingers ;
it should feel smooth, not gritty.
Now that you have smooth soft peaks, add the almond and vanilla extracts;
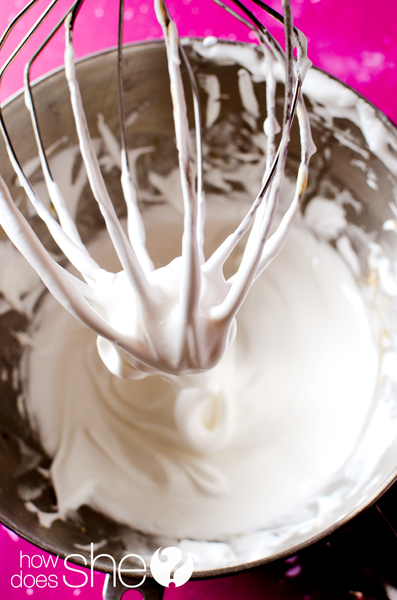
then crank the mixer up to medium high speed and whip until “stiff peaks” stage.
You know you are there when the meringue is tighter, when things start to cinch up in the mixing bowl and
when the whisk is lifted out of the bowl – only the tip should fall over slightly, but everything is stiff and super glossy.
-Be careful to not over beat the meringue, it will separate and “curdle” in a sense.
Just take it slow and trust your instincts – you’ll be fine.
Spoon the meringue into a piping bag fitted with a large star or round tip – or use a zip-top bag and cut off the corner.
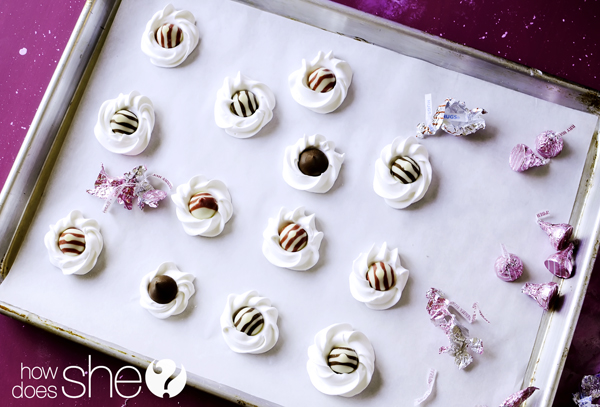
Holding your pastry bag at a 90° angle, pipe little circle “nests” about 2 inches in diameter to hold your chocolate kisses.
Unwrap your kisses and gently press one into the center of each “nest”.
Now take your pastry bag and working in a circle fashion, pipe around the kisses starting at the base to the tip until it is completely covered all the way around the kiss.
Place in the oven for 90 minutes on the middle rack.
After the time is complete, turn off the oven and allow them to cool completely for an hour or more
in the oven before removing them from the baking sheets. (Allowing the meringues to cool down slowly with
the oven will prevent cracks due to a shock in temperature change.)
These little darlings can be made in advance and stored in an airtight container for 4 to 5 days
or in the freezer for 1 month.
Before eating pop them in a 200°F oven for 8-10 minutes and they’ll be as good as new!
(Optional)
To prepare for the chocolate coating: melt the chocolate bits or chips in a double boiler,(a pan or bowl over boiling water on the stove) stirring constantly until melted
or
melt in a glass bowl in the microwave at 50% power for 30 second intervals- stirring each time.
Before you are ready to serve them, reheat the meringues in a 200F oven for 5-8 minutes to re-melt the chocolate kiss inside,
then give them a quick dip in the smooth chocolate, add a dash of sprinkle and you are on your way to Valentine bliss.
Chef’s Notes:
Fat and moisture are the enemies of a meringue.
Bake these on a cool, DRY day and make sure your utensils, all of them are spit-spot clean.
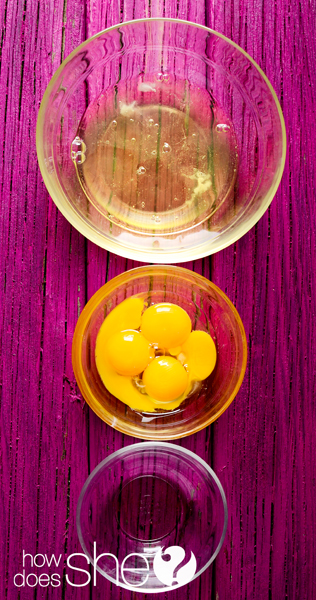
When separating the eggs, use three separate bowls for insurance against “mayhem”(love those commercials…)
one bowl to separate over. one bowl to hold the yolks. one bowl to collect all the whites.
ARGH! Nothing more infuriating than getting to the last egg and a speck of menacing yellow yolk drips
into the entire bowl of unsuspecting egg whites and the whole bowl needs to be tossed!
Use three bowls, a lot less stress, and fewer exclamation marks…
One more thing about eggs, they separate easier when cold,but whip up better at room temperature;
SO…crack the eggs right out of the fridge and allow them to warm up for 30 minutes prior to whipping them senseless.
Baking temperatures: This recipe bakes at a low temperature for a long period of time for a crispy, crunchy meringue that is still a lovely white color.
If you like your meringues to be crispy on the outside, fairly chewy in the middle and are ambivalent about the pristine white color,
opt for increasing the temperature to 250°F – 300°F for 35-45 minutes;
turn off the oven and allow them to cool for 60 minutes in the oven.
Only by trying different temperatures with your oven, will you get the exact texture of your preference.
Finally, if you are having trouble finding superfine sugar, take the same amount of regular sugar and give it a few pulses in the blender.
If you do have superfine sugar, pass it through a sieve to remove any clumps.
These fine sugar crystals absorb easier and faster in the meringue allowing for fewer mishaps and greater joy. Enjoy!
[amd-zlrecipe-recipe:121]










Lynn says
I’ve never made Meringue before but I think with these directions & tips I just may be able to pull it off. Thank you for sharing.
Ashley G says
Love all your pictures. Looks so so yummy!
Stephanie says
You food photos always make my mouth water!!! And the posts make me try things I never would have thought of trying. Your steel cut oats have become a huge hit in my household. I think my stomach is rumbling for them now….
Andrea says
I never thought I’d be wishing for that cold arctic air! but that is the only time the humidity is acceptable here in Birmingham to make a meringue! I think the rain stops tomorrow!
Shelley says
These seriously look SOOO delicious.
Missy says
mmmm. Your directions make me think I can pull this off! What a great Valentine treat!
Alison says
This is amazing!! Thanks for showing how you ‘hid’ the kiss.