It’s hard to resist the urge to buy lots of new things every season when decorations hit the shelves. The dollar sections and craft stores are brimming with cute things that make you forget what you’ve got in storage and pine for something new. Sometimes crafting can be a pricey endeavor, but a quick visit to your local hardware store can turn an every day object into a festive decoration with little or no money spent. Enter: paint swatch projects.
After taking down my Valentines decor, my mantle was bare and sad, so I decided to get a head start on Easter and make a fast, easy garland to hang with my older things. I headed to the hardware store and picked out a few paint swatches. I’m really into crafting with paint swatches lately, and the possibilities are endless.
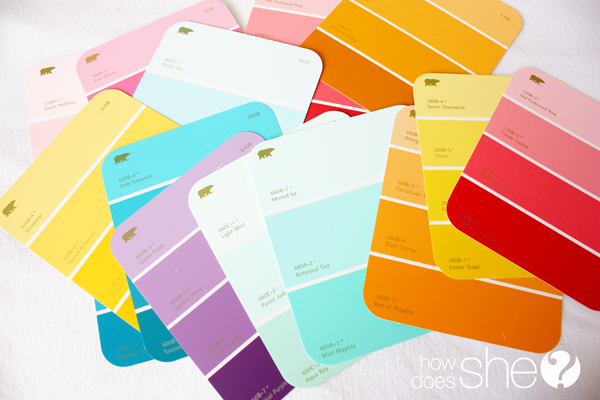
At the hardware store, snatch yourself about 15 different paint swatches in various Easter pastel colors. You can really play with the colors on your garland but I wanted a variety so I just picked a few at random.
Some of the swatches had four colors and some only three, it really doesn’t matter. Using a pencil, draw an egg-shape. I free-handed mine, and using a pencil is key because it erases from the swatch really well. 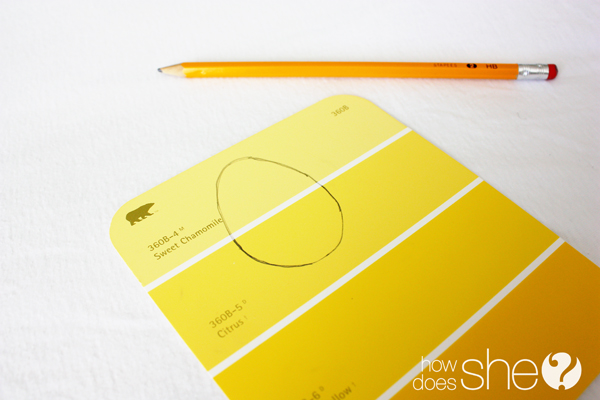
You’ll want to off-set the egg so you can maximize the amount you get from each swatch, with the white line running right through the middle or closer to the top.
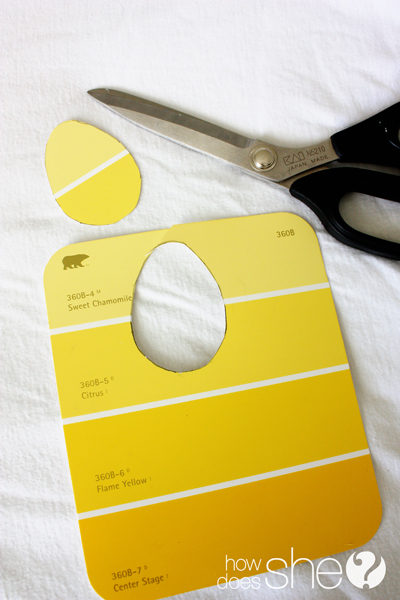
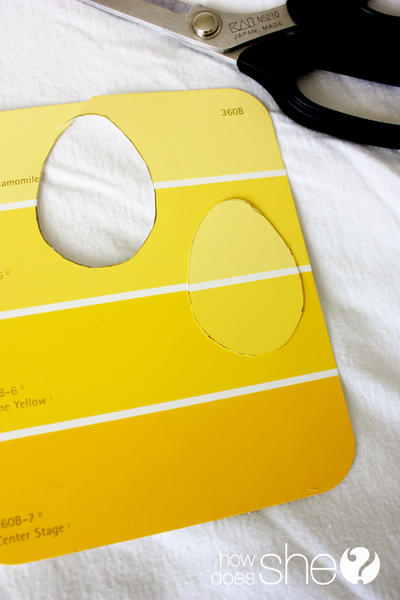
Cut the egg out and use it as a template for the rest of your eggs.
Once you have all your swatches covered with egg shapes, cut them out. Now, this process would be a lot easier with an egg-shaped craft punch, but I didn’t have one and I wasn’t willing to go buy one just for this project.
The cutting didn’t take too long, and I even let my six year-old cut some for me. Don’t worry if they aren’t perfect, just try to make them as close as you can.
Now you have a nice stack of happy little Easter eggs. Here is where you need to make a decision. Initially, I made a one-sided garland, but I have some space on my mantle and the eggs kept turning and exposing the other side, which was not colored and pretty. In my case, I made them double-sided to avoid the turning problem. If you’re going to be hanging them on the wall, one-sided should be fine.
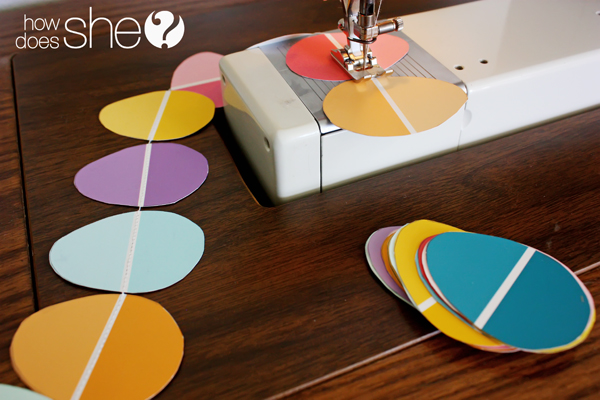
I laid out my eggs in the order I thought looked the best, doubled the eggs wrong side together, and started sewing.
I put my eggs close together, but if you want to spread them out that’s fine too. The white line is a nice sewing guide to keep your eggs straight and camouflage your seam. Feed all the eggs through until you have a nice little line.
You can attach a string or ribbon any way you choose. I sewed some raffia onto the end eggs and made a little bow.
The eggs turn a little, but they look cheerful and cute and make me look forward to the warmer days of spring.
The cost was practically nothing, and I spruced up with rest of the mantle with “Springy” things I had on hand. Nothing says Happy Easter like a string of cheerful little colored eggs!






Nicole says
What a cute and creative idea! I’m going to try this with my kids!
Emily Fonnesbeck says
Nicole, I’m surprised how much my boys enjoyed this project. Of course I did the sewing, but they cut the eggs and handed them to me as I fed them through my machine. It’s always nice to have the kiddos help!
Maggie says
What a great idea for Easter decorating! I like the ease of sewing the eggs together.
Emily Fonnesbeck says
I know it, who knew sewing paper could be so easy and so addicting! It’s my favorite. Thanks!
Shelley says
This is so adorable!!!! I love the ombre look. One more project to add to my easter list. Thanks for sharing.
Emily Fonnesbeck says
Thanks Shelley! I love the ombre-ness of it too. Subtle but different.
Lisa says
Way cool – I have a future project. So pretty!
Emily Fonnesbeck says
This project is so fast and easy you will love it. Thanks!
Ashley g says
So so adorable! I’m making it this weekend! Thanks for the amazing idea.
Susan Arkles says
I have a real concern about taking paint samples for craft projects.
The paint store has to buy these and they are there for their customers to pick out paints.
Shelley says
Thanks for your comment Susan. We definitely think you should ASK before taking handfuls of paint samples. They may even let you buy them if you explain what you would like to use them for. 🙂
Stephanie says
I fully understand your concern Susan and for this reason I’d love share a secret – paint stores often have old samples they will give you in addition to FREE paint! I used to have a decorating business and would also create murals for community projects. Nearly all paint stores have paints in the back that are accidental color mixes. They can’t just throw them out and you can ask to see what they have in storage for free. They will be happy if you take it off their hands since paint has to be taken to a very special recycling facility to be handled and properly disposed of. The paint suppliers would be happy to see it get used if possible. I once received TWO free PALLETS full of paint from my local Menards. And I’ve received old color swatch fan-books from other paint stores, as well as outdated wall paper sample books from designers and stores (great for scrapbooking and collages, decoupage crafts, etc…and would be great for this easter egg garland project as well!) It never hurts to ask – you will be amazed at what you can acquire for free that designers and paint stores have held on to that they can no longer use, to include color swatch samples when they make updates and changes to their stores and lines they carry.
Emily Fonnesbeck says
Stephanie,
Thanks for pointing that out! I agree, you can get some really neat things if you just ask!
Emily Fonnesbeck says
Susan, I neglected to say that I asked the hardware store before taking the samples. Sometimes people do projects where they take all of one color, which is a problem. The man at the hardware store said I was welcome to take a few random colors and that they throw out old colors all the time because the paint companies restock with new colors often. I’m always a fan of asking! Thanks for pointing that out!
Princess Splendor says
What setting should I use on the sewing machine to sew through the paper? I always struggle with making this choice! 🙂
Emily Fonnesbeck says
Princess Splendor, I just use a standard straight stitch set to where I would sew regular cotton. I usually lengthen the stitch because I don’t need the integrity of a bunch of short stitches, and it’s a lot of holes to punch in the paper. Hope that helps!