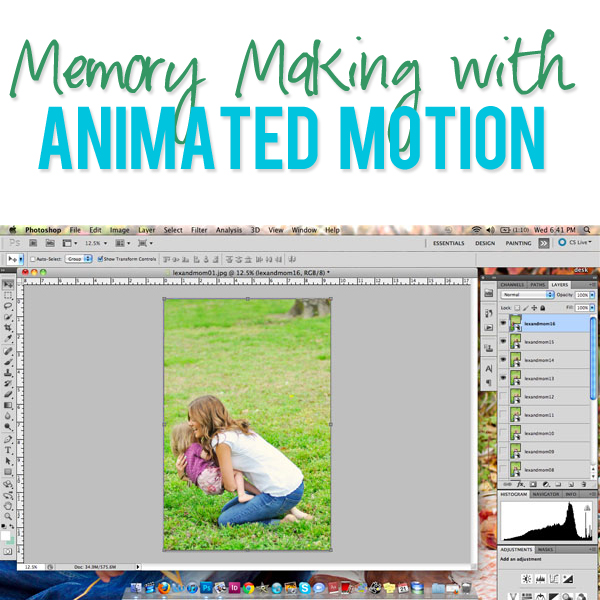
So I’m here with you today, to share how you make those fancy shmancy moving images! I always make mine in Photoshop, so I will walk you through the process! If you do not have Photoshop, don’t worry! I will give you some extra how-to tips at the very end!
1.
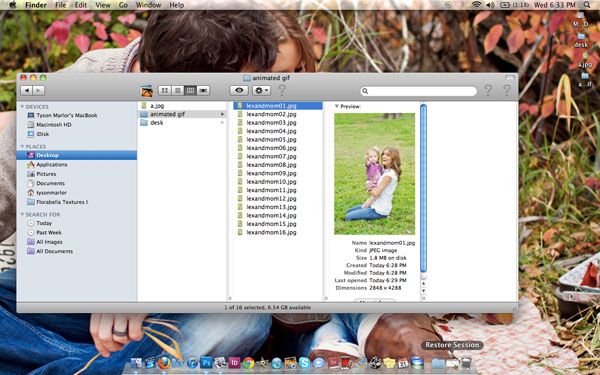
Make a folder with the files you want. It makes it less confusing if you go ahead and name your files in numeric sequence. If you want things to run faster, go ahead and size the images down to at least 800 pixels wide.
2.
File – Open your 1st image in Photoshop
3.
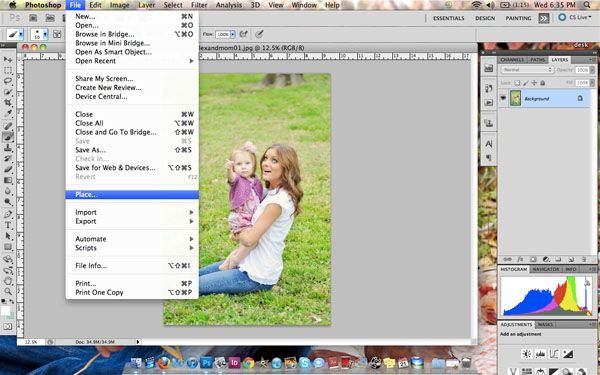
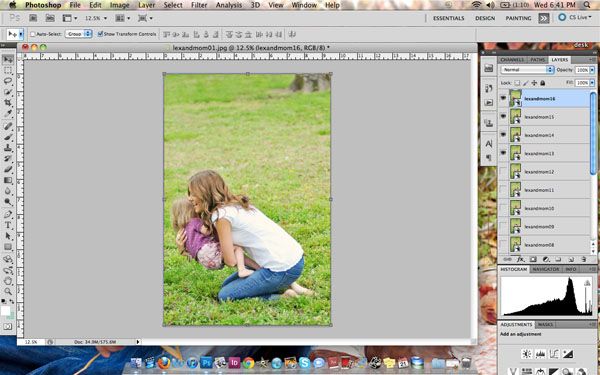
Then you can start placing the rest of the images by going to:
File – Place 2nd, 3rd, etc.. repeat for as many images as you have.
4.
Now that you have all the images placed, make sure they all align the same. Sometimes the images shift a little during this process.
6.
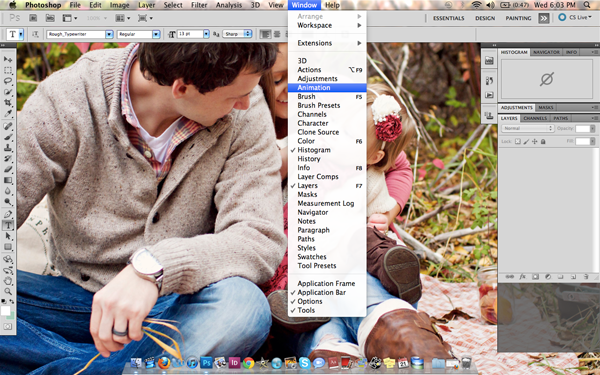
Now that your Animation box is up…
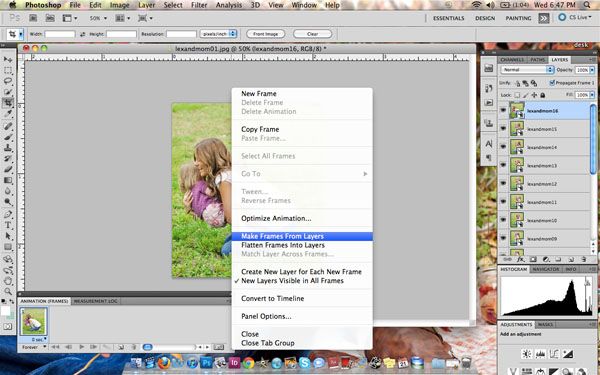
Click on the top right hand corner, on the symbol that looks like an equal sign.
Then click on -Make Frames from Layers
7.
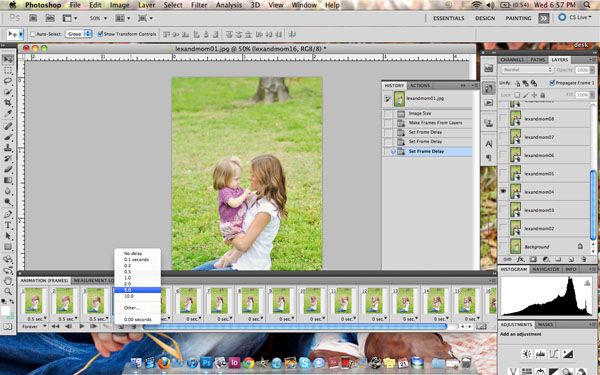
Once you have all of your frames in your animation box, you can change the seconds to however long you want each frame to stay on. I recommend anywhere from .3 – .5 seconds. You need to click “Other” to customize it for that time.
Just play around with it to see what looks comfortable for the images you selected.
Sometimes at the end of my “animation” I like the last frame to stay on a little longer than the rest so you know where the end is.
Also, in the bottom left hand corner of the animation box there is a section that lets you choose how long you want the images to rotate. I always choose Forever so my animations repeats itself.
8.
Now you are ready for saving!
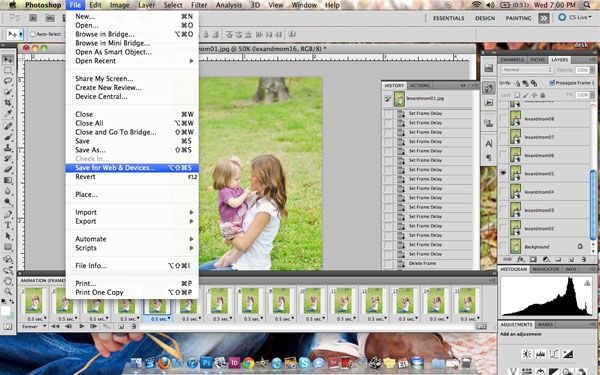
This step is tricky, only for the fact that you DO NOT go File – Save!
YOU DO, HOWEVER, go File – Save for Web & Devices! [important step]
9.
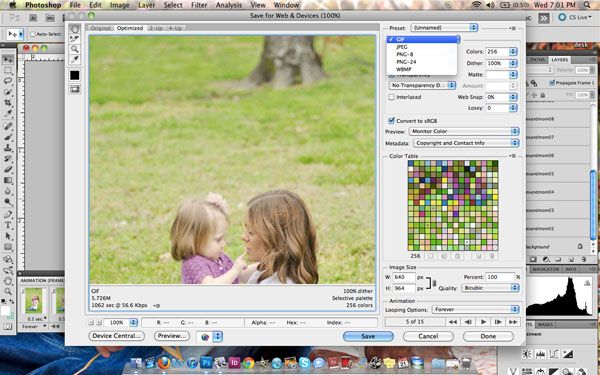
You want to make sure this file is saving as a GIF file. [important step]
It will be in the little drop down as shown in the image below.
10.
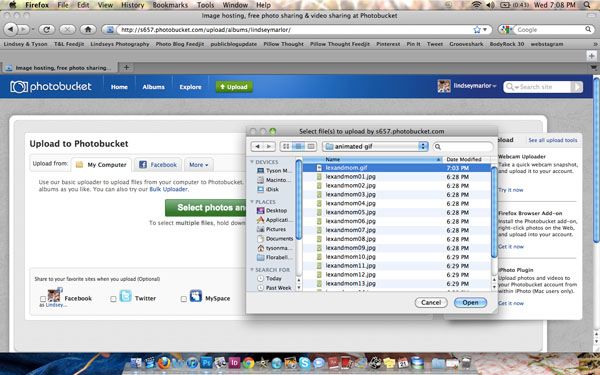
The best way to save & upload to the internet, is to do this in your Photobucket account.
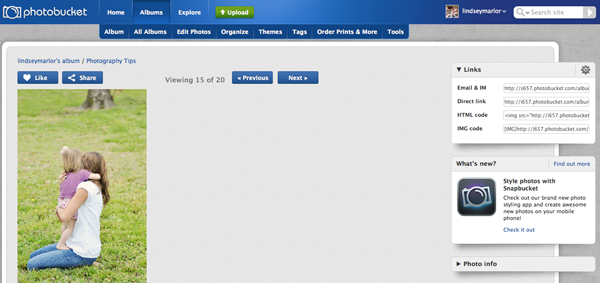
11.
Now just copy & paste the html code from your Photobucket into the EDIT HTML section of your blog post (this is for blogger).
—
More Tips:
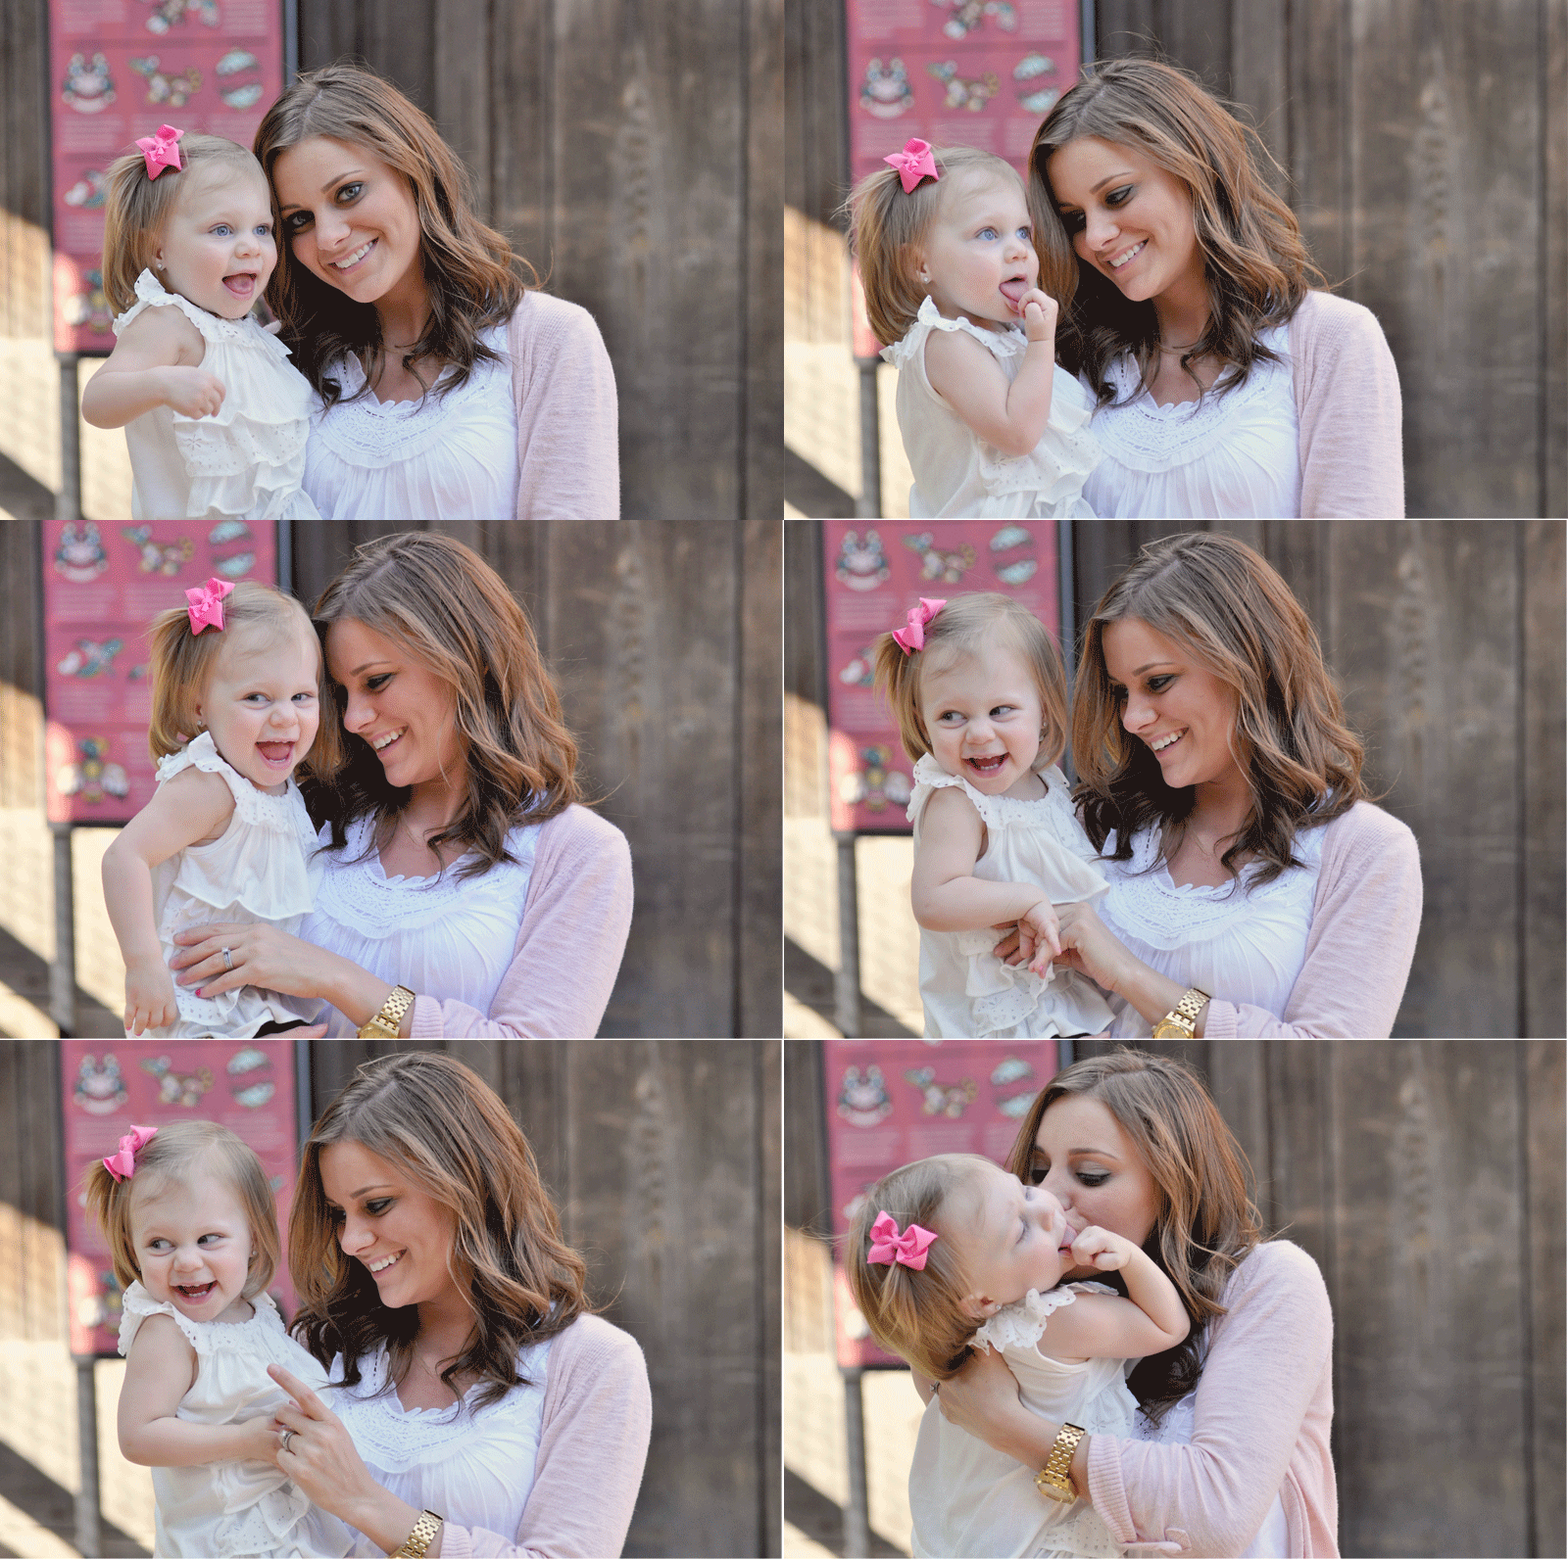
Ok, so do you notice how this one turned out kinda grainy??
Well that is what happens sometimes with animated GIFs. After MUCH research, I found that GIFs have a very limited color palette, hence the grainy look. This was my first animated GIF that I made, that actually looked really grainy, go figure right?! The time I actually make a tutorial for it?! That’s how life goes, right? 🙂
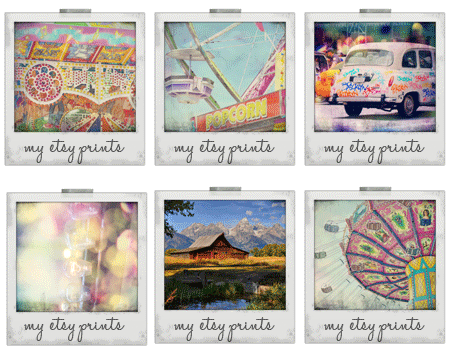
I have made these for a wedding couple, a sister session, and they are also perfect for advertising your blogs or etsy shops! I made one for my etsy shop that stays put on my sidebar.
You can get as creative as you would like!
For the NON-PHOTOSHOP’er
I have found some extra sites that can make these GIF files, for those of you who do not have photoshop.
It does not give you all the flexibilty that Photoshop does, but it will still give you an animated GIF!
http://gifninja.com/
http://www.picasion.com/
http://gickr.com/
http://makeagif.com/
Hope you found this post helpful!! For more photography and real life tips, come visit me over at my blog, Pillow Thought!! I’d love to hear from you!! Just click on my “animated GIF” picture below!





Abby Smith says
My GIF is super pixelated. I know you mentioned it’s because of the limited color palette. Is there away to fix it? Or do I just need to make the whole thing black and white? Bummer!! Thanks for this tutorial!! How fun!
Abby says
Nevermind I figured it out! Thanks!
Abby says
Do you know if this works for CS6? I seem to be having some issues!
Leigh says
Oh I am so excited about this! So so so excited! Unfortunately it looks like I can’t do this on my photoshop elements… Oh well, I guess it’s one reason to convince my husband that I NEED the real thing 😉
Baghy says
This seems like fun, great tutorial, will try it soon!
Jessica says
This is wonderful!! Thank you so much for taking the time to share this tutorial!
It’s been SO enlightening. I can’t wait to try it!!
Cristi says
I love this and can’t wait to give it a try!!
kristen duke photography says
thank you! it looks like i can do this with my cs2, i thought i had to have cs5!
natalie says
Ohhhhh…. I lOVE the tut! I am always looking for step-by-step on how to use photoshop!!! Thank you!
Missy says
This is SO FUN!! I can’t wait to try one – thank you for sharing such a great tutorial!
Alison says
Oh my goodness…that is super cool. Super duper cool.
Thanks for showing us how to do this.
Kate says
This post rocks. Thank you for the step by step. I can’t wait to do one on my blog. I think I will make one of my kids and my husband for father’s day. Thank you!