We’ve taken a few long road trips this summer, all of which were ameliorated by that modern-day miracle: the portable dvd player. I’m sure many of you amazing parents out there pack cute little “busy bags” of creative crafts for your children and sit back contentedly while you watch their genius brain cells multiply.
But if you fall into my category of overwhelmed, flurry-packing, survival-mode traveling mom, then you my good friend, have also used (maybe even overused) the portable dvd player to get you through. Needless to say, now that our travels are over, I desperately wanted to give my kids their imaginations back.
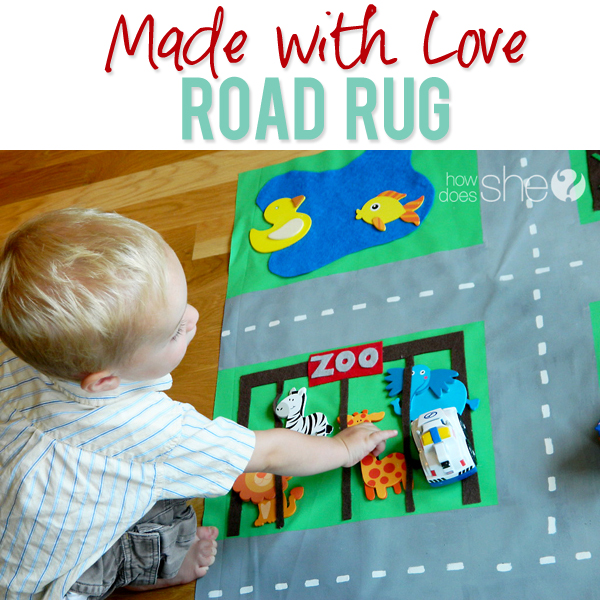
I remembered one of my favorite activities as a kid was playing on a homemade road mat with all of the places we went with our parents. I wanted to recreate that experience for my children.
I thought about just buying one, but found them all too generic and boring. I wanted something personal and handmade that would reflect all of the fun places we go as a family. So I set out to make my own.
Supplies:
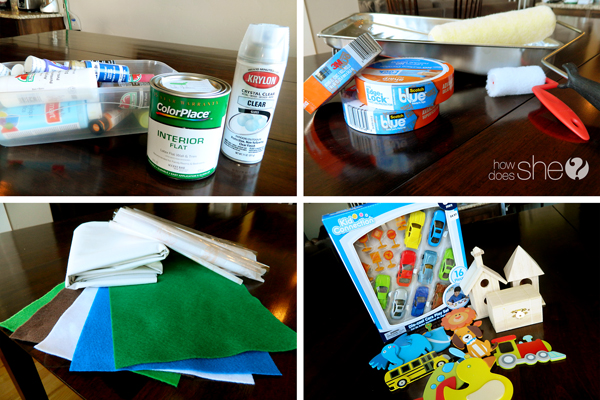
- Canvas-like material (I used blackout shade material found in the drapery section of the fabric store) cut to your desired dimensions (mine was 72″x55″).
- ScotchBlue Painter’s Tape (Check out their amazing creative campaign ScotchBlueRibbons which gives you tons of artistic ways to use their painter’s tape, as well as a chance to win samples and cash prizes!)
- interior paint, assorted acrylic paints, clear coat spray paint
- small paint roller
- felt squares in various colors
Optional:
- clear plastic material (found at fabric store)
- various wooden cut-outs (craft store)
- various wooden houses (craft store
Directions:
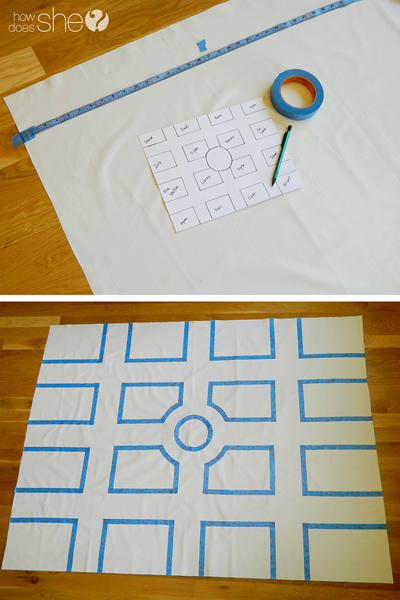
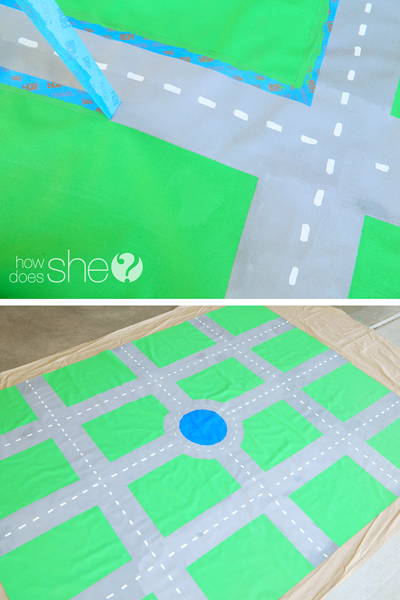
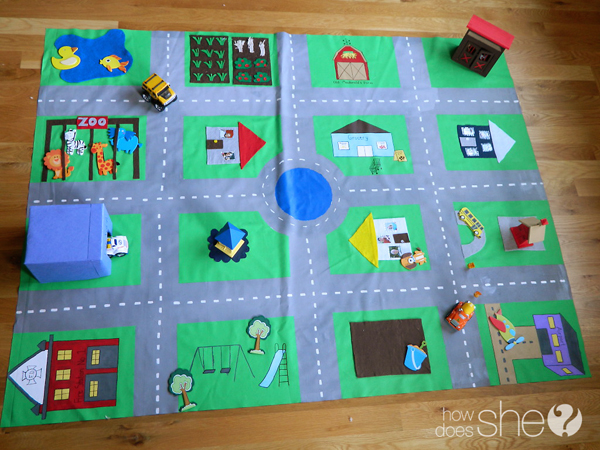
First, I made a blueprint of the road layout. I wanted something very symmetric and clean. Next, I measured and marked the blocks (mine are 14″x10″). Then I used the ScotchBlue tape to mark off roads and blocks.
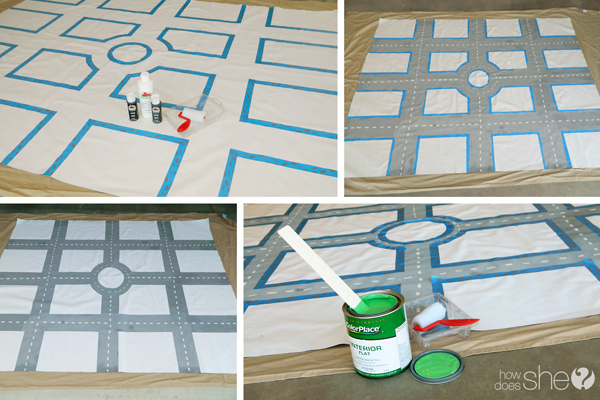
I put the mat on an old sheet in my garage and got ready to paint my roads. I mixed black and white acrylic paint to make the gray color I wanted (*precaution: mix plenty of your desired color, because I ran out while doing touch-ups and then couldn’t get the exact color again). Using a mini paint roller, I applied the gray paint and when it dried, applied white dotted lines with a paint brush.
The ScotchBlue Painter’s Tape is seriously a life-saver for this project. It made my paint lines so crisp and precise!
When the roads were dry, I removed the painter’s tape and then placed more tape onto roads so I could paint my blocks green.
See how amazing the lines are! I just love the clean look of our pretend “town.”
With the paint dry, it was time to add all of our familiar scenic spots and favorite places to go. Here’s what my family loves:
- the pond where we feed the ducks and fish
- the corn field and farms by our house. My kids love spotting horses, “Moos” (cows), and any other animal while we’re driving.
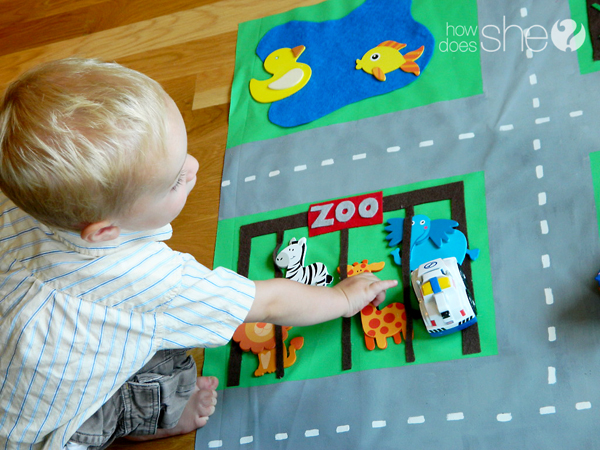
- the zoo
- both grandparents’ houses
- the grocery store
- our house (of course!)
- the car wash
- Snow Shack (where we have the most delicious snow cones!)
- the school
- airport
- park and sandbox
- fire station
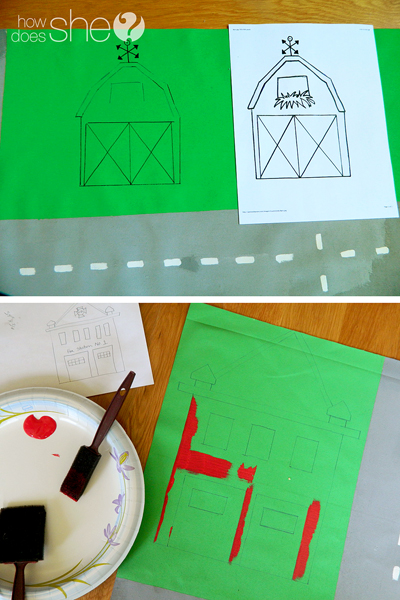
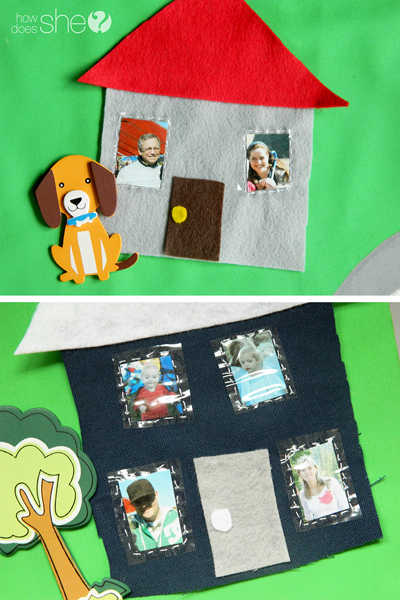
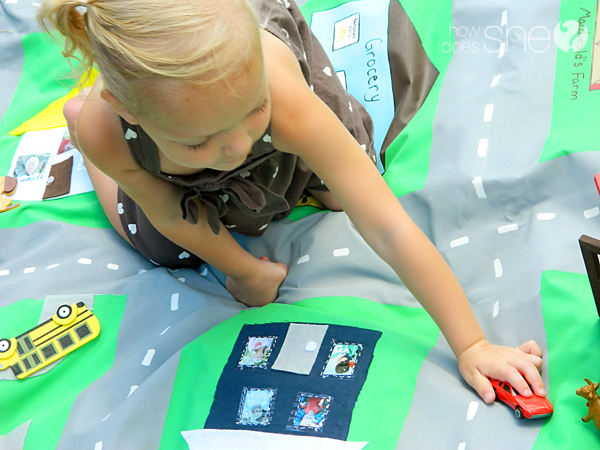
I traced and painted some buildings with acrylic paint, and then made some with felt. I wanted a good combination of paint, felt, and 3D houses to make my road rug colorful and fun.
After all of the painting was done on the rug, I sprayed it with a clear coat of spray paint to add a little protection and shine.
For our house and grandmas’ and grandpas’ houses, I cut out pictures of everyone to use for windows and then hand-sewed the plastic material over them for protection and a window-like look.
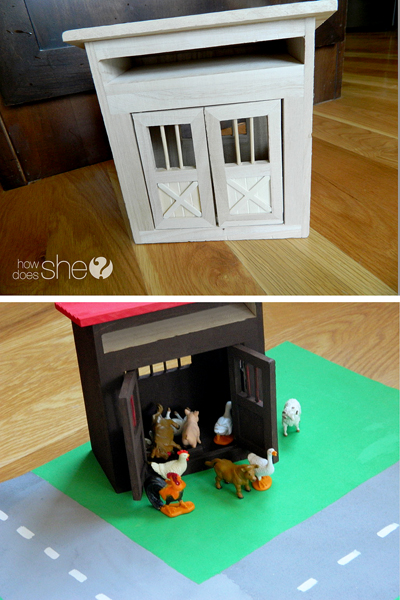
I loved this little barn and, filled with animals, it has quickly become the kids’ favorite!
They also love the car wash I made from a shoebox covered in construction paper.
It was a true labor of love, something that literally took blood (I’m not the best with a needle), sweat (come-on, I’m 6 months pregnant painting in a hot garage!), and tears (my two-year-old found the paintbrush and voila: a huge purple wall mural), but was 100% worth it.
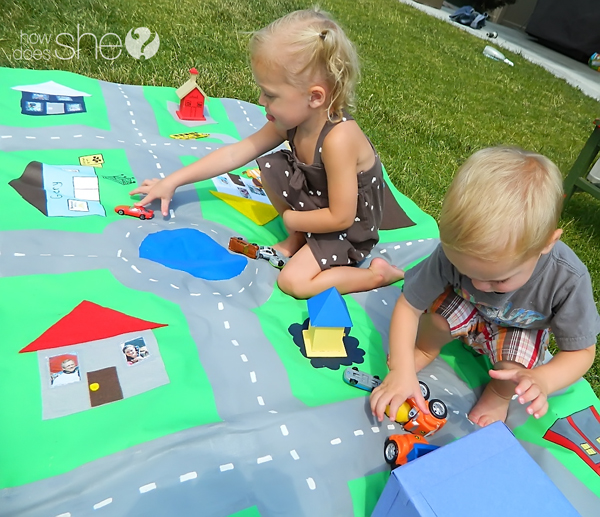
I love watching my little ones pretend to go to all of the places we love to go as a family.
And seeing them play together, their little imaginations flourishing, melts my heart.
The best part is, this road rug is so sturdy and durable, I know it will last not only for all of my kids, but for even my (gasp!) grandkids.
I know they won’t stay little forever. But it makes me so happy to be able to give them a piece of our little life together right now, and to give them a road for their imaginations to travel on.
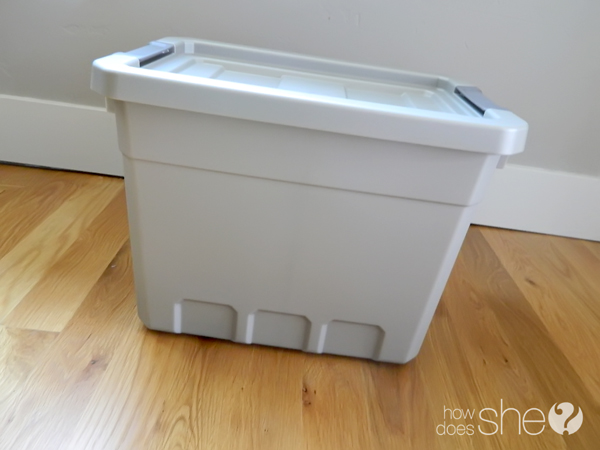
And if you’re worried about storage, the road rug and all of its parts fits nicely into a handy container.
Here are a few of the cute one-sided conversations I’ve heard from my three-year-old while playing with the road rug:
“Hey mister, you sure have a dirty car!” (vrooming into the car wash)
“Excuse me, I would love a magenta mint mango snow cone please. Thank you!” (She is a Pinkalicious fan.)
“Move it, buster!” (Something I’m not proud to say she learned from my diving.)
Who knew a little ScotchBlue Tape could turn something into a treasured masterpiece. If you’re looking for something fun and creative for your children, grandchildren, nieces, nephews, or students that is so unique, you’ll never be able to find it in a toy store, then a made-with-love road rug is the perfect creative project!
Happy creating!
A special thanks for ScotchBlue Tape for sponsoring this post.






Bobbi says
This is brilliant! I have four daughters, and they would love to have something like this for their My Little Ponies! I love how you can customize it with spots that the kids visit every day. AWESOME!
Holly says
I love this idea! So much better (and less expensive) than the manufactured rugs. This is also a great idea to leave at Nana’s house! Fun for all!
Deborah Tanner says
I love, love, LOVE this! My 2 1/2 year old son will get such a kick having one for his own!! But, I do have a couple questions: Are the wooden shapes/3D buildings on the mat permanently or do they come off for storage and for the kiddos to move around? I have to say my brain is on inspiration overload…thanks so much for the great tutorial!
Nicolette says
The 3D wooden buildings just come off and are stored in the bin with the rug and cars. I did hot glue the flat wooden pictures down (dog, school bus, airplane, etc.) because I didn’t want them to get lost and I knew my kiddos well enough that they would carry them off to heaven knows where:). Hope that helps!
Deborah Tanner says
Thank you! It definitely does help…looking forward to getting started!
mylemonayde says
How fabulous are you? This is super cool, my kids would love this, you have made this look easy. Looks like I’m off to buy supplies. Thanks for the wonderful share.
Hayley 🙂
Nicolette says
Yay! With two toddlers, this by all means wasn’t “easy.” It took about a week of nap-times to complete, but totally worth it! Good luck!
Caylin says
What did you use to glue the felt pieces down? So excited to make this for my sons 3rd birthday!!
Nicolette says
I just used hot glue. I had to do the larger pieces in increments because the hot glue dries so fast. So I’d glue a bit, then adhere that part, then glue a little bit more. Hope that makes sense!
AndreaR says
Love this idea! So cute! I am nine months pregnant, but would love to try making this before my August 10 due date. Thanks for sharing!
Danika says
I received a piece of black out shade material in the mail today (for free, yippee!!) from a friend that owns an fabric/upholstery business. I CANNOT wait to do this for my 2 year old son. He’s really getting into playing with cars & such, and loves to name the places we go to on a regular basis… customizing one of these is a brilliant idea instead of purchasing an expensive, generic rug. So glad I saw this, and I can’t wait to get it done for my little guy! Thanks!!!
Nicolette says
Lucky you! How fun, your son is at the perfect age!
Danika says
Can you tell me which side of the material you painted? Mine seems to have a more “canvasy” feeling side, and then a smoother side. I would guess that the paint would hold better on the canvasy side, but was curious as to which side you chose.
Nicolette says
Great question. I used the smoother side as the top to paint on, and left the rough, “canvasy” side blank on the bottom.
Amanda says
What exactly did you use for your clear spray coating? I bought a fabric panel with a world map on it. I’d like to sew it on a thicker, more durable piece of fabric, and spraying a protective coating would be great. Does it hold up well with folding for storage? Spills?
Nicolette says
I just used the Krylon crystal clear gloss spray paint that is for indoor/outdoor. It’s just a clear finish that gives a protective coating to the fabric. The fabric has held up remarkably with folding and storing. No worries there. Luckily, no spills yet, so I’m not sure how stains do with it. Good luck!
Deborah Tanner says
Hi again!
It’s taking me awhile (since my little guy doesn’t always sleep during the day and I want this to be a surprise for Christmas), but I think I am around 1/2 way done…woohoo! Anyway, I’m probably a dork for asking, but how did you trace your sketches onto the mat? Carbon paper? Thanks again!
Nicolette says
You are definitely not a dork! I used a ruler to trace the basic houses but for the more detailed ones like the barn and fire house, I printed out a template (or coloring page) that I liked. Next I used an exacto knife to trace the lines of the template. Then I laid that down on the rug and traced the lines that I had cut out onto the rug. Does that make sense? Email me at [email protected] if I need to be more clear:).
Tina 'the book lady' says
This is adorable & exactly what I was thinking about doing for the kids for winter play. The only thing I’m going to do differently is put it on a big square board that I have. I think I’ll use your mat idea for a Christmas gift for the 2 little guys in my life. Thanks!
I just found out I won one of the ScotchBlue Ribbons Painters Tape Prize packs. No idea what I’m getting I guess – but this is just awesome!
Nicolette says
Yay!!!! Good luck!
Nicole says
I love this! Growing up our absolute favorite toy was a farm mat that my mom sewed – we grew up on a cattle ranch. She is making farm mats for her grand kids this Christmas. I’d love to make one of our town at some point too.
Mom attached ribbon so the mat could be rolled and tied to hold our toys. The mat was flat but had pockets built in that our cars could tuck into.