YAY! I found my computer…It only took 2 days and 4 hours with the internet company to get it hooked up. We {{my family and I}} made it into the Utah Valley safe and sound on Saturday night. Thanks for all your well wishes and prayers.
We were actually greeted into Utah with a rainbow. We drove under the most magnificent stunning rainbow as we drove into the State of Utah. So whoever ordered that for us…thank you!!!
Thanks Shelly and Missy for holding down the fort!
I made this craft before I left so we could celebrate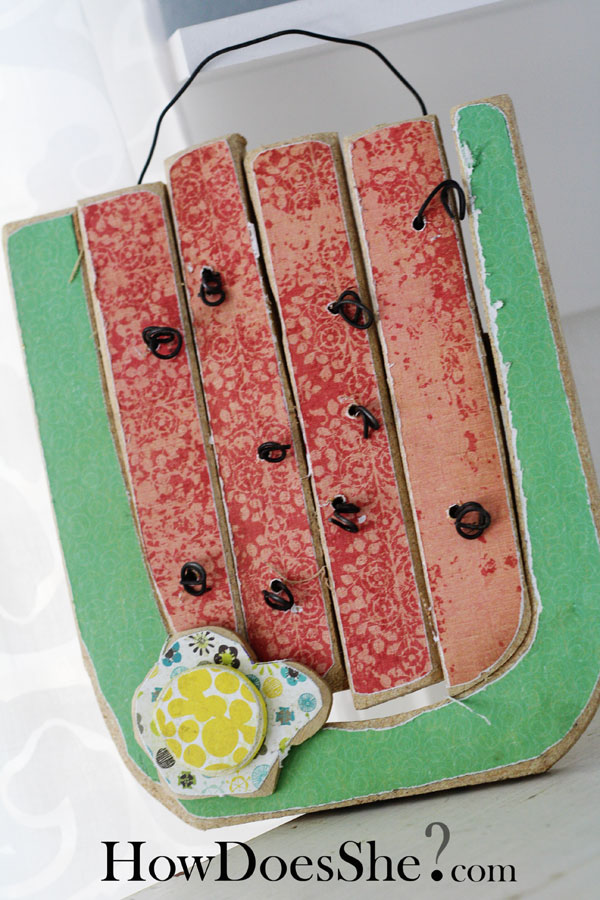
National Watermelon Month!
Seriously??? I didn’t know there was a month dedicated to this fruit!?! BUT, I guess if there is a national onion day, the watermelon better get a day too!
I had a piece of wood…ugly piece of wood that was in my garage. The wood was 8 by 9 1/2 inches. You could use any size of wood depending on how big/small you want it.
 Do you see the ugly part at the bottom? It needs to go! I used a band saw to cut the wood.
I did a basic ‘U’ shape and then cut the ‘u’ into 4 strips. Easy cutting.
Scroll saws can cut it out too!
Mod Podge the ‘slats’ with red paper.
Then use green for the rind.
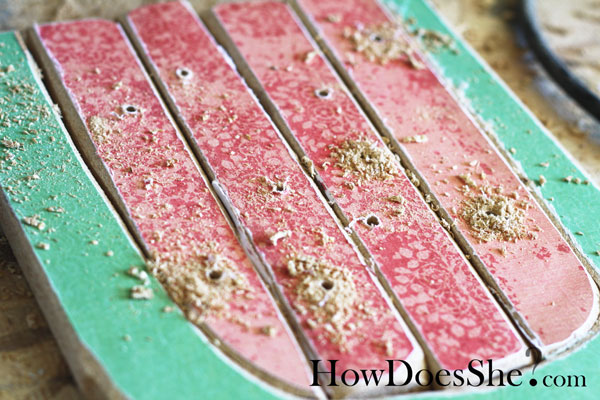
Sand the edges and drill holes. Make sure you do it in sets of 2.
I did 5 sets of 2. AND…just do it to the red parts. No holes in the green. You’ll see why soon!
Oh and I am sorry the bottom of the picture is fuzzy. I got a new lens and I’m trying to figure it out. I think the center of the picture is crisp and focused, but the front is a bit fuzzy and it’s giving me a headache looking at the picture.
I got the black wire at Lowe’s hardware store.
It comes in a big spool and it’s by the picture hanging section…Isle 17. HA! I am there way too much!
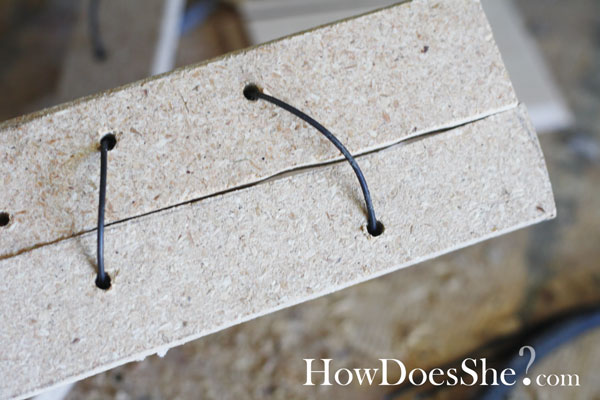
Cut out 4 – 6 inch wires and 1- 12 inch wires. Put the smaller wires in the bottom and the really long one near the top.
Pull all of the wires tight except for the top one. Leave the top one loose so that you have something to hang it with.
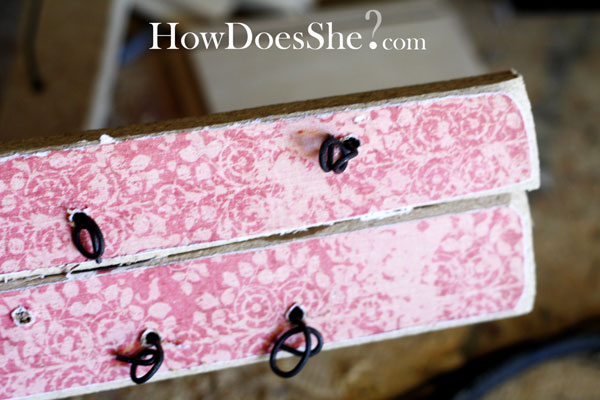
Then you’ll twist the ends of the wire on the front side…creating the look of ‘ SEEDS!’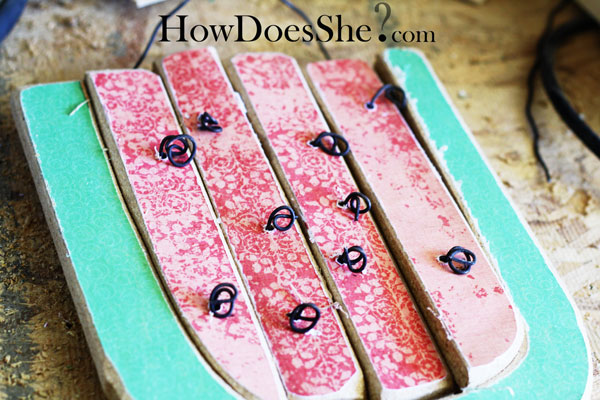 ‘
‘
Flip it over to see how it’s looking. See the top wire, how it’s a bit longer? That’s where it hangs.
The slats are a bit wobbly and not attached to the green yet so…
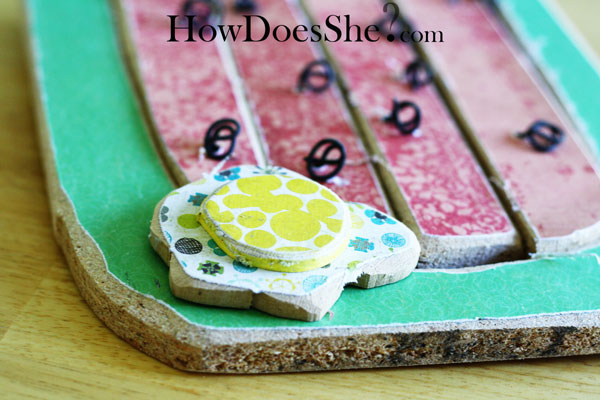
Use a piece of scrap wood {{or a paint stick would work}} to secure the back of the watermelon and attach the red to the green.
So you know how I said I did this the week I was moving? Our staple gun was packed, so I had to do it with a {gasp} hammer and nails! Can you see how good I am at using those?
The nail kept bending over! I had to take out a couple too. Seriously I can’t even nail straight!
It needed a bit of embellishing so I cut out a flower with 1/4 inch MDF wood and decorated it.
A paper flower would work too.
Make sure to sand of the ugly bottom of the wood too! Gheeze!
 A watermelon using scraps of wood!
No calories and just as sweet.
We are participating in these linky parties…thanks!






Stacie says
This is so cute…you are better at hammering nails than I am!!!
Bobbijogrunewald says
I am in love with this! It’s so shabby chic. I love the paper you chose, and the little wire seeds….genius. Thanks for sharing!
Angie says
Adorable!! I love all of your wood crafts!
Kate says
I love how the little wires make the seeds! Too cute!
Cassie says
It is fabulous!!!
What a great project!!!
=)
.-= Cassie´s last blog ..August is Primalicious!! =-.
Jessica says
Keep the wood crafts coming…LOVE them!! You’re so crafty!
Stacey says
This is adorable! I can see a pumpkin in the future, what do you say? Love your site!
Alison says
Cute idea! I like fall pumpkins!!!
Jenifer says
Adorable! Thanks for the tutorial! And your pictures are great too!
Jenifer
Cantaloupe Corner
Penny says
So Cute!
Amanda says
Great tute Alison! Featured you this morning 🙂 homeandgarden.craftgossip.com/how-to-make-a-watermelon/
If you would like a “featured by” button, you can grab one here!
homeandgarden.craftgossip.com/grab-a-craft-gossip-button/
Heather - Dollar Store Crafts says
It’s super cute. You’re a genius with wood & mod podge! 🙂
.-= Heather – Dollar Store Crafts´s last blog ..Fashion Tutorials and other Link Love =-.
Marni Bringhurst says
I featured this today over at Sassy Sites! Come by and check it out!! I love your blog!!! 🙂
Amy @ Positively Splendid says
Absolutely darling! What a fun project!
.-= Amy @ Positively Splendid´s last blog ..We all scream for =-.
Stacey says
A-dorable. I love that there is a mounth dedicated to watermellon. Yummy!
Amanda M. says
Darling idea!
I shared it in my sweet summertime watermelon inspiration board.
http://frillsandfrolic.blogspot.com/2011/06/fab-finds-sweet-summertime-watermelon.html
Amanda
Karen Brunson says
I have a question for Alison about the watermelon described (wood mod podged with paper, seed made from wire). Did you whitewash the red paper used for the melon? Not sure how you achieved that look. Very cute. Get ready, summer!