
Sunburst frames and mirrors are popping up all over home decor lately. It gives a bit of a mid century, classic feel with a touch of modern thrown in. Recently, I saw one made from thin metal pipes, but it was heavy and rather pricey. After some study and consideration, I decided I could make my own using the humble drinking straw, and this is how I did it!
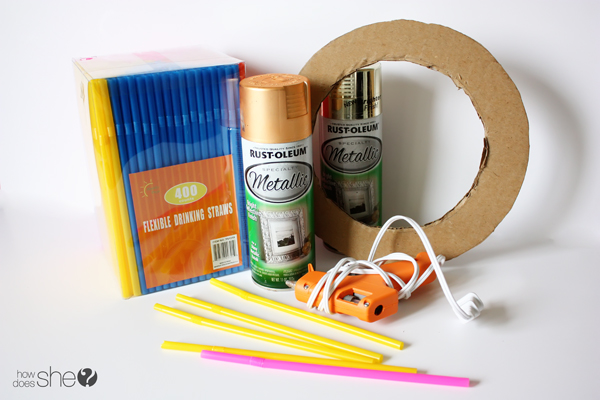
What you’ll need:
A cardboard ring- I made mine from tracing a few bowls and cutting it out. It’s far from perfect, but it doesn’t have to be. You could also get a pre-cut ring at a craft store.
A hot glue gun- I used a lot of glue.
Drinking straws- I used about 200 straws for my project, but it depends on the size of your ring. I used flexible straws, but I think if I did it again (I mean when I do it again) I will use straight straws.
Spray paint- I used an entire can and almost wished I’d had another.
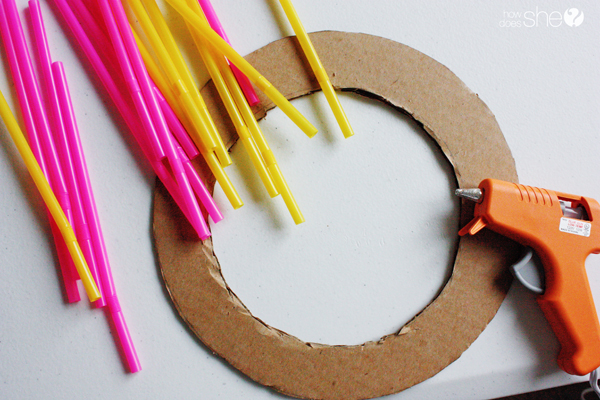
Plug in that glue gun and get your supplies ready. You’ll notice that the straws are different lengths in the final project, don’t worry about that until later. For now, start gluing the straws in a circle around the ring.

Glue them in a circular pattern with little space in between. You’ve got to be careful that you stay circular- that means straight out- so you don’t start to get wonky and crooked.

After you’ve got one layer glued, do another to fill in the gaps. It’s important that you try to keep the hot glue hidden and not goop it all over the place, this will help with the final layer and overall look of the piece.

Cut some straws in halves or thirds and keep gluing until you get to a look you want and where everything is covered. For the last layer I cut my straws short, and then glued them in places that would finish the look I was going for. After that, I trimmed the other straws at random lengths so they were not all the same.

Once all your straws are secure and in place, it’s time to spray paint. I set my project on two paper cups so it was off the ground, and I sprayed it over my grass since I used a lot of paint. Be sure to paint the ends of the straws, and really get it all over and around the sides. I sprayed the front and then after it dried I sprayed the back and then the front again. I used an entire can of spray paint and I probably could have used another quarter of a can for good measure.
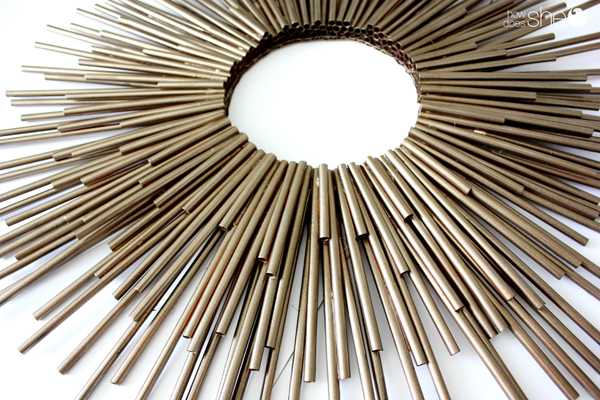
Done! I liked the metallic brassy paint because it looks like metal tubing, but any color would be nice. I liked this on my wall, but it also looks great hung on a door.
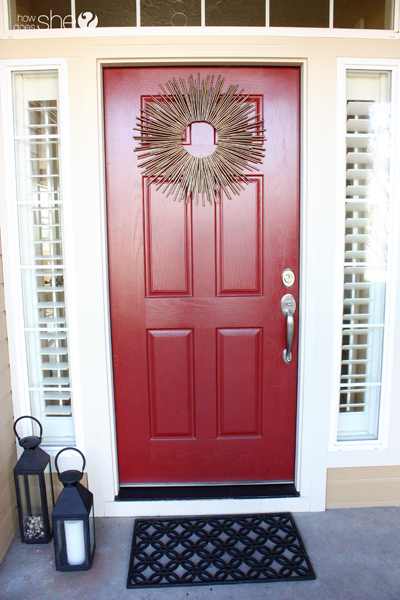
This was such an easy project, as well as inexpensive, which is my favorite combo.
Happy gluing!


LseeN says
Very nice. So where are the other 19 straw crafts?
Doretta says
Love this idea! What did you use for a hanger?
Dee says
Wow, so simple and looks awesome! I so wish I didn’t live in the city and had a little patch of grass outside to spraypaint! I will definitely do this though. Sometime soon, hopefully…
Lol
Looks great
D
Sally French says
Hi there – if you have a large cardboard box, you can prop up your project inside and spray into the box. A bit more fiddly (and you’ll want to open a window!) but I used to do it before I had my garden 🙂
Stacey Coker says
Hi Emily! I love this sunburst & am going to make it for my daughter’s new place. Would you please let me know the dimensions of the ring you used – the circumference of the inner circle & of the outer circle. I really like the size of yours. thanks!
Lauren says
Neat! I’ll share with recycling/reuse community. If people decide to make this, please make it from clean used straws. Think about how many straws we get from fast food/to go.
Ashley says
So creative and cool!! Love this.
Anupama says
True
Kerri says
This is genius! LOVE!!
Ebony says
this is such a creative idea; try putting a small mirror in the middle. I’m going to make this.
Susan Carroll says
AuntSue
Love your ideas. I’m visiting my grandkids this weekend and we will be dancing like leprechauns!. Your straw wreath looks awesome. Great idea.
Stephanie says
I love how this turned out! I need to make something like this for my house!
Missy says
I never would have guessed straws from the final picture – so clever!
Nicole says
This is seriously amazing! I doubt my ability to recreate anything nearly this good, but I’m very tempted to try! Thanks for the tutorial. 🙂
Anupama says
Amazing
Carina says
I love this! I would never have guessed these were straws if I didn’t read your post. So cute 🙂