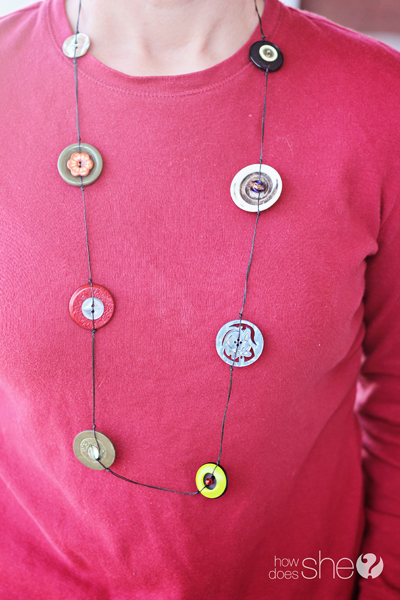
The other day I was having breakfast with some work friends, and my friend Jamie had a necklace on that was so fun and fantastic that almost everyone commented on how great it was. It had big buttons and was long and chunky and colorful. So fun! I didn’t even get a really close look at it, but I’ve been thinking about it ever since. I loved the necklace the moment I noticed it but my love grew when I heard the story behind it. It was Jamie’s Grandma’s necklace from back in the day and when she was “downsizing” her jewelry collection Jamie became the new and very lucky owner! I love quirky, cool stuff that comes with a story. I also love funky Grandma jewelry so much so that I had to try to recreate it from my memory…with a few twists of my own. Come along!
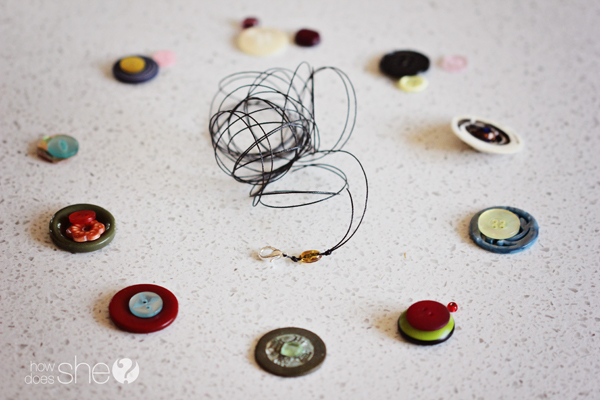
Stuff I used:
Buttons – get out your stash and look at them with new eyes
Beads – I wasn’t sure if I’d use a bunch or a few. I didn’t use too many but they were helpful when I needed them.
Twine or Floss – I used a good beading floss. You don’t want it snapping on you.
Clasp – Actually the clasp is optional since it’s so long . I used one in case I ever wanted to wrap the necklace around my neck twice.
Scissors – helpful
Fingers – pretty crucial
First, I spread all of my buttons out and found the biggest ones I had, and then decided which 12-15 were my favorites. Then, I matched them up with other buttons that contrasted in color, texture, size and style. I wanted it all, particularly every color. I think when you’re doing something like this that is random, you have to make sure that NOTHING matches. Just keep shuffling it around until it you’re in love with your combinations and the placement of each button combination on the necklace. In addition to buttons I also used the inside of a conch shell, and an old oriental coin. Mix it up!
I wanted my necklace to be around 40 inches, but two strands are used, so I used about 3 yards total, just to be safe. Fold it in half and slide your clasp on. To secure it I knotted it, added a bead and knotted it again, but you could do a million things here.
And construction begins… Knots are going to give you the spacing you want between the buttons. I went with with 2 1/2″ between buttons, but anywhere from 1 1/2″ to 2 1/2″ will be great. So, tie your knot near your clasp where you want your first buttons to be. Keeping the buttons in place is just going to take weaving the floss back and forth through the holes of the beads and having tight knots right up next to the button at top and bottom.
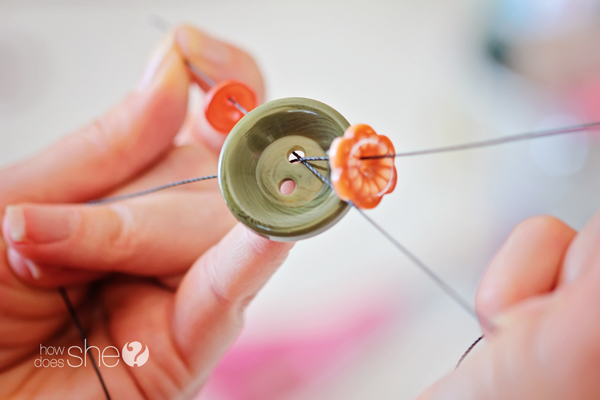
Bring each end of the floss through the same hole crossing at the hole.
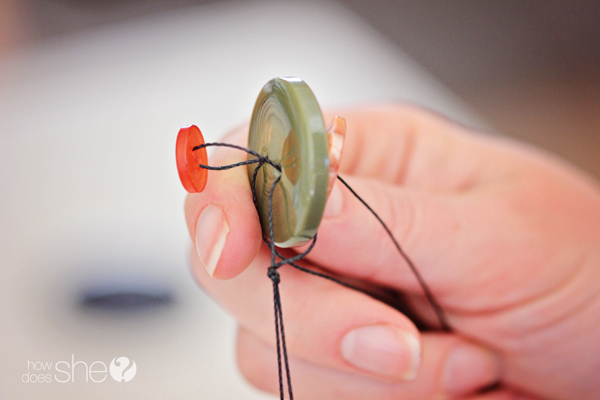
Add your 2 side buttons. Thanks to the magic of gravity the empty holes are always going to want to go down, but fight the feelin’. . It might help you to lay it down on a table to do this since you’re going to need to weave it back and forth through the holes and the magic of gravity is always going to want that empty hole to go down. Anyway, after you add your side buttons, thread your ends back through the empty holes in your side buttons, then through the empty hole in your big button (crossing, again)
…and it will look kinda like this.
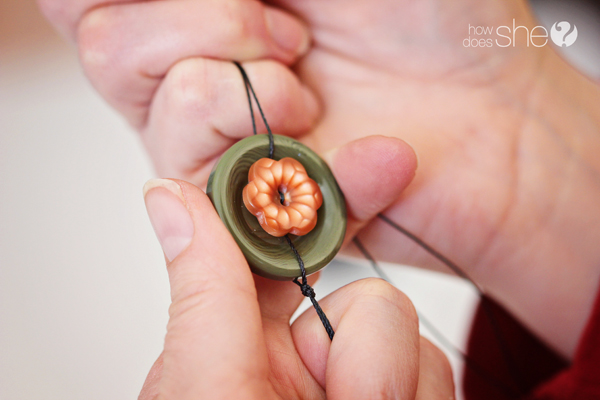
Then tighten it all down close to the knot by pulling the floss tight in either direction and pulling the large button down until you have it in the right spot and the side buttons pulled tight to the large one. I was going to ask if you have ever put on a bolo tie because that’s the only thing I could think of to compare it to, but actually, if you’ve ever worn a bolo I don’t want to know about it. No, really, I don’t wanna know. 😉
Then just repeat, about 14 times. 🙂 Tie a ring on securely at the end for your clasp, and you’re done! Trim your floss and throw on your new necklace! Shazam!
I told you I’d only caught a glimpse of the inspiration for this necklace and obviously didn’t have directions. In the process I learned a few things. So at the risk of exposing my imperfections, I’m going to tell you what I might do to differently. Aren’t I nice?
-I didn’t add side buttons to both sides of all of my buttons, but think I would the next time. I just like the added texture.
-Wouldn’t it be cool if there was a small bead on either side of the buttons? So it would go: knot, bead, knot, BUTTON, knot, bead, knot, BIG SPACE, and so on. Again, good texture right?
– I left 2 1/2 inches between my buttons, but I’m wondering if I would like 2 inches better? Hmmm, maybe so.
I’ve already worn it AND received compliments! And why not? It’s so much fun.
I’m so glad that Jamie and her grandma are such cool ladies!
We’re linking up to these great parties!
—
Lastly, we are participating in a fabulous Spring Fling Week! Make sure to check out each new post this week! Today is Hoosier Homemade’s Lemon Chick Peepers! So adorable!




Alison says
I think this is so fun! I loved seeing it on you and Jamee!!
bonnie says
So cute! I have a ton of buttons and this would be perfect.
Heather says
I love this, I make all sorts of button jewelry but still haven’t tried this yet! Pinned for later 🙂