hAPPY 4th of jULY
I guess I am excited for the 4th this year, because I’ve done 2 flag posts in a week. Here’s the other one just in case you missed it:)
The parades where kids get more candy than on Halloween, cool smooth snow cones, bright loud fireworks, and kids running as they shrill in delight. Oh, and did I mention snow cones? Cherry, bubblegum, blackberry, lime and then tiger’s blood???? Who thought up the name tiger’s blood for a flavor? That name is really gross, but it has to be the absolute best flavor of liquid sugary syrup!
Anyway, enough dreaming of the 4th, time to prepare. Shelley, Missy and I all have our best eats…easy recipes to bring to a barbecue coming up next week and a new printable for summer! YAY
So, on with the flag. I have a great friend, Stephanie who made one of these flags last year in a craft group. I talked her into doing another one so we could show you. She was excited because she needed to make one for a friend, so it worked out well…2 birds with one stone! Thanks Stephanie!
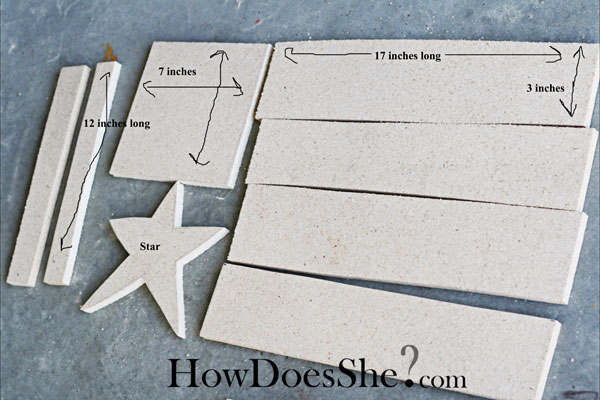
The wood that we used was cheap, pressed half inch wood. I used a band saw to cut it out. Make friends with your neighbors who have saws. They come in handy {{both the kind neighbor for letting you use the saw and the saw!!}}
For the star, I just drew one. It measures about 6 inches by 6 inches. Nothing perfect. The sides are supposed to be lopsided. Perfect for my drawing skills!
Shown above is the wood you need to cut to finish the project. I even added the measurements with squiggly lines:)
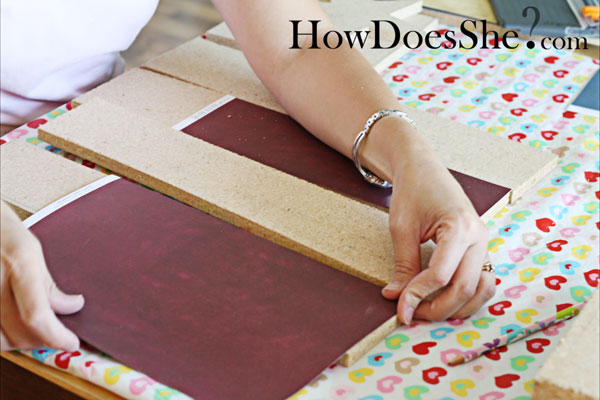
Then you’ll measure your paper to fit the board.
I had to throw in the cute naked kid who ran out of the house and stole the head gear. He thought he was funny…he was!
This post came at a perfect time because someone asked me what I do with my paper when my wood is longer than the paper. The wood measures 17 inches and the paper is 12 inches long. So the answer is rip it like you mean it or buy really long paper. You can use wrapping paper as long as it’s thick. The cheap kind you find at the after Christmas sales won’t work. It wrinkles and makes a mess.
You’ll need 1 sheet of red paper, 1 sheet of blue and 2 sheets of white. Mod podge the paper onto the boards. The white you’ll need for the flag part and the star. You can also see that Stephanie stained the edges of the paper to help it blend, but still look like it is supposed to be there.
Sand the edges. If you’ve got her…use her. The belt sander is what I’m talking about, not Stephanie! If you don’t have one, good ol’ sand paper will do the trick too!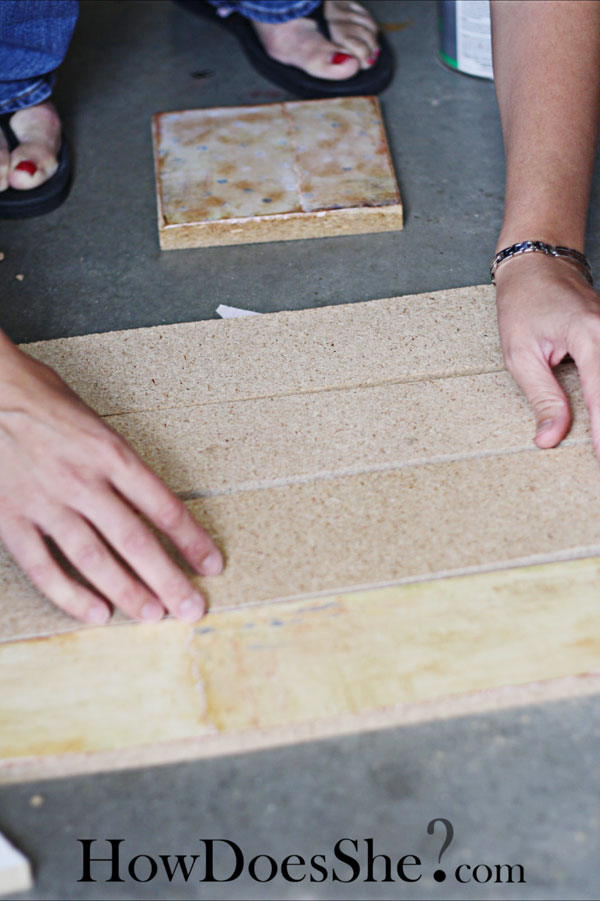
Line up the planks so the back side is facing up.
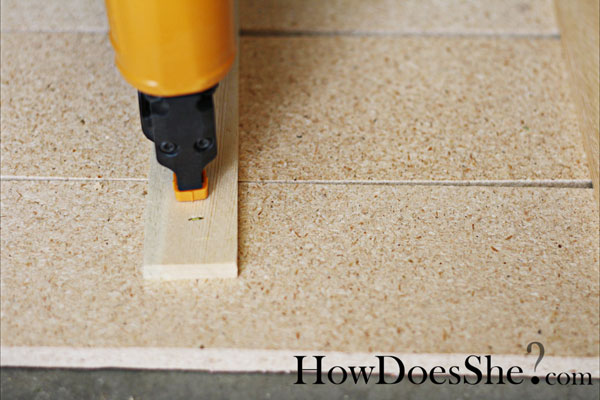
Now, enter in the long strips and staple gun. No staple gun? Don’t dispair…use wood glue. Use about 8-10 staples per side. Do it to both sides.
 This was Stephanie’s first time using a staple gun. No blood, no stapled fingers…she’s pretty much a pro and soon to be addic, she loved it!
Hint** make sure to double check the length of your staple vs the thickness of the wood so that the staples don’t shoot through to the front of the flag. Otherwise you will have created a weapon instead of a flag.
Flip the 4 boards over so the pretty side is up. In the top left corner add your 7×7 inch block. Make sure to put the staples (or wood glue) in the center so that you can’t see them after you put the star on top.
Use wood glue for the next part so that the staples won’t show in the star. Let it dry. After the wood glue is dry, drill 2 holes in the top corners of the white ‘flag’ part. Add your wire and twist so it won’t fall out!
Easy and cheap, but will hold up through all wind storms 🙂
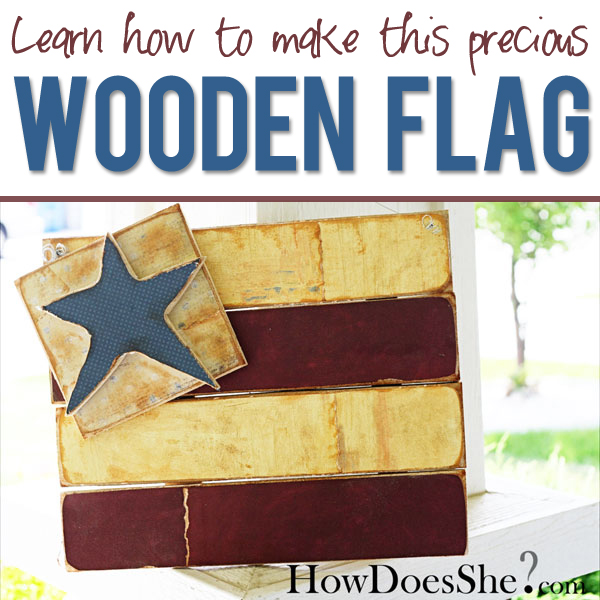
Finished Project!
Thanks again Stephanie for creating the flag!





Jill says
That is super cute! Love the paper you choose. Do you sell these?
Alison says
Hi Jill
We don’t sell them…we are getting ready for tomorrows post:) Thanks for the kind comment though! Happy 4th
lindsay lee says
THis is adorable. Thank you for sharing!
.-= lindsay lee´s last blog ..Chalkboard Fun =-.
stacey says
Very cute!
Philip @ RAOP says
You ladies come up with some of the nicest home decor crafts. This one is amazing. Texas would love you! 🙂
.-= Philip @ RAOP´s last blog ..DAD: What Fatherhood Means =-.
Tiffany says
U gals make me want a saw, any ol’ saw will do!
Karen says
Sorry for this question, but how did you get the paper on? Modge Podge? Love this project! Thanks!
.-= Karen´s last blog ..Rainbows! =-.
Alison says
Oh, yea…I forgot to add that detail! Mod Podge the paper to the board:) Thanks! I put it in.
Andrea Leland says
awesome. My mother in law has a patriotic theme decorated bathroom and would love one of these. I might have to make one for each of us!
.-= Andrea Leland´s last blog ..Auntie Ann’s Pretzels =-.
nancy says
darling craft for the 4th! thanks for sharing!!! 🙂
chantielle says
I have the same question, how do you get the paper on?
And how do you affix the metal string that you hang it with?
Thanks!
Alison says
Sorry, I added that to the post. Mod podge the paper to the wood. The wire…just drill a hole in the wood and then pull the wire through and twist it. Thanks for asking so I could edit my post:)
Amanda@The Hand Me Down House says
This is just too cute! Thanks so much for sharing! Love it!
.-= Amanda@The Hand Me Down House´s last blog ..A New Twist on our Faux Six-Panel Doors =-.
meghan says
How cha cha is this!!!
Luv this.
.-= meghan´s last blog .. =-.
Melanie @ Whimsical Creations says
Very cute!
Kari@Ucreate says
I. LOVE. THIS!
.-= Kari@Ucreate´s last blog ..Personalized Nursery Art =-.
Kera Butler says
I L-O-V-E this!!! Quick question. What product do you use to stain the edges?
Alison says
We used a stamp pad! Just one from the craft store. The color was ‘tea stain’
Aubrie knight says
This is so cute and I love the step by step. Thank you for sharing!!!!!!!!!!!!!!
.-= Aubrie knight´s last blog ..FHE Board Reveal =-.
Rose :: FineCraftGuild.com says
actually this one came out really good.
yep, you are amazing with all those tools in the toolbox!
.-= Rose :: FineCraftGuild.com´s last blog ..Crafting World Peace =-.
Life n Reflection Kristy says
Girl, you’ve got skills!
Stephanie@cre8tive says
I was so excited when I saw this post, because I thought at first you used acoustical ceiling tiles! But then I read on and noticed it was wood. I have a bunch of acoustical tiles laying around, they make great tack boards, but how many tack boards can one person have? Maybe I should try it using the tiles and see how it turns out. It would be lighter right? Thanks for the idea.
Stephanie
.-= Stephanie@cre8tive´s last blog ..img_6502 =-.
Melissa says
So cute! Thanks for making it look so ‘do-able’!!!!
Amber says
Steph LOOKS like a PRO!!!!
Raelyn says
Love this….off to make one!
.-= Raelyn´s last blog ..Been a while….. =-.
debbie says
Hi, I love how you did this flag.. I got to make one.. Thanks
.-= debbie´s last blog ..Win Win Situation =-.
Jessica Jensen says
Beautiful and such a creative idea! I have featured this project on my blog:
madeitorboughtit.blogspot.com
.-= Jessica Jensen´s last blog ..Friday’s Creativity =-.
A Scrap of Time says
I always love your blog! I just wanted to let you know that I passed on the Trendy Blog Award to you! So, stop by my blog to pick it up, and then pass it on to 10 of your favorite trendy blogs. =o)
.-= A Scrap of Time´s last blog ..Thank You- Thank You- Thank You- =-.
Tracie says
I love it. My dad is helping me cut out the pieces for mine today!!!!
.-= Tracie´s last blog ..Purse-Diaper Bag Tutorial =-.
megan - a ruffle in time says
just shared this on my blog.. i love it! thanks for sharing!
Rachel says
That is so cute! Thanks so much, I’ll be linking.