High Heel Cupcakes
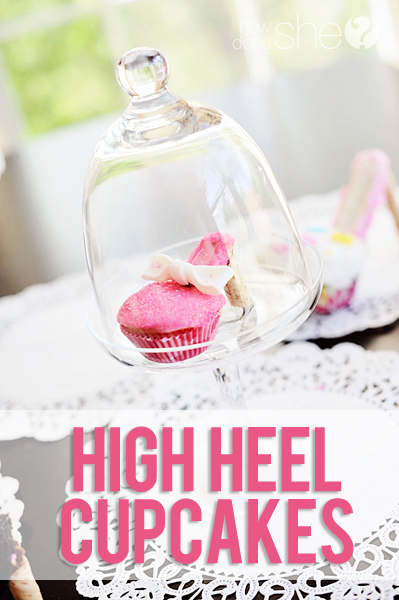
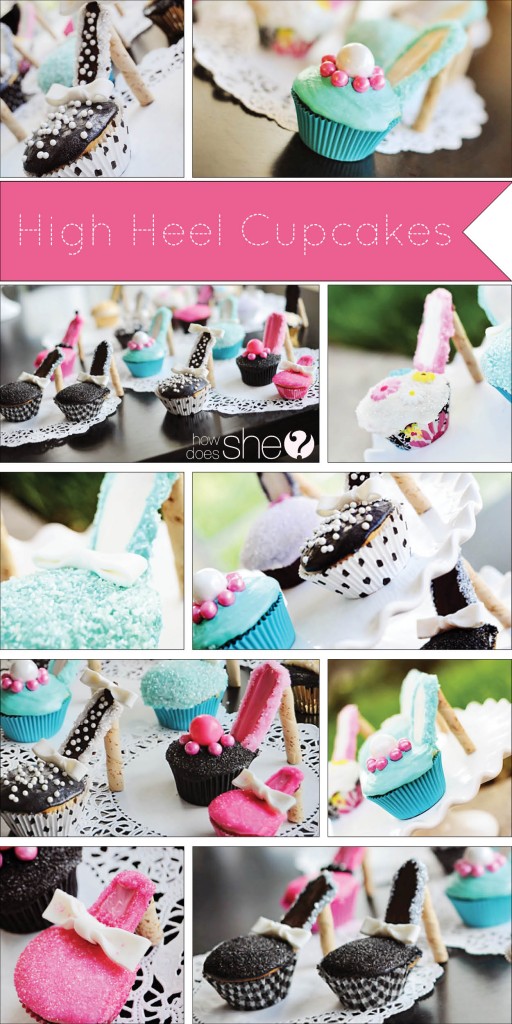
Ok, all you lovers of high heels! I’ve received a few requests from our fans on Facebook that I share a tutorial on these high heel cupcakes I made last week, so here it is!
So cute, right?!
My friend originally got this high heel cupcakes idea from flipping through our local newspaper, The Denver Post. Go figure! We knew it would be perfect for the girl’s party we were having. I’ve also been told by a few readers that you can find an awesome shoe tutorial in this book, You ready? Let’s start on high heel cupcakes!
Step One: Cupcakes
Bake your cupcakes. Keep in mind, the liners you pick will be the bottom of your shoe. Sometimes I bake with double liners, so that the liner’s color is more vibrant.
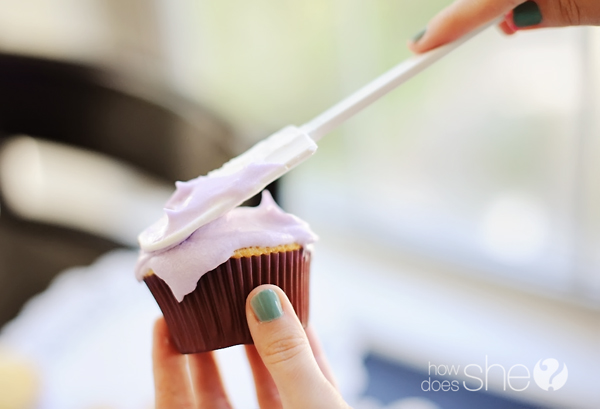
You’re then going to want to frost your cupcakes.
You can use coordinating colors to go with your cupcake liners, or change it up, however you’d like.
I first whipped up my frosting, and then I used this awesome food coloring to change the colors of my frosting. The great part is, you only need a drop of this stuff. The color goes a long way!
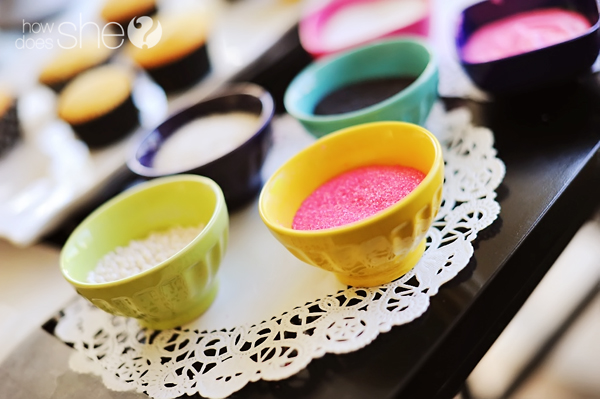
This next part is fun. Assemble your sprinkes and decorate away!
I found that holding the cupcake and dipping it upside down into your sprinkles works really well if you want full sprinkle coverage.
You can also sprinkle them with your hand. Be as creative as you want!
Finished? Good! Let’s move on to the next part of the shoe.
Step Two: Arches
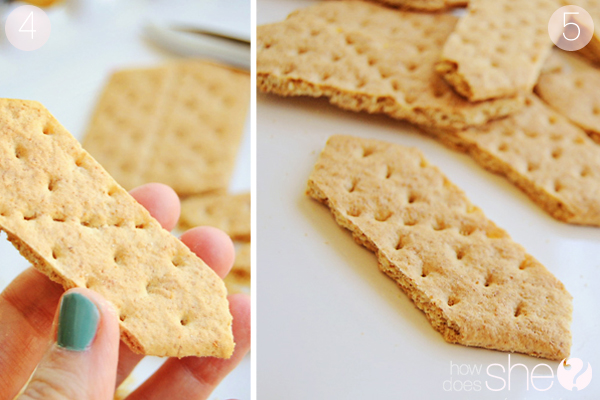
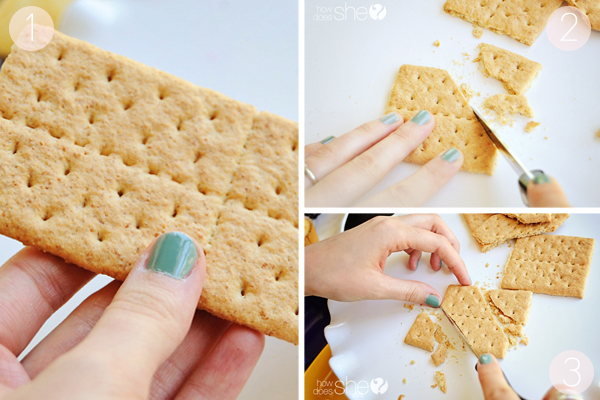 When you’re finished, your cookie will look similar to a tie. It’s fine if it’s not cut perfectly, these are very forgiving and will look great once you cover them with chocolate.
I’ve heard nutter butters, or Pepperidge Farms milano cookies would work as well, but I’ve never tried it.
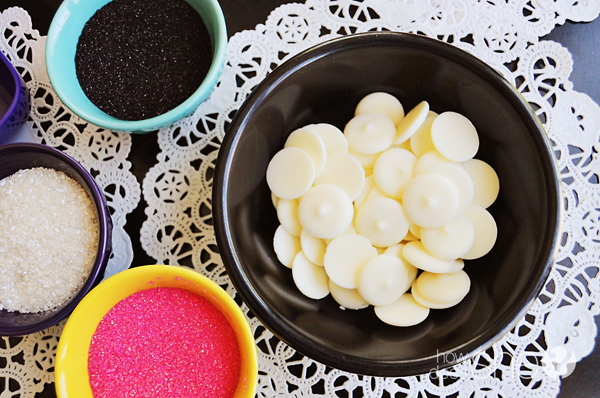
For the colored part in the arches, you will need this awesome invention called candy melts.
Melt them in the microwave in 10 sec. increments. Stir after each time until it is smooth and melted. Don’t be afraid if you need to reheat along the way.
I used these candy melts for mine. You can find them in many different colors, so once again you can choose to coordinate it with your liners and frosting.
Once you’ve dipped your cracker in the chocolate, lay them on a sheet of wax paper to dry.
The great thing about candy melts, is that they dry rather quickly. You can even speed up the process by sticking them in the refrigerator.
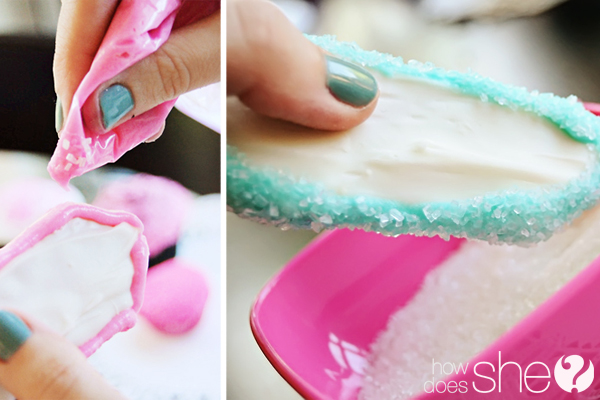
Next, you will pipe frosting along the edges of your cracker. You can use a piping bag and tip, or you can be professional like me and use a ziplock bag. 😉 Keep in mind that you are piping on FROSTING, not your candy melts. I just used the left-over frosting from my cupcakes. Once again, don’t worry if your piping job is uneven. We’ll fix that.
After you have piped your frosting, you can dip the cracker in sprinkles to give it a nice finished look. Place back on your wax paper to dry, or if you’re in a hurry you can attach the heel first and then let it dry.
Now is also the time to place any other candy on the arch that you may wish to have. (See pics of finished shoes below.)
Step Three: Heels
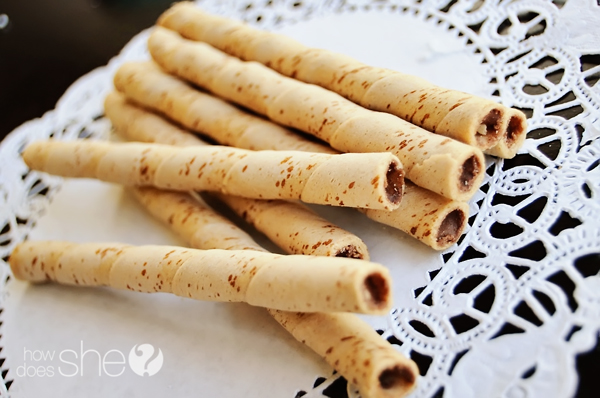
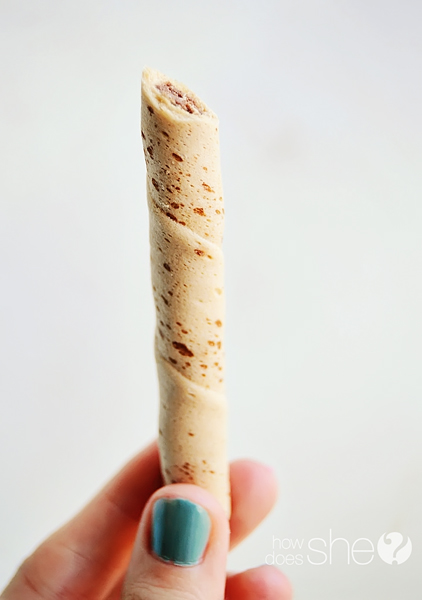
For the heels, you will need a package of cookie sticks.
Pirouettes, or Oreo Fun Stix work great.
Cut the cookie in half, and then cut one side at an angle. Your arch will sit on the angled portion.
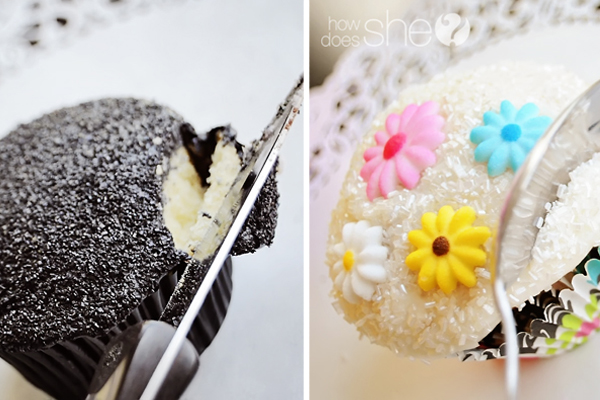
When you are ready to attach your arch and heel, take a knife, or spoon, and gently press down about a 1/2 inch (or bigger, depending on what you find works for you). Remove the frosting and small piece of the cupcake to expose a small hole. This will be where you insert the arch.
To attach the arch, gently press it into your cupcake. (I would make sure to hold onto the middle of the cracker, so you don’t smudge your frosted edges.) You can place frosting on either side’s arch to make it more stable, or gently use your finger to smooth the frosting around the arch.
Keep supporting it with your hand as you reach for the heel.
Dip the angled portion of your cookie stick (heel) into your melted candy melts. (You may need to re-heat this beforehand).
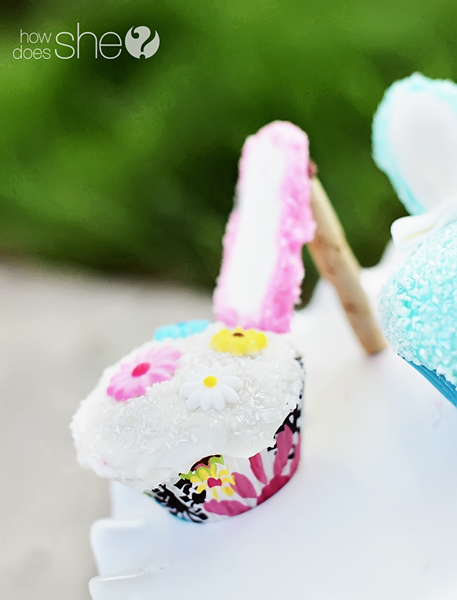
Gently put the arch on the heel, and let go. You will not want to move them again until they’ve dried and are stable to move.
-Note. Make sure your cupcakes are on a level surface so that they don’t fall as they dry.
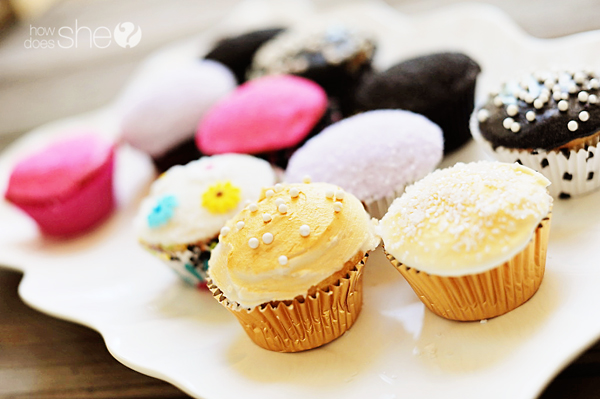
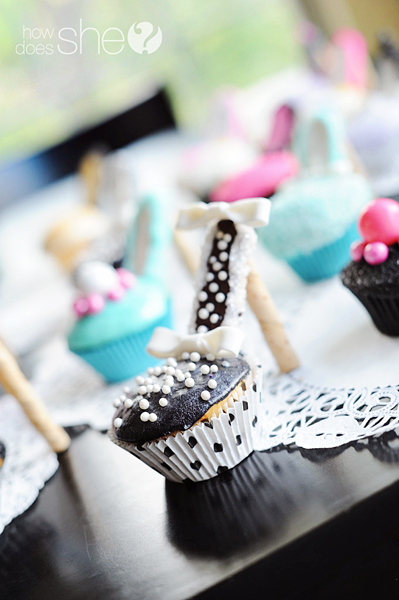
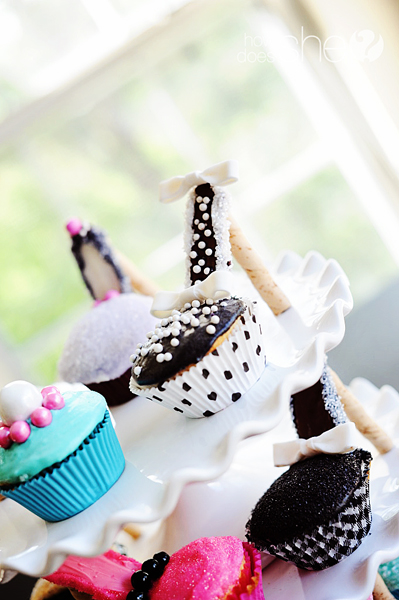
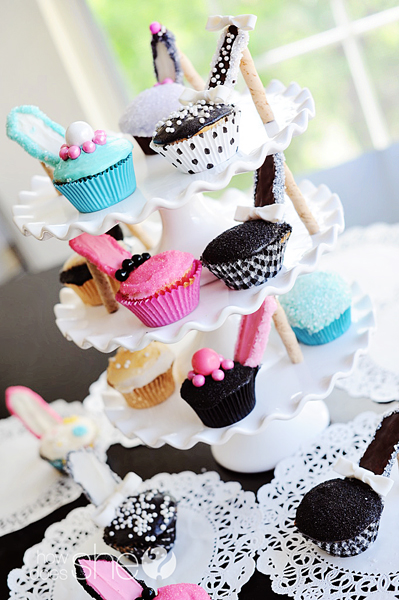
Next, you can accessorize your shoe however you want! I used sixlets, pearl sprinkles, and gumballs. Sweet Baking Supply had a huge variety in all colors to choose from.
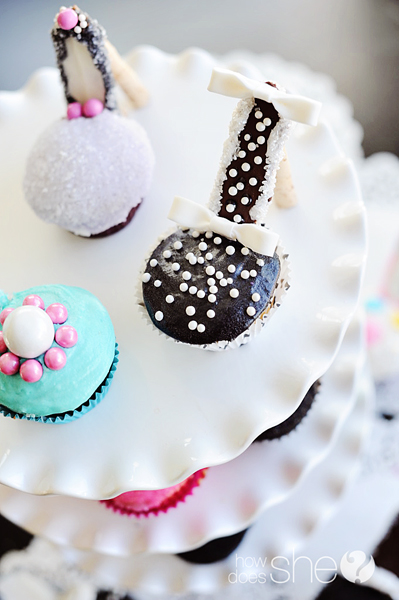
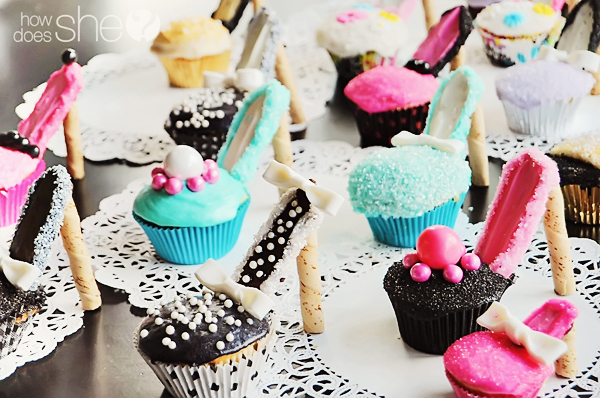
And you’re done! The finished product will look something like this: TA DA!
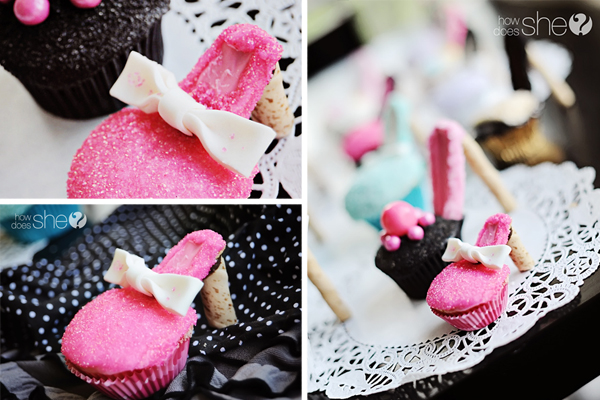
I decided adding some girly bows was a must, so the night before I made the cupcakes, I made some fondant bows to accessorize my shoe.
Please don’t look too closely at my bows, as it was first time making them! Fondant is trickier than it looks. Just sayin’. 🙂
–
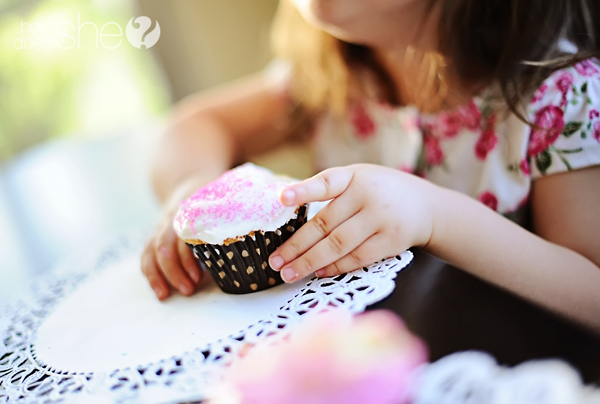
I had the help of my little assistant along the way.
So we decided to make a few ‘mini-me’ heels just for her.
Adorable, right?! How cute would these be for a little girls’ princess party?! Eek!
It could be the little glass slipper. 🙂 Awww.
High Heel Cupcakes
Moving on…there’s really no rules for how to decorate these, have fun with it!
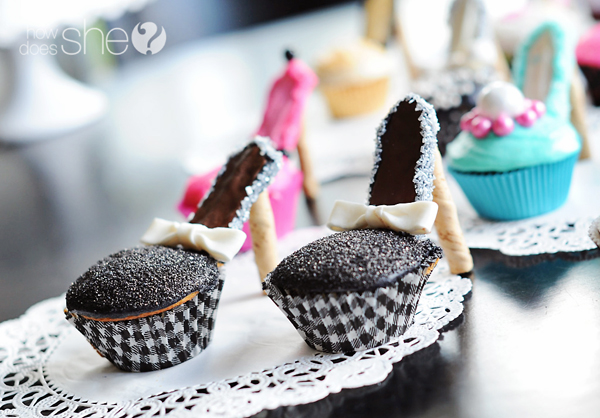
You can make them in pairs:
Or individually.
These would be so fun to have at a bachelorette party, or a girly-girl birthday party, or simply a GNO!
I thought these would be a really cute Mother’s Day present, so I packaged it up in a gable box and gave it to my mom with a new pair of heels. 🙂
I also thought they’d make cute gifts for your girlfriends, or even bridesmaids! The possibilites are endless with these!
And there you have it! The high heel cupcake tutorial! I hope you had as much fun reading as I had baking.
(Probably not, considering I ate half of them.) 😉
And because we love pinterest around here, here is a collage to remind you where to come when you are ready to make some! Follow our baking board while you are over there. 🙂
–
High Heel Cupcakes
Almost all of the cupcake liners, sprinkles, food coloring, and fondant used in this post were from the Sweet Baking Supply shop! They have the BEST selection to choose from. Be prepared to spend a lot of time shopping. It’s a baker’s paradise. Seriously.
Happy baking (and eating)!

Ingredients
- Cupcakes - any flavor - baked
- Graham Crackers
- Frosting
- Sprinkles (a variety)
- Candy Melts
- Pirouettes, or Oreo Fun Stix work great.
Instructions
- Bake your cupcakes. Keep in mind, the liners you pick will be the bottom of your shoe. Sometimes I bake with double liners, so that the liner’s color is more vibrant.
- You’re then going to want to frost your cupcakes.
- You can use coordinating colors to go with your cupcake liners, or change it up, however you’d like.
- I first whipped up my frosting, and then I used this awesome food coloring to change the colors of my frosting. The great part is, you only need a drop of this stuff. The color goes a long way!
- This next part is fun. Assemble your sprinkes and decorate away!
- Take a graham cracker and cut (or break) it in half. Place your graham cracker on a cutting board. Using a knife, turn it diagonally, and cut about 3/4″ to an inch off of each corner, slightly tapering it.
- In my opinion this is the hardest part. Don’t get discouraged if you break a few. The trick for me was to brace the full cracker in one hand, while swifly cutting the corners off in one fast swipe.
- When you’re finished, your cookie will look similar to a tie. It’s fine if it’s not cut perfectly, these are very forgiving and will look great once you cover them with chocolate.
- I’ve heard nutter butters, or Pepperidge Farms milano cookies would work as well, but I’ve never tried it.
- For the colored part in the arches, you will need this awesome invention called candy melts.
- Melt them in the microwave in 10 sec. increments. Stir after each time until it is smooth and melted. Don’t be afraid if you need to reheat along the way.
- Dip one side of the graham cracker into the melted candy melts and smooth the excess chocolate with a knife, spoon or spatula. Don’t worry if it’s not perfectly smooth. Mine were rather wavy, and they turned out fine. Once again, you only need to cover one side.
- I used these candy melts for mine. You can find them in many different colors, so once again you can choose to coordinate it with your liners and frosting.
- Once you’ve dipped your cracker in the chocolate, lay them on a sheet of wax paper to dry.
- The great thing about candy melts, is that they dry rather quickly. You can even speed up the process by sticking them in the refrigerator.
- Next, you will pipe frosting along the edges of your cracker. You can use a piping bag and tip, or you can be professional like me and use a ziplock bag. 😉 Keep in mind that you are piping on FROSTING, not your candy melts. I just used the left-over frosting from my cupcakes. Once again, don’t worry if your piping job is uneven. We’ll fix that.
- After you have piped your frosting, you can dip the cracker in sprinkles to give it a nice finished look. Place back on your wax paper to dry, or if you’re in a hurry you can attach the heel first and then let it dry.
- Now is also the time to place any other candy on the arch that you may wish to have.
- For the heels, you will need a package of cookie sticks.
- Cut the cookie in half, and then cut one side at an angle. Your arch will sit on the angled portion.
- When you are ready to attach your arch and heel, take a knife, or spoon, and gently press down about a 1/2 inch (or bigger, depending on what you find works for you). Remove the frosting and small piece of the cupcake to expose a small hole. This will be where you insert the arch.
- To attach the arch, gently press it into your cupcake. (I would make sure to hold onto the middle of the cracker, so you don’t smudge your frosted edges.) You can place frosting on either side’s arch to make it more stable, or gently use your finger to smooth the frosting around the arch.
- Keep supporting it with your hand as you reach for the heel.
- Dip the angled portion of your cookie stick (heel) into your melted candy melts. (You may need to re-heat this beforehand).
- Gently put the arch on the heel, and let go. You will not want to move them again until they’ve dried and are stable to move.
- -Note. Make sure your cupcakes are on a level surface so that they don’t fall as they dry.
- Next, you can accessorize your shoe however you want! I used sixlets, pearl sprinkles, and gumballs.

{We’re sharing these cupcakes at these fun linky parties! Check ’em out!}
Looking for more cupcake inspiration? Check out 30 of the CUTEST cupcakes in the world! Which is your favorite?
Go for the ultimate in flavor by making these AMAZING lemon meringue cupakes. Look at that topping!
If you’ve got a bunch of cupcake liners left over after making your favorite cupcakes, why not put them to good use by making this gorgeous cupcake liner pom pom?



















Emily says
Simply incredible! They turned out just gorgeous!!
Alison says
CUTE CUTE CUTE!
Edith says
You did a good job in the tutorial. I needed it for my friend’s birthday in August. :
🙂 will let you know how it turned out. In the meantime, will just oohs and aahs your creation for now. Good job!
Hilary says
Such a fun post! Guuuuush. I love how you made the mini-heels. LOVE!
Shelley says
These take my breath away. I love the colors and all the little details. Thanks for sharing what worked for you. 🙂
Mindy says
Oh my goodness those are adorable!!! Nice work.
nickelle says
Seriously! The Cutest High Heel Cups Cakes EVER. (period) 🙂
Good Job Alysha!!
Christy says
These are just too cute!
MandySue says
Just loved your tutorial, it was fun, informative and so cute! I can’t wait to make these tasty treats! Thank you for sharing!!!!!
Lindsey Marlor says
ummmm these turned out ahhmazing!!! your awesome!
Lara says
These are darling!!!!!!!!
Nesleirbag says
The. very. cutest. cupcakes. Ever! And your step by steps described it so well! You are so wonderfully creative! Thank you for a wonderful post!
Gigi says
Woaw! I don’t even want to eat something so beautiful.
http://www.tributetothetribe.com
Tara says
Absolutely DARLING!! Seriously! I wanna wear these, not eat them! lol
Jill @ Kitchen Fun With My 3 Sons says
Cute!!!!
kelly says
Do you have an easy cupcake icing recipe – like for these high heel cupcakes please? thanks
alysha says
Hi Kelly! Yes, I do! I mixed 2 3/4 cups powdered sugar, 3 tablespoons butter, and 3 tablespoons milk. Super easy. 🙂
Kristy says
I imagine you could leave the graham cracker out of the equation and just use the melts on parchment paper to make the shape of the arches. That’s honestly what I thought you did when I saw the post on Facebook. 🙂
Connie says
Gorgeous!
Alyssa says
These turned out amazing!
Carolyn M says
Excellent job! I have a similar recipe for them from DUFF and got all my supplies for them at the Michael’s store and the directions online at Michael’s website. They are called “Fancy Shoes Cupcakes”
http://www.michaels.com/fancy-shoes-cupcakes/29998,default,pd.html
Susan says
These are just fabulous!
Sherry says
Nice work! I love how your nails match the cupcakes. 🙂 Everything looks amazing! And those mini heels!!
Danielle Cattani says
Where did you get your adorable boxes??? i LOVE them!
alysha says
Hi Danielle! Thanks for your comment. The boxes are actually from Michael’s. You can get them in the baking section. 🙂
Nicky says
Thank you for posting this! I LOVE your blog!!!!
Gracie says
Cupcakes and Heels!! My kinda party! 🙂
Ashley says
WOW! Those look INCREDIBLE!
Korinthia Klein says
Too cute! Thanks for the tutorial.
Alissa says
These are the CUTEST cupcakes I have EVER seen in my life! I’m in love with them! 🙂 Thanks for sharing this great idea!
Caddie says
Super cute! And your bows are great!
darlene says
cutest idea ever! can’t wait to make up a million reasons to make these 🙂
Mandy says
So…where can I order these. Can you make me some too? 🙂 Love every last detail, from the bows to the mini-heels!
Shannon says
These are wonderful! Thank you much for sharing these- I can’t wait to make them! And your fondant bows look great, BTW! If that’s your first time, well, you must have a gift or something! Great work!
Mel Miller says
These are adorable! I posted your tutorial on FAcebook to share your blog!! So many of my friends love it & continue to ask me how you did them!!
You are an inspiration to craft addicts like me :).
Linda says
Thank you for posting this. I pinned you on my board. ;^)
Pat says
My daughter loves High Heels and has many different kinds. These will be great for her bridal shower! I love making different types of cakes. No one knows what will come out of my kitchen next!
Geimy says
Thank you for posting this. I have been wanting to do something big for our end of the summer Girls Night IN with my 4 daughters 18, 14, 13, 9. And this will just absolutely blow their minds because WE all love shoes and they know I love my high heels. I love watching my girls go in my closet and put my heels on and walk all over the house. This will be so much fun to make together. Can’t wait to see what they come up with.
maggie says
Instead of cutting up graham crackers you could use lady fingers.
Pamela says
I love this cute idea.. How did you make the peep toed shoes? Want to use for a party..
Pamela (pinknmascara) says
Love this idea.. And I really like your site. Now following with my blog at pinknmascara.blogspot.com, also on twitter and Facebook and pinterest
Monica Nikolai says
I LOVE these cupcakes! Just a few ideas. The larger ladyfingers r perfect because they r the shape of a sole.I also sprayed the heels with color spray to match the color of the shoe.I find that they are hard to transport due to the fragile nature of them.
Victoria says
How well do these high heel cupcakes transport? They look so fragile that I would be afraid to move it to a different platter or box. Can you share your experience with this?
Angela says
PLEASE TELL ME THERE IS A PLACE WHERE I CAN ORDER THESE HIGH HEEL CUPCAKES?????????? LOL
Fatma says
I love it ! Thank you for the Tutorial…
Anneliese Tairawhiti says
Hi there – For some reason I can’t e mail this or print it out – wanting to make these this weekend for my Mothers 60th Birthday…
Jovan says
Alysha,
These are the most amazing cupcakes I have ever seen!
My client just opened a shoe store and these are so perfect for serving with champagne on “Girl’s Nite Out” events at the store! Can’t thank you enough for posting this information. If you send me your mailing address I will send YOU a fabulous shoe related gift for posting this! Best Regards, Jovan Van Drielle, Scottsdale, Arizona
Alisa Seymour says
i love this, I going to try this with a women’s group at church.
celesteandpearl.blogspot.com says
You girls are incredible! Thank you for the amazing tutorial! We made these this past weekend for our Academy Awards party, and while they weren’t near as pretty as your’s, we had so much fun and they were a smash hit!! We’re posting how our’s turned out on our blog with a big thank you to you and a link to your site! Thanks again and love your work! xox Liz and Lo {celesteandpearl.blogspot.com}
Chauntae says
How sexy, exciting, simple’ yet sophisticated! I love it! Ideas are flowing. Thank you so much for sharing and your instructions are very easy to navigate. Great ideas!
Jaslyn Fellows says
Hi, for my birthday I was thinking about having higheel cupcakes making them would be fun, but it would be easier to order them so I would like to know if there are any bakeries that specialize in them.
Elizabeth says
My friend and I saw some high-heel cupcakes in a Facebook post and loved the idea! She wanted some for her upcoming birthday. I agreed to make them for her. I couldn’t find a good recipe until I saw this one. The step by step directions with great pictures to accompany each step was incredible! It was so much fun making these and they turned out beautiful and delicious. My friend was so thrilled to get her high-heels!!!
Amina says
I read this tutorial around 8pm and had to make them immediately! it’s super easy! my sisters birthday is today and the whole week i was thinking what to make for he. and when i saw these heels i had to make them for her, hence she’s a biiiiiig heels fan and has approximately a 100 pair of them.thank you so much for this tutorial! i would have uploaded some pictures, but’s it’s night and i don’t think they would turn out as wanted them to be.so i’ll take some the first thing in the morning 🙂
Heather @ Snookie's Cakes says
Fantastic idea! Thank you for sharing.
Jeri Dettmann says
How far in advance can the “high heel cupcakes” be made? Was wondering, I’m considering making 120 of these cupcakes for a Ladies Spring Tea next year.
Jeri
Bernadette says
Could you use those Ovation chocolate sticks for the heel? Or would they not be in proportion and/or not be able to support things?
Mary Faucett says
Used a Nutter Butter by Nabisco for the instep. Separated the cookie and scraped off peanut butter this gave me two insteps to use. The figure 8 of the cookie was perfect and eliminated cutting the gram cracker.
Geri says
I love these and they looks so easy to make that even I could do them. I’ll have to think of an excuse to have a get together and “serve” them!
Aleasha says
Wonderful little goodies!! My Daughter is turning 5 and she’ a shoe diva 🙂
Kathy says
Oh, but these shoes are gorgeous! Probably you published this a while back, but I just found it. I love your artistic touches. Thanks for this idea! 🙂
Sarah says
what would be a great way of “shipping” these to a bridalshower. I am going to attempt to make them for my sister, but what do you suggest to make travel possable
marji says
these are the greatest! can hardly wait for a GNO to make them together. I think it will be great fun with everyone creating their own. Thank you. I wish there was a shorter version I could print out to take with us.
marji says
cover your tray with parchment or aluminum foil and I think I would add a dab of frosting on the bottom of the shoe and the bottom of the heel and place them close together on the tray and this should stabilize them for transporting. Just remember to gently loosen them (maybe with a sharp knife or a metal spatula) before serving. I’m sure this would save the shoes from destruction during the move.
Kimberly says
Hi Great Recipe. I thought of something to make this easier. Milano cookies for the show part.
Jenue says
Love it!
shirley Day says
I thought the high heels were great, I’m all the time thinking of something to carry to the nursing home for the nurses. I can’t wait to start.
Miriam Gomez says
I love your Cup Cakes.. soo Cute
sonia says
hi!! how do you transport the stilettos? thanks 😉
Carolyn Taylor says
Just incredible. Very cute!
Myrtle Bennett says
thank you for sharing your cupcakes they are wonderful., I’m sure my granddaughters will love them if mine are a success!!
I live in Holland and do not know what candy melts are can you explane them?
Mary helen parham says
Want to bake! These shoes look fun.
Harry and Val Contois says
Thank you so much for the all the beautiful ideas on Whoot I have encouraged a lot of folks to check site out I’m amazed at recycle projects, crafts all of it Some Is too late for me, now in an apartment, but a lot of it we can learn and pass on I just want to thank you for making the world a lot brighter these days and making me inspired to share the wealth of your knowledge Thanks and Bless all of you HC