Want to make a big impression this summer and have the cake at your next party be the one that everyone will be talking about? I may have just the solution for you.
When I think about what to share with you, the word dessert is the first to pop into my head. Desserts are fun, colorful, warm our hearts, and everyone loves them. There is no guilt in taking a bite of something that is worth biting right? And this cake is well worth it.
Also, when it comes to how to make my desserts, I try to pick my battles. The demands of our lives sometimes do not allow us to bake grandma’s 5 hour chocolate cake recipe that has been with the family for centuries, when the party is just starting in a few hours! I have been there, trust me, and most of my grandma’s recipes don’t even call for a mixer!!!
Well, for that reason, shortcuts and semi-homemade baking was created just for people like us. This colorful cake will bring a spark into your life and make your summer even more colorful. My goal is to teach you how to layer a 6 layer cake without sinking and curving, and add a frosting so delicious that everyone will be licking their fingers and ready for more.
This post may be a little longer than usual but it is done for you to create a successful bakery-style cake. When baking from scratch or semi-homemade make sure all of your ingredients are at room temperature, your oven is pre-heated at least one hour before baking, and all of your ingredients are laid in front of you. These few suggestions will make you bake like the pros and every dessert you make will be a winner!
Note: I rarely follow the cake mix instructions. I normally modify them to give a more homemade feel and taste. We are doubling this recipe, because this is a tall cake. Get ready for a colorful time in the kitchen!
Rainbow Cake
Level of difficulty: Easy
Ingredients:
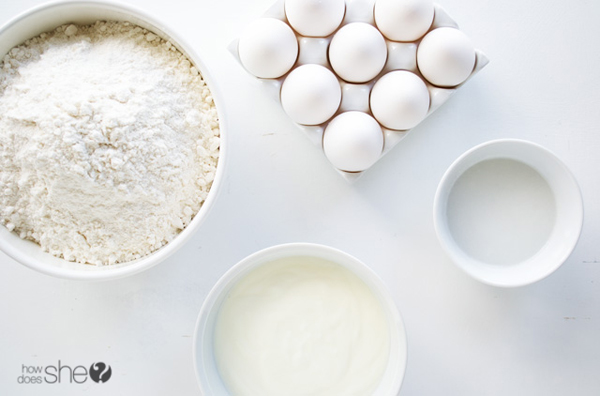
2 boxes of white cake mix (I used Betty Crocker Super Moist)
8 eggs (room temperature)
⅔ cup coconut oil (melted but not hot)
2 ½ cups plain yogurt (room temperature)
1 ½ teaspoon or more of Wilton food coloring: red, yellow, blue, purple (violet), green, and orange.
Note: If you can’t find purple food coloring, mix blue and red. If you can’t find the orange food coloring, mix yellow and red.
Directions:
Preheat oven to 350°F. Grease and line six 9” round cake pans with parchment paper (bottom and sides) — if you don’t have parchment paper, grease and flour your pans. Set aside.
Add the cake mix, yogurt, and eggs in a bowl and mix them on low speed. Add the melted coconut oil, and continue to mix it for about 3 to 4 minutes on medium speed.
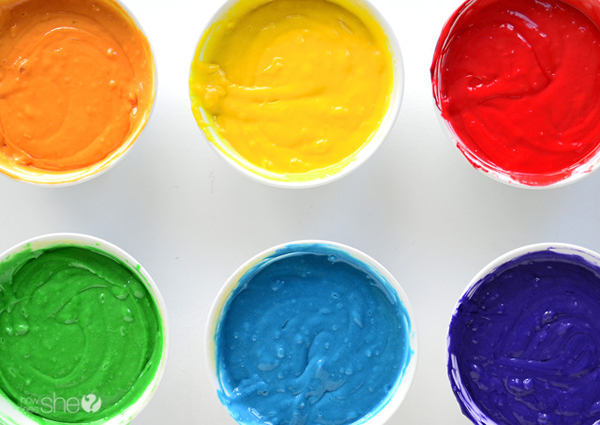
It’s very important to divide the batter evenly between six medium bowls. I used a scale, but if you don’t have one try using a measuring cup. You want to make sure all of the layers have the same height when baked.
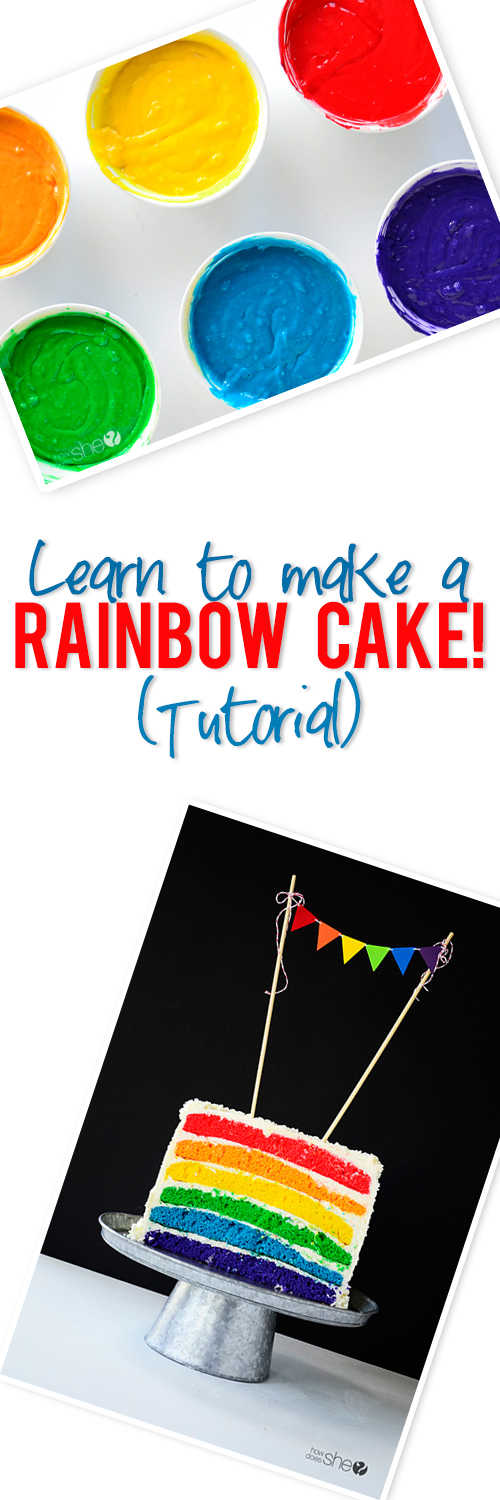
Add the food coloring in each bowl and tint the batter by mixing well, until you reach the desired shade.
With a spatula scrape the batter into the six prepared cake pans and bake for 12-15 minutes or until a toothpick inserted in the center comes out clean. Let the cake cool in the pans for a few minutes, then transfer the cake layers to a wire rack to cool completely.
Simple Buttercream Frosting
Ingredients:
8 sticks soft butter
16 cups powdered sugar
4 tablespoon clear vanilla extract or more if you desire a stronger vanilla flavor
6 tablespoons heavy cream or more if you desire a lighter frosting.
Directions:
Beat the butter with a paddle attachment on medium speed for a few minutes.
Start adding the powdered sugar with the butter on a low speed until well incorporated.
Add the vanilla and increase the mixer speed to medium and beat it for three minutes.
Lower the speed again and add the heavy cream. Increase the speed back to medium and beat for about 2 to 4 minutes.
Note: I am doubling this recipe. You must divide this frosting into two parts. Save the second part for later. The first part goes for the filling of the layers and the crumb coat, and the second part goes for the final coat.
To assemble the cake:
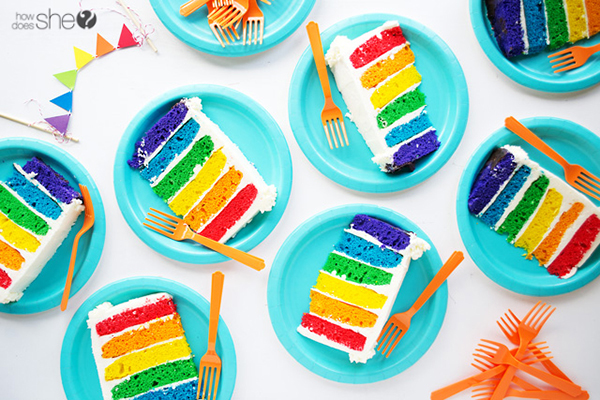
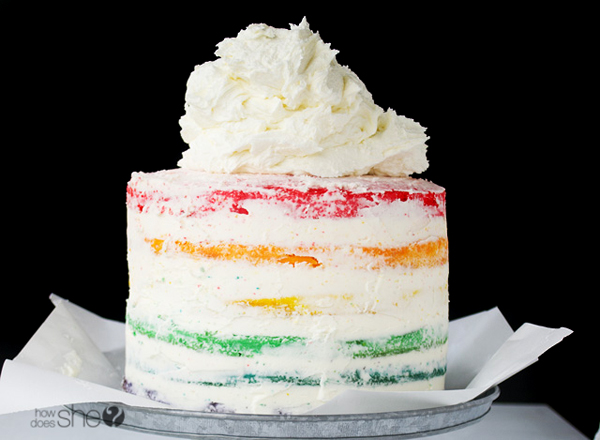
Place the purple layer on a cake plate and spread about one cup of buttercream frosting, repeat the process with the other layers: blue, green,yellow, and orange. The red layer is the final layer and should be placed on top of all layers.
With an offset spatula start covering the top of the cake, filling the edges, and covering the sides. This is the first coat or sometimes called the crumb coat, this layer should be thin, and you shouldn’t worry about the crumbs showing at this point. Refrigerate it for 30 to 60 minutes.
Pull the cake out of the fridge and add the final coat, start from the top of the cake to the sides, working with your offset spatula. If you have any frosting left, put it in a pastry bag and decorate the edges of your cake.
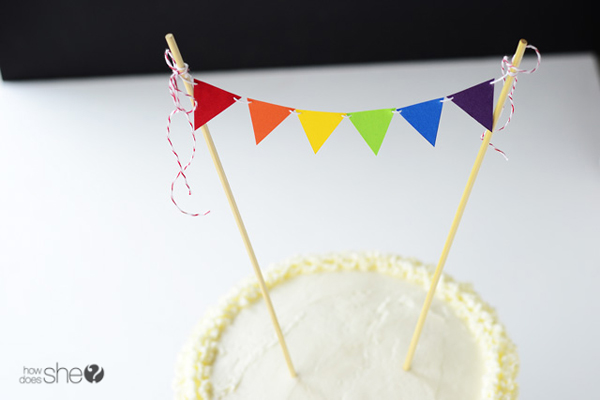
I was very excited when I made this cake. I went to the store and got some coordinating paper to make a rainbow cake banner to use as a cake topper. Using scrapbook paper, some twine, and two bamboo skewers, this adorable banner was created and less than 20 minutes.
Cake banner toppers are easy to make and add a nice customized touch when presenting your cake.
When cutting cakes, I like to use a bread knife. I also clean the knife after every piece I cut. This way you will have a chance to have nice slices of cake to serve.
Here you have a 6 layer cake, that is filled with a delicious simple homemade buttercream icing. This buttercream recipe is also great for piping decorations on cakes and cupcakes. During the fourth of July celebrations I used the same frosting recipe to decorate some gluten-free blueberry lemon cupcakes for my family and they loved it!

Rainbow Cake
Ingredients
- Rainbow Cake Ingredients:
- 2 boxes of white cake mix (I used Betty Crocker Super Moist)
- 8 eggs (room temperature)
- ⅔ cup coconut oil (melted but not hot)
- 2 ½ cups plain yogurt (room temperature)
- 1 ½ teaspoon or more of Wilton food coloring: red, yellow, blue, purple (violet), green, and orange.
- Note: If you can’t find purple food coloring, mix blue and red. If you can’t find the orange food coloring, mix yellow and red.
- Simple Buttercream Frosting Ingredients:
- 8 sticks soft butter
- 16 cups powdered sugar
- 4 tablespoon clear vanilla extract or more if you desire a stronger vanilla flavor
- 6 tablespoons heavy cream or more if you desire a lighter frosting.
Instructions
- Rainbow Cake Instructions:
- Preheat oven to 350°F. Grease and line six 9” round cake pans with parchment paper (bottom and sides) — if you don’t have parchment paper, grease and flour your pans. Set aside.
- Add the cake mix, yogurt, and eggs in a bowl and mix them on low speed. Add the melted coconut oil, and continue to mix it for about 3 to 4 minutes on medium speed.
- It’s very important to divide the batter evenly between six medium bowls. I used a scale, but if you don't have one try using a measuring cup. You want to make sure all of the layers have the same height when baked.
- Add the food coloring in each bowl and tint the batter by mixing well, until you reach the desired shade.
- With a spatula scrape the batter into the six prepared cake pans and bake for 12-15 minutes or until a toothpick inserted in the center comes out clean. Let the cake cool in the pans for a few minutes, then transfer the cake layers to a wire rack to cool completely.
- Simple Buttercream Frosting Instructions:
- Beat the butter with a paddle attachment on medium speed for a few minutes.
- Start adding the powdered sugar with the butter on a low speed until well incorporated.
- Add the vanilla and increase the mixer speed to medium and beat it for three minutes.
- Lower the speed again and add the heavy cream. Increase the speed back to medium and beat for about 2 to 4 minutes.
- Note: I am doubling this recipe. You must divide this frosting into two parts. Save the second part for later. The first part goes for the filling of the layers and the crumb coat, and the second part goes for the final coat.
- To Assemble the Cake
- Place the purple layer on a cake plate and spread about one cup of buttercream frosting, repeat the process with the other layers: blue, green,yellow, and orange. The red layer is the final layer and should be placed on top of all layers.
- With an offset spatula start covering the top of the cake, filling the edges, and covering the sides.
- This is the first coat or sometimes called the crumb coat, this layer should be thin, and you shouldn't worry about the crumbs showing at this point.
- Refrigerate it for 30 to 60 minutes.
- Pull the cake out of the fridge and add the final coat, start from the top of the cake to the sides, working with your offset spatula. If you have any frosting left, put it in a pastry bag and decorate the edges of your cake.








Courtney says
Do you h ave to use coconut oil? Can something else be substituted? Or do you not even really taste the coconut? I’m not a fan of coconut flavor. Sorry.
Ana Helena Campbell says
Hi Courtney! You don’t have to use coconut oil, you can use vegetable oil instead. When I bake with coconut oil I really don’t taste the coconut flavor.
Chloe Crabtree says
You make this sound and seem so much easier than I am sure it would be for me!
Ana Helena Campbell says
Chloe! Trust me, it is easy to make. All you need is a good motivation, patience, and a little bit more time. Hahaha!!!If you ever make this cake,please feel free to contact me and I will walk you step by step okay?
Shelley says
Still can’t get over these pictures… so so cute.
Ana Helena Campbell says
You are so sweet Shelley. Thanks!