Hey there Ladies! It’s time to pull out your sewing machines again! You are about to get the perfect excuse to buy that darling fabric you’ve been dreaming about! Maybe no one else does that.. but I have a mental filing cabinet full of fabric I want to buy and use! Ok, maybe I’m just a little crazy.
We all know how much fun ironing is right? 😉 Ok.. not right. I hate ironing. ESPECIALLY when I have to pull out my ugly, brown stained, worn out ironing board. Yuck, it makes the job so unpleasant. I finally had enough and decided I needed to find a way to iron in style. Sounds like fun? Ok, Lets get started!
Supplies:
About 2 yards of fabric – measure the length of your ironing board and add 9 inches
2 yards of 3/8″ elastic
Thread
Sewing Supplies
First things first! If you want to be able to wash your cover in the future, you need to pre-shrink your fabric! Throw it in the wash and dry it according to the instructions on the bolt at the fabric store. Usually you wash cold and dry at med heat. After it’s dry iron out all the wrinkles. Then you’re ready to start!
Turn your not so gorgeous ironing board upside down on top of your fabric. Line one edge about 3 1/2 inches away from the edge of the fabric, this way you have a good size piece of scrap fabric left on the other side!
Using a ruler or measuring tape cut the fabric 3 1/8″ away from the board edge. It doesn’t have to be perfect.
Flip your ironing board back on it’s legs. Now you’re going to press under 1/8″ along the edges of the piece you just cut. You will sew this under for a nice clean finish.
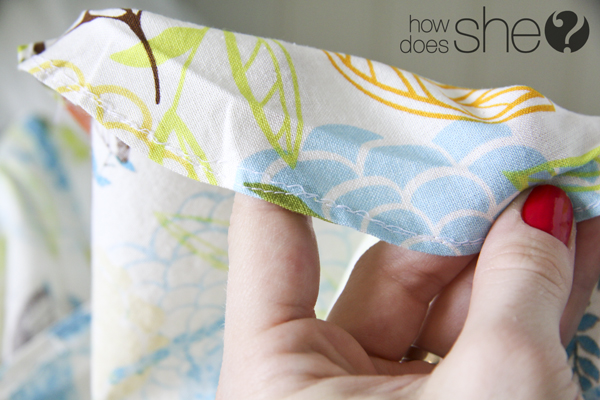
Stitch right on top of the newly pressed seam, it really doesn’t have to be perfect, just make sure the stitching goes through both layers.
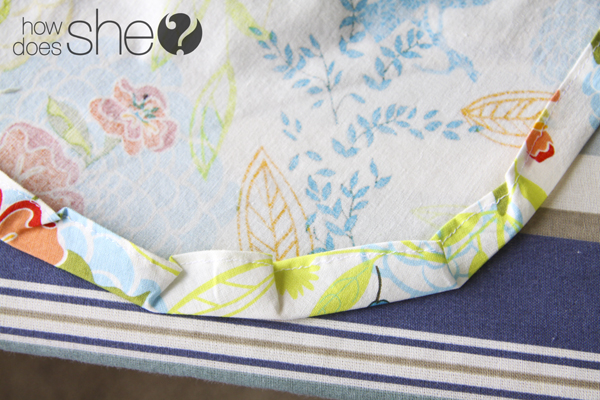
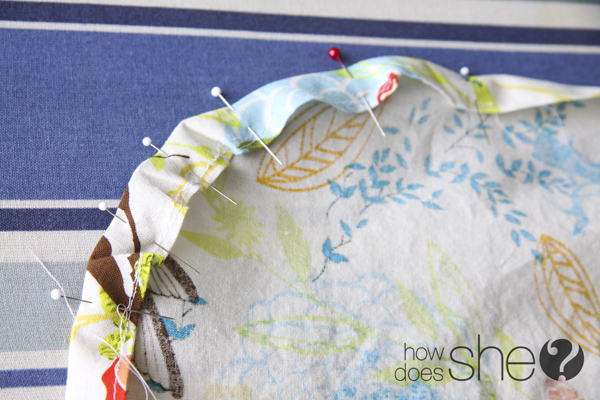
Next take the fabric back over to the ironing board. Using a ruler or measuring tape press under 5/8″ along all the edges. Here’s the problem you’re going to run into. On the rounded edges (the two bottom corners and top rounded edge) the fabric is going to be hard to press evenly. Just do the best you can and you should end up with some creases like this picture below. We’ll fix that next.
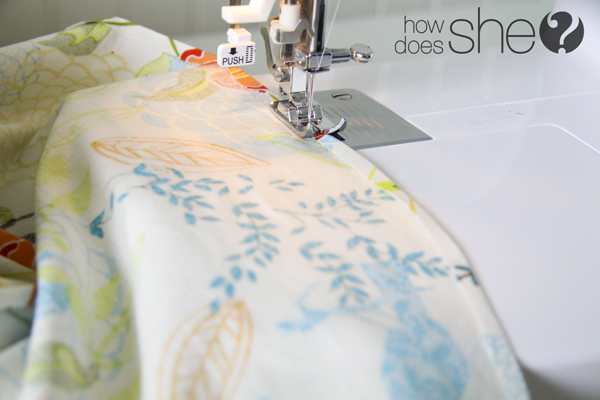
Along the three rounded edges we are going to add a single row of gathering stitches. Here’s how. Sit down at your sewing machine, find the stitch length control. Change the stitch length to 4. Then just along the rounded edges stitch right on top of the other row of stitching you already have. Leave the thread tails long so you can easily gather them.
You already have the 5/8″ seam pressed down, so take a few pins {yuck, pins.. they are necessary for this} and pin the pressed edge down. It should pucker and NOT lay smoothly.
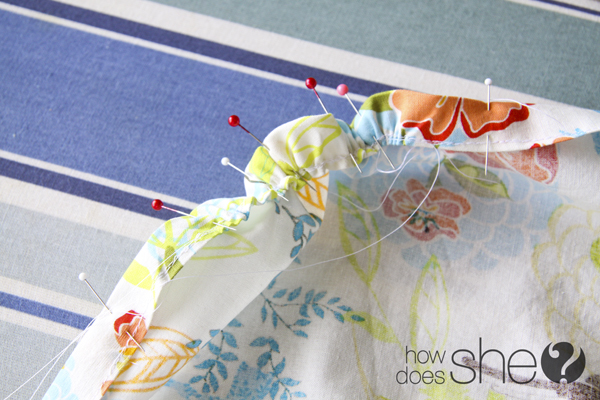
Next find the top thread of the gathering stitch you just added. Pull the long thread and bunch/gather the fabric to the middle of the curved edge. Like this:
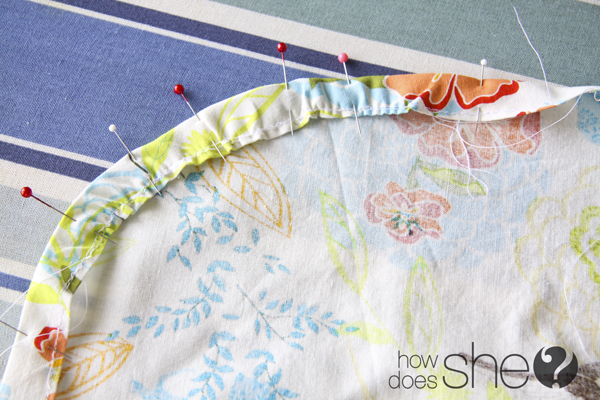
Then smooth out the gathers until the fabric no longer puckers and lays smoothly against the top piece of fabric! Doesn’t that look so much better! Leave the pins in for the next step.
Sew on top of the clean finish seam you already have to create a casing for the elastic. Make sure you leave an opening to thread the elastic through. An inch should be plenty!
Hook a big safety pin onto the end of your elastic and start scrunching and pulling it through the casing. When you get back to where you started, hook the bobby pin onto the other end of the elastic. I ended up using exactly 2 yards for my ironing board. Slip your cover over your ironing board and cinch the elastic until the cover fits snugly. You may not need to cut anything off, but just make sure it fits right. When you have marked your elastic where it needs to be sew the two pieces of elastic together with a few rows of stitching. Then stitch the casing closed where you left the opening. OR if you are feeling lazy.. you can leave it open.
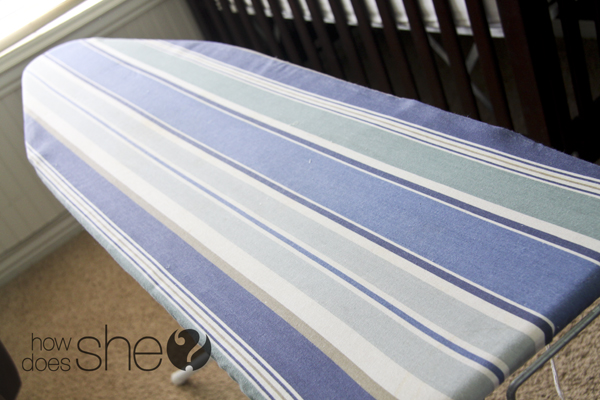
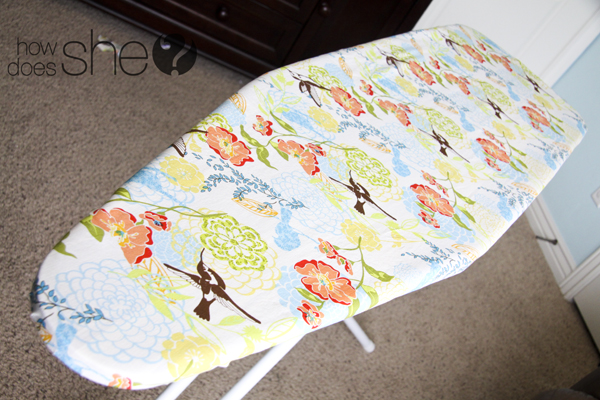
AND… You’re done! Slip your new cover on right over your old one. This will add extra padding and unless your fabric is sheer you shouldn’t be able to see your old ugly cover through it. This cover is washable! If you ever have the need, throw it in the wash and it will look like new! Now admire your beautiful new ironing board! Here’s a shot from underneath.
Whew, that looks so much better! I no longer have to be ashamed of leaving my ironing board sitting out for days. Trust me, it happens. Now all your friends and neighbors will be asking where you got that cute cover!
I get excited every time I pull it out! Off to the laundry room to start ironing in style!
Many of you have been asking where to find cute fabrics. Fabric.com has some darling prints (Heather Bailey, Amy Butler, etc) at discounted prices.








Alison says
So cute! Can you make one for me? ha. Love the fabric too!
Penny says
Your cute fabric makes me want to iron!
Jen says
This is awesome! I recently bought a new cover at IKEA, but it didn’t fit my ironing board. So I had already planned to try to create my own…now I don’t have to make up the directions as I go. Thanks!
Kate says
I can’t believe how easy that was! I would have never thought to try to make my own. I will now! So so so cute.
Shelley says
Lara, how do you find the time to make all this cute stuff?! Love your fabric choice. I’m obsessed with cute fabrics too…
Peggy says
Thank you for the wonderful directions! Our ironing board is truly hideous but I hadn’t come across a “pattern” I liked so far. In all honesty this is so much easier than the way I was making ironing board covers in the past. (plus someone asked me recently if I could make her a new cover….)
Thank you for the heads up on the fabric. I am always looking for affordable fabric especially since we are in the process of a building project and I need to make curtains, pillows, floor pillows and storage boxes (affordably as there is ZERO decorating budget!)
Mindy says
Adorable! Where did you get your cute turquoise chandelier? I LOVE it!
Heather says
Ohmygoodness…CUTE! I was honestly doing my 5th load of laundry today when I peered at my board and thought “honey you need a facelift!” Dare I say that its cover is cut, brown and stained with fabric paint so much so that I actually flip it so that the cover faces the wall so just in case anyone was to go into my laundry room they wouldn’t see it! 🙂 Perfect timing…now onto fabric shopping and trying to remember how to actually thread my sewing machine 😉
Missy says
That cute cover would make ironing tolerable…maybe. I agree about the chandelier – please share.
Lara says
Post coming up 😉
Natalie Johnson says
My husband was just telling me how he needs to get me a better ironing board…. TADAH! I think I found my golden ticket.
Anne says
you make it look so easy and what a fabulous piece of fabric! Super fun to give at a bridal shower, Thanks!!
shavonna says
My son was just asking me if his ironing board cover could be washed(as he was taking it off)and the answer was no. With this wonderful idea I can help him have a clean ironing board and clean uniform all the time. Thank you.
Mjika says
Thank you for the detailed instructions! I just repainted my laundry room lime green and was determined to work my ironing board into the decor. I found fabulous fabric that works perfectly in my new room. It was super easy to complete and less than a bland one at the “W” store. Thanks so much!!!
Melissa @ Love Affair With My Brother says
love this tutorial! My ironing board is HIDEOUS! This is just what I needed to make it beautiful 🙂 Thanks!
Amy says
LOVE it!
I have the same fabric! Going in the kitchen for towels, apron, etc. But now I’m thinking it WOULD make a great cover for my ironing board…
Thanks for sharing!
louise says
Thanks! I keep saying I’m going to do this, but keep doing other things. I have an ugly ironing board, with sticky stuff on it and a piece of cloth stuck to the sticky stuff so I won’t iron over it! 🙂 I need a new one, huh….
dawn says
i saw this via grograin fabulous. i stumbled upon your awesome tutorial, just when i needed it. i would love to do this with a red amy butler print to jazz up our laundry room. thank you 🙂
emmaolju says
c est superbe ce que tu fais j aime beaucoup bises de la france
arlene says
Lara….thank you so much for the great tutorial! I need to make a cover for my vintage ironing board – I can’t buy one – they don’t fit……but now with your help I can have it all fixed up in no time!
Now all I need to do is to choose a cool fabric to do it in!
Thanks again for the great tutorial
hugs
Linda says
Hi I Really Like your great tutorials!!!
I Link to you on my Blog,
http://paneamoreecreativita.it/blog/2011/07/raccolta-di-progetti-di-cucito-creativo-per-lestate
Thanks for sharing 🙂
Cati Holker says
Cute!! Where did you get that fabric? Is it by a particular designer that you know of? Thanks!
Lara says
It was from Jo Anns, I don’t know if I ever checked the designer! But fabric.com has some darling fabrics too! I hope you find something cute! 🙂
Tanya says
Thank you so much for explaining this. I found this on Pinterest, though I am sure that I have been to this blog before. I can’t wait to try this. I am going to repin it.
Nikki B. says
I love any reason to buy fabric!
Jenni says
Thanks for the tutorial! Mine desperately needs to be redone, and you made the process look quite simple. 🙂
Linda says
I just finished making my cover…LOVE IT! I saw a picture in Pottery Barn that used the ironing board as wall decor, but couldn’t find a pre-made cover to go with my new laundry room color. I came across your step by step instuctions and…easy peasy! Thanks so much for such great instuctions and pics! It work perfectly. 🙂
Kayla says
I did this last week! It turned out pretty good too. I sewed it with the string in, so I didn’t have to pull it through at the end. Thanks for the inspiration:)
Kayla
Shannon C. says
Oh finally! An ironing board cover tutorial that makes sense! Thank you!
Leah Bonebrake says
now to make a sewing machine cover to match!
Margaret says
That’s for the great tutorial! I will be making a new cover this weekend.
Sarah says
Thanks for this wonderful tutorial! I have a smaller table top ironing board, and finding cute covers seems to be impossible! Though I might do a drawstring instead of elastic. 🙂
Felie Hempfling says
Super adorable Lara! I have to agree, I think I get more excited about cleaning the bathroom then I do ironing! But if you must iron at least do it in style!
Marcia Loftin says
I have a mini ironing board, needed cover desperately, I can use this pattern from the regular size and make myself a new cover, I keep it in my sewing room so have plenty of fabric handy, can’t wait to have a new bright board. Thank you so much.