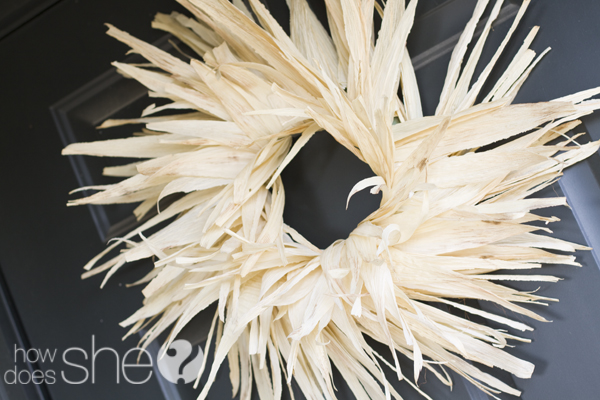
My sweetest cousin sent me an email a few weeks ago showing me her latest creative project. {She is always doing something jaw dropping}. I said, “That’s it. You’re in.” Lucky for us, I’ve recruited her fabulous talent to the HowDoesShe blog. Lara will be posting every now and then, so make sure to give her a warm welcome for her very first ‘official post’. You are in for a treat. She even sews (more than just my typical square projects). 😉 I’m crossing my fingers that she will share a few EASY sewing projects with us in the near future. As for today, an adorable, inexpensive Corn Husk Wreath tutorial.
—
Hello all you amazing How Does She women! I am so excited to be contributing. You may remember me from this last spring? My beautiful and talented cousin Shelley shared my favorite way to keep my feet warm, in the post Hello Therapeutic. Being a guest was a lot less intimidating, but I’m sure up for the challenge of sharing with this amazing group of women!!!
In my mind there is no better way to bring that incredible fall air into your home than a little decorating {and possibly some chocolate chip pumpkin cookies :D}. This is by far my favorite season of the year and I always get excited to do fun fall activities!
I spotted an adorable corn husk wreath in a home decor store a few weeks back. I took a good look at how it was put together and decided it would be more than easy to make! I headed to the dollar store and wal-mart to pick up the supplies and my grand total came to $7.00!
Here’s the supplies you’ll need:
– 1 green foam wreath (dollar store)
– 1 pkg of short sewing pins
– 1 8 oz pkg of corn husk (walmart, by the Mexican food)
– 1 brown ink pad – optional
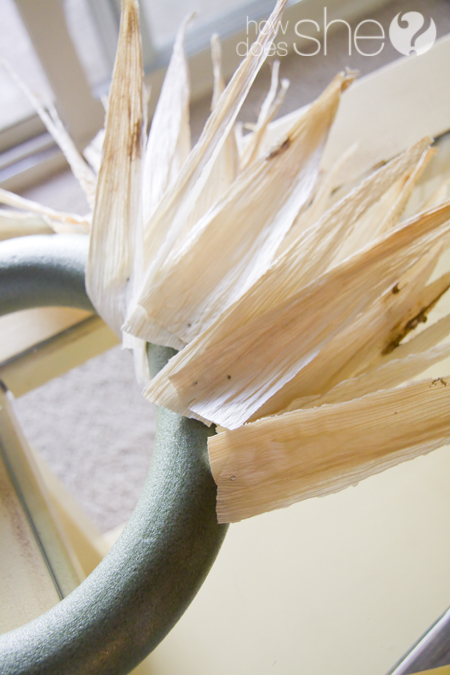
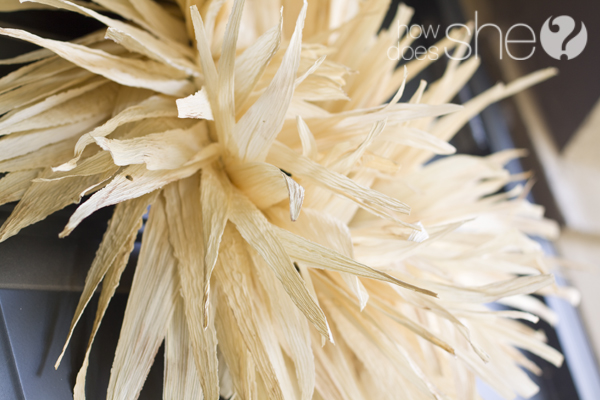
First off, separate the corn husks cause they’ll all be stuck together. Then soak them in a sink full of water until they’re pliable, around 5-10 min. While they are still damp tear them into 1-2 in pieces. Let them dry for a few minutes. Beginning on the outside pin the wider ends of the pieces to the foam wreath. I stacked 3-4 strips on top of each other then pinned. The more you stack the fuller it will be. On some you may need to use 2 pins to keep them in place. You could use hot glue, but pins are more forgiving and I like forgiving! Work your way around the wreath pinning each row closer to the center. Wrap the last row into the center and pin down the wider ends well so they don’t show through the center of the wreath. Now hang it up and make sure you haven’t missed anything. Then take the ink pad and stain the tips and edges of the husk pieces. You can skip the last step, I just thought the ink added a little more character. Hang it up and let it dry! That’s it! easy.
Cheap, easy and it turns out adorable! Bring on Thanksgiving!


Green Gracie Home says
Adorable! Love how it turned out.
Jacque Charwood says
ADORABLE!!! Gosh I wish I was creative like that… LOL
.-= Jacque Charwood´s last blog ..What would you do with 110 Million =-.
Donna says
So clever! I love the simple design. Thanks for sharing!
Suzanne says
I love this. Very classic in color and style. I love the simplicity and natural look of it!
.-= Suzanne´s last blog ..Apples to Applesauce =-.
Celeste says
This is such an awesome idea! My family always makes tamales for Christmas so this would be a great way to use some of the husks! So everyone keeps mentioning Pumpkin Chocolate Chip cookies… Does anyone have a good recipe?
Carina says
1 lg can of pumpkin
2 boxes of spice cake mix
1 bag of chocolate chips.
Mmmmmm
Mix together. Cook at 350 for 11 mins (I think) Sorry I am doing this from memory.
Lara says
This really is the best chocolate chip pumpkin cookie or muffin recipe. I love it 🙂 and It’s so simple
Stephanie@cre8tive says
Lara you rocked this one! I love the simplicity of it and the texture..oh and the price. Welcome aboard.
.-= Stephanie@cre8tive´s last blog ..The Chandelier Deal =-.
Thrifty Princess says
I love the simple beauty and added a tiny colorful ear of Indian corn to the center of my husk wreath. The colors of the corn match my maroon front door.
Michelle says
Great job! I really like this wreath and the corn husks will look great against my black entry door…guess I know what I will be creating this weekend!
Thanks!!
.-= Michelle´s last blog ..He did it!! =-.
Stacia says
Beautiful wreath! I love decorating for fall!
.-= Stacia´s last blog ..Strawberry Bread =-.
Leslie says
LOVE THIS IDEA!!! Going to def give it a try next week!!! I can’t wait to see all your Christmas ideas!!
.-= Leslie´s last blog ..Multitasking Gone Awry =-.
Michelle says
OH, I just love this! It might also work on a table top with some of the cute apothecary gars I’ve been seeing in the middle ot a few of the cute little pumpkins with some indian corn. Adding these items to my growing fall decor shopping list.
Lara, welcome to this great blog!
Robin says
I love it! I have an acorn wreath that’s been sitting and waiting for something more…I think I might add some corn husks behind the acorns now. And if that doesn’t work, I’ll just make this one instead.
thanks for the tut!
em says
I am so going to make this!!!! It looks simply DARLING!
angie says
love it it is so fall and harvest like and yet so simple
Monica says
beautiful!! I’m planning on making some corn husk wreaths for Christmas that are a little different but this one is really gorgeous too!! Thanks for sharing!!!
.-= Monica´s last blog ..Haunted Playhouse! =-.
Tonya says
I love it – I think that I can do this! =)
alison says
Super Cute Idea! I love this. I am so glad you posted!!!!
.-= alison´s last blog ..Corn Husk Wreath Tutorial =-.
pennymck says
So cute, and you made it look so easy!
Marie says
Okay, I actually have all the supplies. We made Tamales with corn husks and I have a whole bag left over! Yay, I’m going to make this this week!!
christine says
that is really cool I love it
Kimberly says
Gotta make it; thank you!!