 Boring…My front porch…that is…
I read Just-a-girls post on flower box windows and thought that would solve the problem. To help liven up the front porch.
I started out with a complex design that used MDF wood and if you know about MDF, it swells when water gets on it and that won’t work since I have to…water the plants…that was my {DUHH!} moment! So, I pulled it apart and then…3 hours later started over. I even had one reader ask if I needed help. UMMM I always need help! (Thanks Kimberly)
So, I guess I should blame Just a girl for the 3 hours of wasted time…no thank her for inspiring me to get some made and add a little love to the porch.
I decided to go with a simpler version and simpler it was…and I think I even like the design better!
This project was so simple that building the boxes only took about 30 minutes. I did two boxes so one box would have been about 20 ish…
So you are welcome for saving you a bunch of wood and wasted time. I am glad I was able to do it for you:)
You…your honey will be so proud that you made this…just don’t tell him how easy it was:)
I ran back up to Lowes and asked them what they recommend, cedar or redwood to make a plantar box…cedar won!
It was only $1.50 a board and only 2 are needed to make one box! So why $3.12 for the title? Taxes…
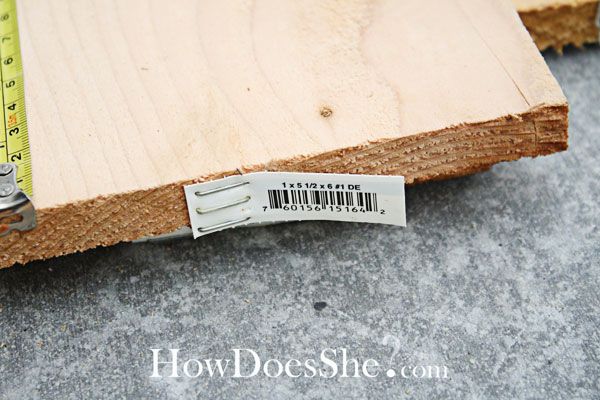 The cedar is the kind used for fences. 1 x5 1/2 x 6. All that means is 1 inch think, 5.5 inches wide and 6 feet long. v
After measuring the window…yep I did use a tape measure this time:) I cut the board to 32 inches. I had to take a picture of the tape measure because it will be lost again and I wanted proof that I do own one!
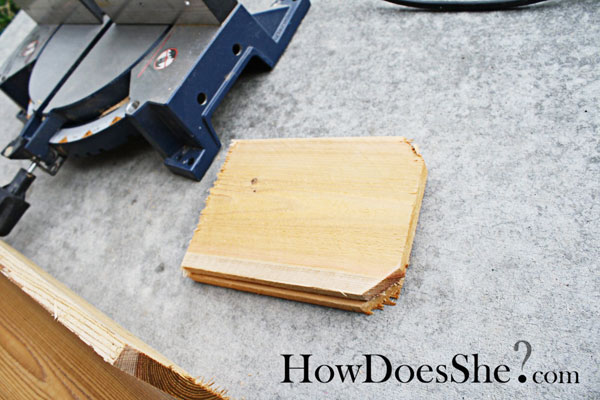
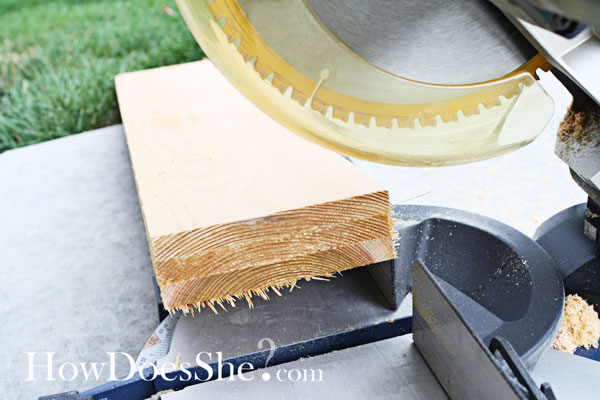 Cut 3 boards at 32 inches. Do you smell the cedar? Crisp clean cedar? Ask Lowe’s if they will cut your wood if you don’t have a chop saw…it never hurts to ask:)
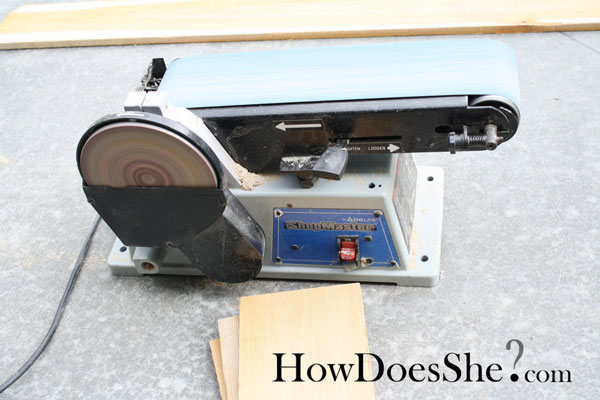 You want to see my favorite tool? Here she is! This is one tool you better not pass up at garage sales! Go sander. Go fast’ness’. Go Smooth! Go Blue!
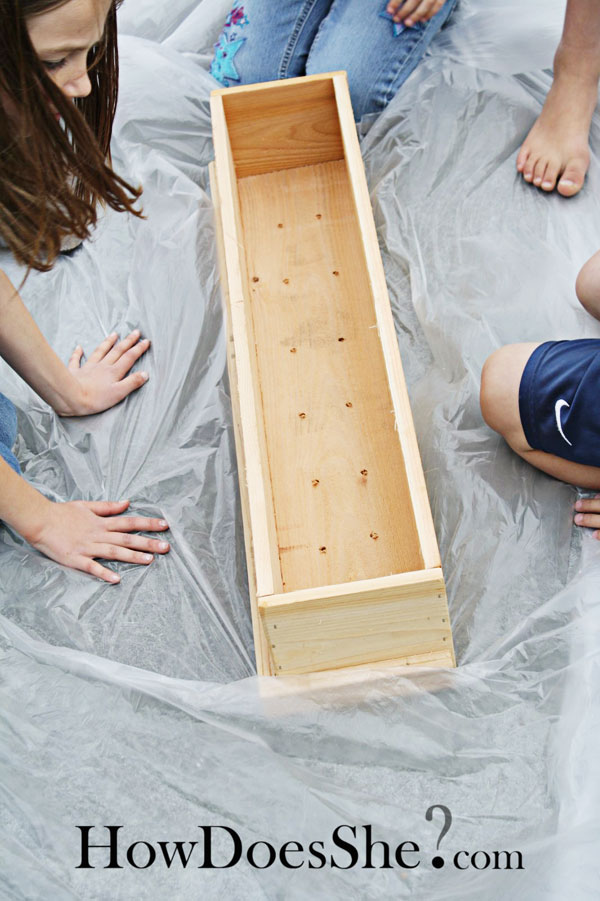
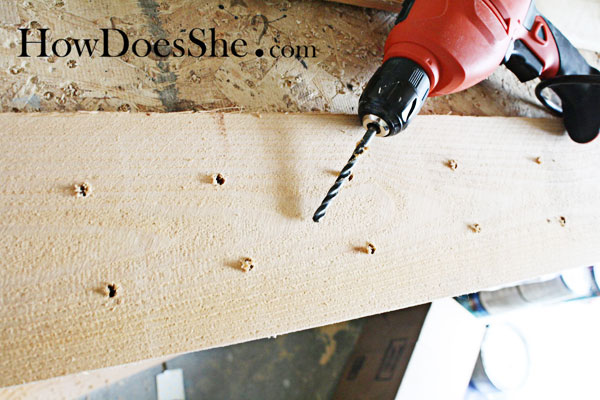 Creating drainage. Drill holes on the board that goes on the bottom. I think I got a little drill happy!
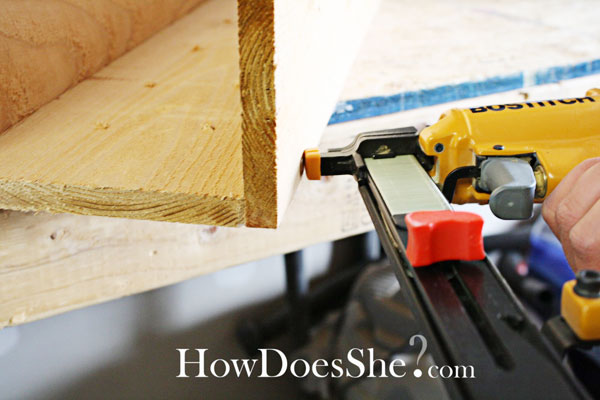
Use your staple gun to attach the sides….another one of my favorite tools. I have too many favorites! I asked for it for Christmas and my husband was so excited he told his dad…His dad was so excited that he wanted to go in on it too! I think they were both just as excited to give it as I was to receive it! I used 1.5 inch staples and about 15 on each side. It’s not going to fall apart!
If you don’t have a staple gun, get out the drill and use the screws.
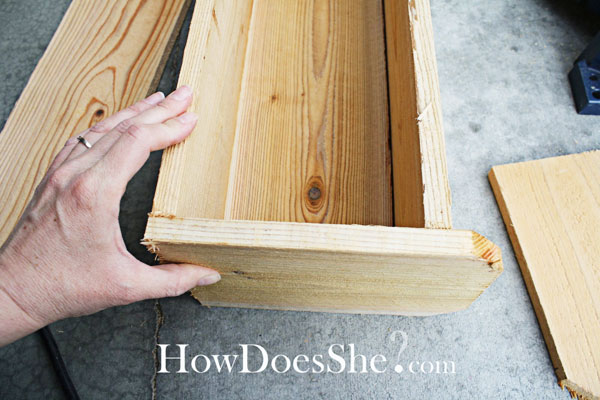
 You’ll have 2 sides and one bottom…
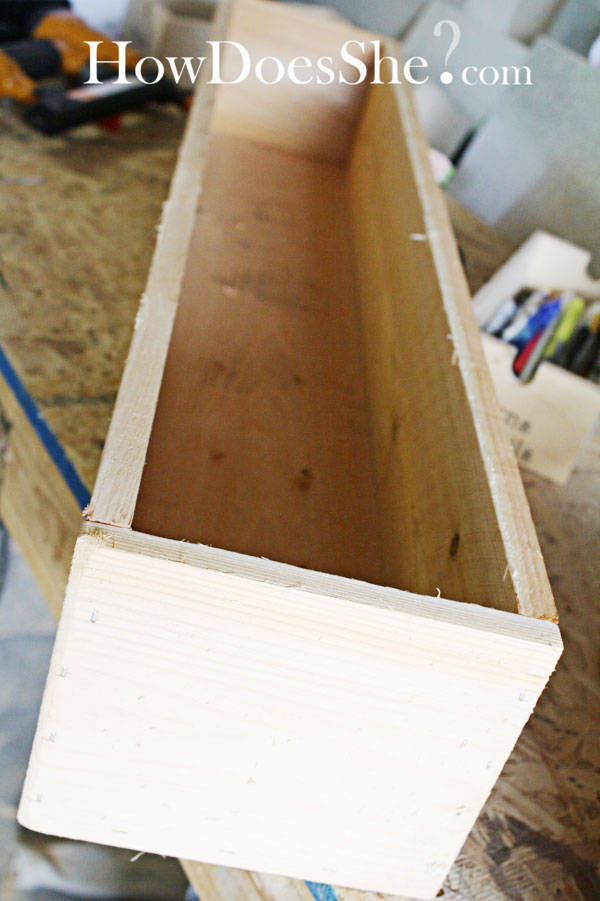 Adding the end pieces.
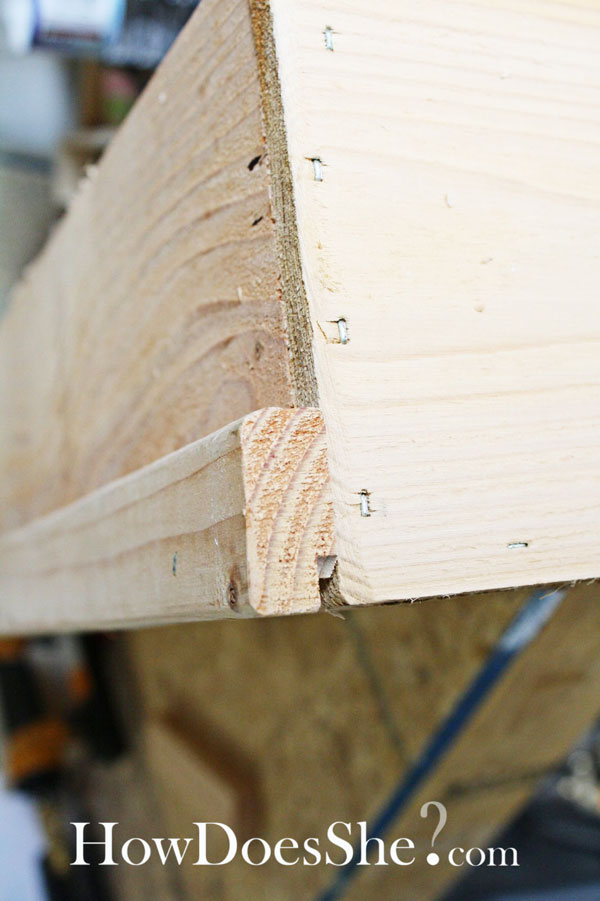 I found some scrap wood to add as trim. It is 1×2 inch wood that I was going to use to make a frame, but I changed my mind…kinda. I ‘framed’ the box.
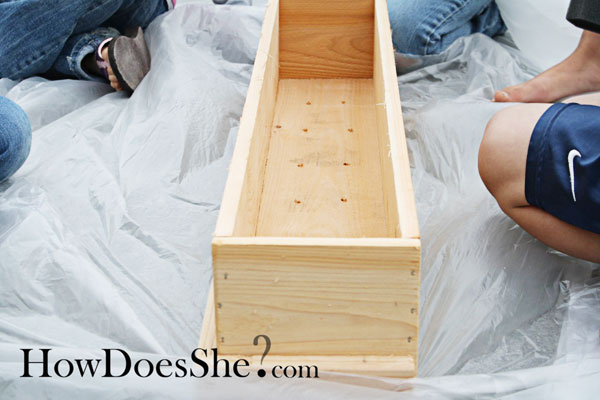 Enlisting the troops to paint! They were so excited to paint!
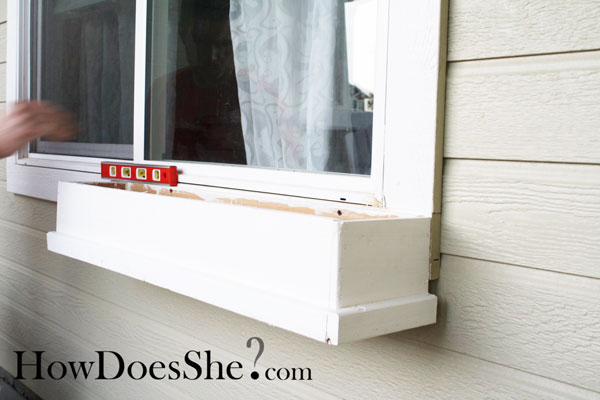 Then enlist your hubby to help you hang them…you really could just do it on your own, but he wanted to help so I let him. He needed to feel apart of the ‘coolness’! He’s a good man!
 Side one done…waiting for side two!
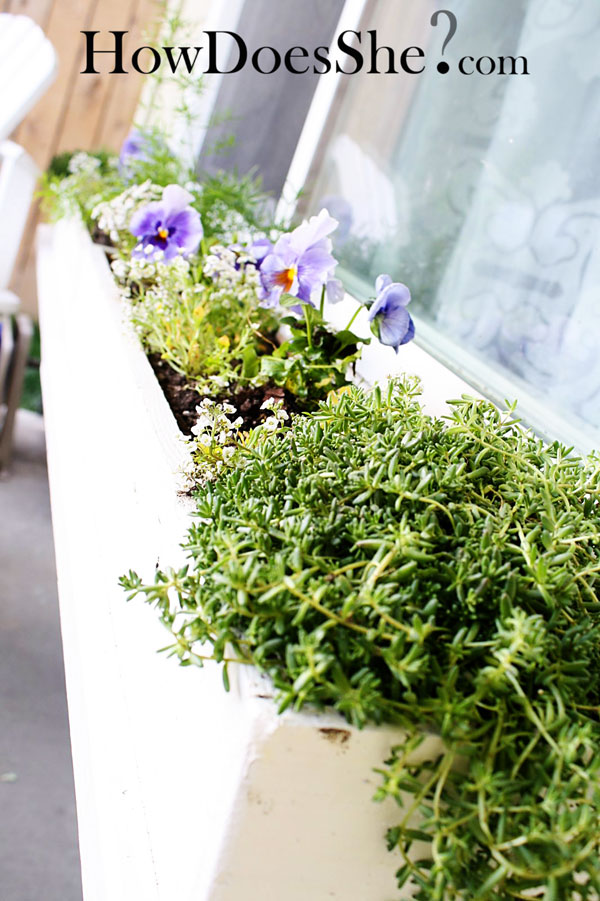 WonDERfuL! Colorful! DEliGHt.FUL! Yea for Spring.
 Can you tell I’m a tad excited on how they turned out? The day after we got them hung I made my husband drive by the house a couple times just so we…I could look at them again.
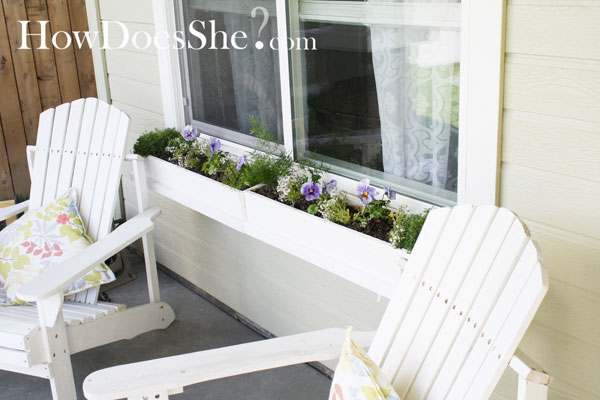 I put some gravel rock at the bottom to help with the draining. Now here’s to hoping I will remember to water them!
I got the chairs last year in a kit from Harbor Freight BTW. They were pretty easy to put together and a lot cheaper than buying them already made. I painted them white. I like white!
Readers…Any tips on keeping the soil moist?
Okay, just one more shot!
 A head’s up for Missy’s post tomorrow…it is super cute!!! I am excited to make them!



Heather says
I love it! They look great and thank you for always sharing all the details. And when I saw the chairs I looked them up on Harbor Freight’s website and there they were …. gotta get my hands on those!
.-= Heather´s last blog ..Debbie Downer =-.
Alison says
Yea! I am glad they still have some. We love ours!
Shelley says
Gorgeous Gorgeous Gorgeous!! So remember how I made you those lemon cupcakes the others Day? I think it’s your turn to make ME something! 😉 I’ll take 3 please! 😉 Okay Okay, maybe I’ll just come borrow your saw.
Alison says
YOu know the garage code…come on in!
Kim says
looks fantastic! I am like you… I have to always remember to water! lol… best tip, make the kids do it as a chore rofl…
Kim @
party inspiration
Alison says
Genius! It will be on the chore list!
Andrea Leland says
that is a sweet staple gun!! I want one! I am definately going to try this. I have a great big front porch that needs some love, it looks so bare, and we have two windows that we could add flower boxes to. We have a great antique rocker out there right now, but that is about it. I am wondering if the flowers will grow without direct sun? Our front porch is covered and no direct sun.
Is your area covered or does it have sunlight?
great idea! thanks!
.-= Andrea Leland´s last blog ..Chocolate Chip Oatmeal Cookies =-.
Alison says
No there is not direct sun, so I bought ‘shaded’ plants. Ask your nursery workers and they will give you the right ones. I did buy a couple that said ‘part sun.’ I am willing to just see if they work:)
Crissi says
Also, think edibles!!! There are a bunch of neat greens that look gorgeous when interplanted with flowers and grow well out of the direct sun. Try lettuces like ‘little gem’ or some coloured Swiss chard! I use chard in my ornamental pots and in places like my mailbox garden for height and subtle colour.
M says
Gorgeous!!! Wonderful job!
.-= M´s last blog ..days go by.. =-.
Angie Smith says
AHH!I was just telling my husband yesterday that I wanted a planter box under our big picture window! Thank you for the tips and the cheap solution! I can’t wait to head out to the hardware store to pick up some wood!
Alison says
We want to see them:)
Jackie says
My mom gave me a great tip for watering when you may not remember to. Have your kids take a handful of ice cubes out each morning on their way to school. Have them drop them in the planters. During the day the warm weather (if we ever get any) will help them to melt and keep the soil moist for longer. The boxes turned out so cute. Now how to get my husband to make me some?????
Alison says
Love the ice cube idea…no spilled H2O!
About the husband part…you can do it yourself. I really was an easy project!
Jackie says
If my husband allowed me to use the saw I would, but I am notorious for cutting myself. I have been banned from all power tools!
Amie says
I just have to wait too long on my husband to get things done in the shop for me! Go to Lowe’s they will cut your wood for free! as many cuts as you want….I imagine as long as that is not too excessive….really though, they have this huge sweet saw that they use!
Terri D says
Oh if only my house did not have horrid vinyl siding!
tiffany says
Good job!
Philip says
$3.12 for the window box, $500 for the tools to make it. 😉 I am just giving you a hard time. They look great. I made a similar set for my wife a few years ago.
.-= Philip´s last blog ..They Are In Good Hands =-.
Cherie Z says
You never cease to amaze me!!! I love everything you make….i have a miter saw in the garage still in the box(I’ve had it for about 5 years!! …I bought a 2X4 the other day to make something out of!! i just love the smell of wood !!! I need to get a nail gun and a compressor now!! How much was your nail gun?? keep these projects coming!!!
Alison says
Congrats on getting it out of the box! 🙂
I don’t know how much the air gun was, but I know they bought a basic one for me. Watch for spring sales or just use your drill with screws until you can get one! We want to see your projects BTW!
amy says
Anyone know anything about drilling into stuco?
Jane T says
I know they make a drill bit for drilling into brick and cement. Ask at the Home Depot or shop like that. I bet they have a bit for stucco too.
Michelle Holmes says
I wouldn’t suggest you drill into stucco. There is no turning back. Stucco has an underlayer of wire. You have to drill really deep to be able to grab something solid. Perhaps you could make it a flower box on the ground or put it on a short table. we’ve had stucco for years and I’ve had to hire a professional when our stucco breaks.
Kathleen says
i made a double window box out of cedar so i could have a little garden on my apartment balcony. i used the cedar fencing and just had one on the ground and one at the height of my top rail. it was fun! you could do the same thing to avoid drilling in to your house, plus we had fresh parsley, rosemary and cilantro! i put in flowers, tomatoes and strawberries too. so instead of the little short sides and used a long cut to attach them to each other bunk-bed style.
Chelsea says
wow I love it!! Great idea- I actually have been wanting to do something like this for awhile now since the town home we rent doesn’t allow us to plant anything in the ground!! Thanks for sharing
Sarah says
I love it! Thank you for showing how easy and pretty it can be!! I think that would look lovely on our house! We are prepping it to sell so that might be a nice touch!!
.-= Sarah´s last blog ..Help Lord, I’m Getting Ready to Start Homeschooling My High Schooler E-Book Review =-.
Kari @ Ucreate says
You gals are always sooo creative!
I must feature this window box!
.-= Kari @ Ucreate´s last blog ..Sponsor Giveaway: Madison Reece Designs =-.
gouldmanj says
Can you please mention how husband put on the house. It is something that I would have to do myself and not sure how to go about it.
Alison says
Ya…he just drilled it in. He pre-drilled a hole with a small bit so the wood wouldn’t crack and then used a 2 inch screw. He used 3 screws and drilled them straight to the house. Does that help?
Diana says
If you add some peat moss to the top it keeps the soil moist longer. But if it is in the shade it should dry out too fast. Good luck and great job!
Chris says
Yes, I too would like to know how you attached them to the house. thanks!
Kristin Johnson says
just thought i would share a quick tip I learned last summer. instead of putting rocks on the bottom of big planters you can use crushed soda cans. Much lighter than rocks! yoyr planters look awesome!
Alison says
Awesome…thanks for sharing!
Kelley says
Hmmm…thank you. I have a couple of cedar fence posts like that from a recent patch to our fence. It looks very easy to do..thank you!
.-= Kelley´s last blog ..NO! The "birds and the bees" already? =-.
pamela ponder says
I love it!!
.-= pamela ponder´s last blog ..MY SON GOT AN AWARD FOR BEING A GREAT CITIZEN!! (helping a lady from a pitt bull attack =-.
Laura says
OK, this is SO my next project! I’ve wanted window boxes ever since I visited Europe where they can be seen everywhere! Our home needs some curb appeal… I think this will be a good touch! Thanks for sharing the cheap solution!
Amy @ Positively Splendid says
What a transformation!!
.-= Amy @ Positively Splendid´s last blog ..Beguiling blossoms (a metal flower tutorial) =-.
Kowanda says
Awesome! I think I can make window boxes now.
TammyM says
That is beautiful! Awesome project and tutorial!
.-= TammyM´s last blog ..Pop Cans to Roses =-.
karen day says
Love the window boxes! Another great thing to put in the bottom instead of rocks is styrofoam peanuts. Very light weight and a good way to recycle. Also, the best way to keep the plants watered is to start with some Miracle Grow (or other brand) potting soil that contains the water retention additive. It’s wonderful for absent minded gardeners like me.
Crissi says
I use the insides of diapers (those crystals!) mixed in with the soil. They expand and build so much moisture! They are great for ornamentals. I’m not sure I’d use them for edibles.
Beckie says
Spring has sprung…it looks great. Awesome job Alison.
.-= Beckie´s last blog ..Project Completion =-.
Nancy says
so lovely! I am going to make one too!!! Thanks for sharing.
stacy says
That is truly amazing and you are so talented!
AmberLee says
Alison!
They are beautiful! and
I have TOTALLY been on the look out for a good window box tutorial. thank you, thank you for reading my mind.
.-= AmberLee´s last blog ..Flower Rings for Mom =-.
Alison says
Amber you are cute…you are welcome. I tried to read it:)
Shea says
Those are fantastic. I came across this website and don’t know if you know about it but it is great for do it yourself woodwork for women. Hope you enjoy it. It inspires me.
http://www.knock-offwood.com/
Joleen Haag says
Love these super cute window boxes. I have vinyl railing on my deck and up my front steps to my house. Do you think these can hang over the sides as well? I need something to spice it up!!
.-= Joleen Haag´s last blog ..Snowing =-.
MERoot says
One of the best things to use to keep moisture in your plants are water crystals. They swell up when water is added so you don’t need to water as often. Also they are just really cool to have some science fun with your kids. You can find them and some experiments for them at http://www.stevespanglerscience.com/product/1283
No I’m not affilated w/ Steve Spangler…I’m just a science geek 😉
Alison says
I love science…thanks for the link!
Lisa says
I learned the hard way last summer, planter boxes dry out easily…line the boxes with plastic, provide drainage holes to match up with the holes in the boxes and water with Miracle grow.
Linsey says
Wow, that made a huge difference, it looks so good! How have I NOT BEEN HERE? Thanks to tatertots and jello for sending me… I don’t know how I’ve missed your site. Fabulous!
Denissa says
Love it! I’m new to your awesome blog! Can’t wait to catch up 🙂
Amy says
I wished I owned a house to do this to!
Jen says
Simply- beautiful. I’m impressed. I’m coming over from Tatertots and Jello- entering your contest over there. Thanks!
Jen
.-= Jen´s last blog ..The Baby Times! 4th Edition =-.
shelly (cookies and cups) says
Gorgeous! Now I just need a circular saw 😉
.-= shelly (cookies and cups)´s last blog ..Snackity Snack =-.
Jodie says
Your projects are so cute. I just love all your posts.
I have been using the water crystal things that swell up to 20 times there orginal size. You can buy them at D&B Farm and Garden store or Fred Meyer. They are in the garden department and come in a small foil bag ($3 ish) or a plastic jar ($8-$10 ish). I don’t have the bag still but they are easy to find. Good luck.
Jodie
Kim Walker says
This is a great tutorial! Thanks for the complete instructions! Love it!
Creative2xmom says
These turned out so good. I love them! Be sure to stop by my place and link up on Monday. I’d love to see you!
Jonathan says
One of the best things to use to keep moisture in your plants are water crystals. They swell up when water is added so you don’t need to water as often. Also they are just really cool to have some science fun with your kids. You can find them and some experiments for them at http://www.stevespanglerscience.com/product/1283
No I’m not affilated w/ Steve Spangler…I’m just a science geek 😉
heather says
Thank you for posting this. I have saved it and will get right to it as soon as we move into our new house this summer. I have always wanted a porch and now that I am going to have one these will look so pretty on it.
.-= heather´s last blog ..How to do a Triathlon =-.
The No Money Mama says
I love window boxes!
Julie H says
Love the window box! Looks pretty easy.
Mine’ll have spices!
Nikki says
I would LOVE to have window boxes on my house. But the base doesn’t allow those kind of modifications. Maybe when I get my own home one day. You make it look so easy!
.-= Nikki´s last blog ..Who needs a flashlight anyway? =-.
Kamaile says
Yes!!! I was just about to buy some but now I don’t have to;). We just finished a small deck in front of our home and I thought what better to dress it up with then a lovely, fun and functional flower box. I am soooo excited to get started. Hmmmmm, I wonder what time our Home Depot closes?
David says
Neat. I made a similar planter box for my sister’s front deck/porch. The planter was a thank you for keeping my garden watered while we were on vacation.
I used a pressure treated fence picket/board. The ends are slightly tapered (wider at top than bottom) and I used the dog-eared end as a pattern so that each end had a dog-eared top – a little decorative. I painted the finished box with a faux stone spatter paint and added some Marigolds to finish things off.
The tapered shape wouldn’t lend itself to being a window box, but works well on deck or other flat surface.
Julia @ Hooked on Houses says
What a bright and cheery porch makeover! Love how it turned out. Great job! 🙂
.-= Julia @ Hooked on Houses´s last blog ..This Week’s News from the Homefront =-.
Michelle @ Sweet Something says
Great idea!! The boxes really added a lot of detail!
.-= Michelle @ Sweet Something´s last blog ..Ribbon Detail =-.
Jane F @ Atticmag says
The planter looks like it’s always been there. That’s the very best test of success! Great job. Jane F
.-= Jane F @ Atticmag´s last blog ..Picture Wall Possibilities =-.
RJ @ A Life Designed says
Great project! I love window boxes.
.-= RJ @ A Life Designed´s last blog ..We have coat coverage! =-.
Kenzie says
Love them! Great job!
.-= Kenzie´s last blog ..Bridal Shower Invitations =-.
janny says
Well, cool boxes. I think I’ll make a zillion and change my window screens to the pull apart kind to water from indoors (easier to remember). I use the watering crystals, but I also use a tray, rocks, and then soil. Water can drain to the rocks/pebbles and go back up to the plants. Or use a side-poked water bottle just laying in among the flowers… tiny holes to leak out water.
Mrstn123 says
I would love window boxes. How would you go about attaching them to a brick house that has a little bit of a brick ledge outside? I think I want to be able to remove them for the winter if possible.
Rose :: FineCraftGuild.com says
my goodness, you are one handy gal! they look terrific!!
link up this tutorial will ya at our next mclinky party for only the most fabo diy projects…. such as this one!
tada
.-= Rose :: FineCraftGuild.com´s last blog ..Crafting World Peace =-.
Jeanine says
Love the idea, I knew there was somewhere with directions on how to make these! I have the perfect spots to put them, too!
BTW regarding keeping the soil moist, I have bought at HD or Loew’s a or even a garden area at Target etc.
It is a gel clear that comes in a plastic container and you mix it up with your soil and when you water it expands HUGE! That way you won’t have to water as much!
Michelle Holmes says
I made two of these but they were significantly larger. I used 1 X 6 cedar (four high) and used 4X4 cedar posts for the corner supports. Total dimensions was around 4 ft long by 2 ft tall by 18 inches wide. I didn’t put a bottom on it because I put them in my backyard along the fence (to cover up holes that the neighbor’s dog dug), filled it with dirt and then planted strawberry bushes. They turned out cute. Next time, I’ll use 2X6 cedar to make the sides a bit stronger.
Jackie says
I LOVE them! I have been wanting to do a window box on my home for a while now, but I am a little nervous to make my own! Yours turned out great! How did you attach it to the window? I have no clue where to start, but I this post helped a lot…thanks so much! =]
Alison says
WIth really long screws! I made sure they were in studs. Oh and one thing I’d do next time is fill the bottom with something lighter…peat moss or something else that our readers suggested. Thanks for the kind comment BTW!
Inspire Me Heather says
Wow, another great tutorial – you rock! I linked this one to my window box project post too, it’s fantastic!
Jenny says
Is there a reason you did two for the one window rather than one? Were you worried about bowing or was it for a different reason?
Thank!
Alison says
Ya I was worried it would be too heavy so I broke it up into two:)
Erica says
i would love to make this project but i cannot find lumber, especially cedar, for anywhere near that price! what is the secret?
Betty Lustila says
These DIY’s are wonderful!!! If you have a handyman hubby.. mine… not so much. If it doesn’t use duct tape, binder twine, sludge hammers, 10 penny nails and a chainsaw… forgetaboutit!
Angela says
Great job! This has given me an idea for my backyard. Thanks for the inspiration. 🙂
Lynette says
Thank you so much for posting this!! I wanted a window box without paying the high price and this worked perfectly. It cost me $5 in wood to make a 3 foot box and took only about 30 minutes to make. I am NOT experienced in woodworking, but it turned out beautifully! My neighbors are going to start wondering why I keep stepping out on my front porch to admire it 🙂
Vickie B. says
I love the flower boxes! I am slightly confused thou when you said to buy two boards, but to cut three boards at 32″?
I also love your tools. You have a great family to gift then to you.
Trisha Marlene says
I have garden boxes like this on the end of my shed that are currently being occupied by green and purple bell peppers and sweet peas in the other. I strung string all across for the peas to travel and decorate while growing. To keep them moist I bought the glass water bulbs from Walmart for 99¢ each. It helps them not dry out so fast before my next watering session. I water once a day and it takes me almost an hour and a half to water everything. I think I went a little overboard this year! Good luck to you and I’ll be sure to visit your page often! It’s full of great ideas! Thanks and good job!
Adriana says
Hi! I just saw this on pinterest and would love to make some for my house. I have a couple of questions though. 1) what are gravel rocks & why exactly do you need them? & 2) can you say exactly how you put them up. I’m new at this whole gardening thing so I don’t really know a lot. 🙂
Cassi A. says
Love this!!!! Thanks for posting!! How big are your windows?
Sidney says
I like the boxes a lot. I use fence pickets for a lot of things.
One way to keep the soil moist is to mix the insides of a disposable diaper (the part that absorbs the liquid) into the soil. I haven’t done it yet, but it makes perfect sense to me.
Jess says
I have a question on how you handed the boxes? How exactly did you do that my house has siding thanks for helping!
Stephen says
Break open a depends pad, and mix the contents with the soil. It will retain more moisture.
Janet says
I’m going to make some of these, thanks for the inspiration. One thing, it’s probably a good idea to either line the boxes to protect against the possibility of rotting. You can also put some metal flashing between the window box and the house.
Joddy Gargagliano says
I love what you made. I would have loved to see the plants when they were mature – toward the end of the season.
JoJo says
To help with moisture, try water gel beads. From Amazon. They are small crystals. You
add water and they swell. And blow your mind, they are too cool.
In their swollen state, and to soil, mix well.
As your soil dries out, so do the beads, but when adding water,
to water your flowers, the gel beads will also take in the water,
once again helping with moisture.