Personalized Birthday Gift!
Sparkles!
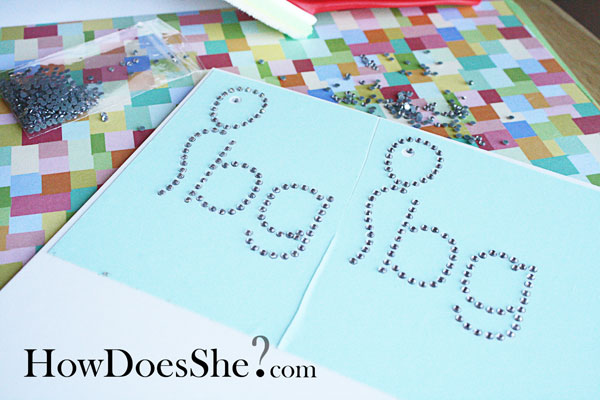
I am LOVING this sparkling (is that a word?) ability with the Silhouette craft cutter. My daughter’s birthday is coming up soon and she is sharing her party with her best friend. So FUN. I wanted to make them a twin birthday shirt to wear to their party together. Sillhouette to the rescue! (If you want a chance to win one, enter here.) I was going to have the shirts say birthday girl, but I didn’t want the words to go all the way across the front of the shirt. So, Alison suggested just putting the initials…I told her she was off her rocker, and then 10 minutes later I came up with a BrIlLiAnT idea – why not just use the initials??? They don’t keep me around for nothing! I downloaded a balloon template off their website, played around in the software until I had it just the way I wanted it and my design was born.
I thought after it would’ve been fun to put their names on the shirts or their initials, but {balloon b g} is what they are getting…and I am liking it!
Really, the possibilities are endless!
Sillhouette has a great video tutorial on their website, but here is my attempt at a picture tutorial on how to use the rhinestone feature with the Sillhouette Craft Cutter.
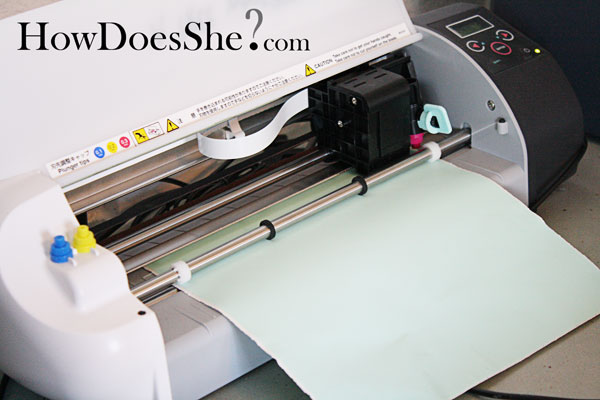
You saw the screen shot of how you design your template above. Once that is done, you load the template paper into the Sillhouette and put the pink blade in. I suggest testing a little area first, we didn’t have the setting exactly right the first time so we had to poke out the dots instead of just having them come cleanly off as they are supposed to. It wasn’t hard, but had we tested, we would’ve avoided this…I’m blaming Alison here.
The other thing we realized is we could’ve only made one template and used it twice instead of wasting template paper…again, Alison’s fault.
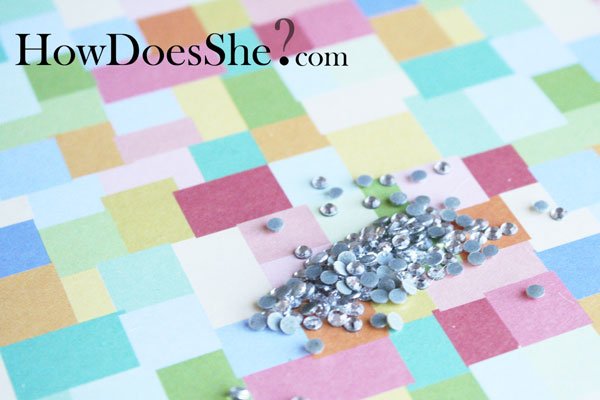
Admire the sPaRkLy rhinstones!
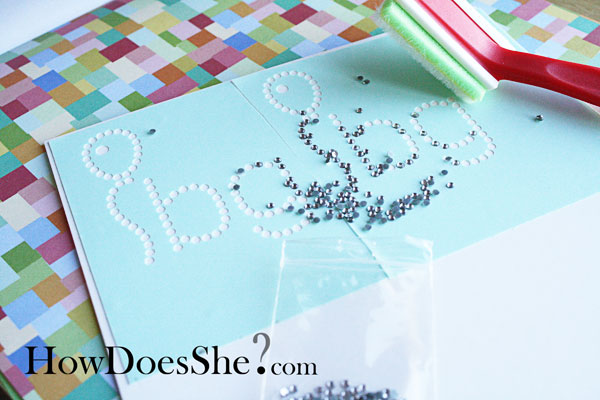
Brush them into their slots with the provided brush…
they all go into the slots and they are magically all face up.
Put the sticker paper over the top, rub the rhinestones onto the paper, the lift up your design!
Figure out wher you want to put it…left, right, center…just choose already!
Put shirt on ironing board with a cloth over the design.
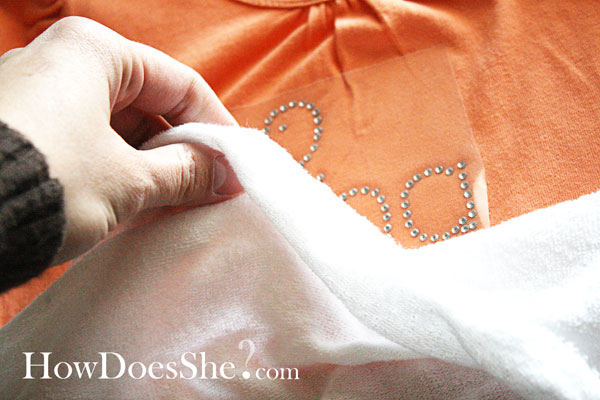
Pull off the sticky paper and…

I recently saw some pictures taken at a local candy shop from my photographer friend that I loved so I couldn’t resist getting the girls together for a little photo shoot… (thanks, Amy for the inspiration!)
dOUBLE tROUBLE!https://howdoesshe.com/personalized-birthday-gift/
Thanks Em, for letting me borrow your aDoRaBlE little angel for the shoot! And for teaching me how to make these tu-tus (how about a tutorial?)
Happy Sparkling!
We are participating in SkipToMyLou’s Made by You Monday – Thanks Cindy!





Katie says
Oh wow I had no idea you could use the Silhouette this way, how creative.
Craft Passion says
this is awesome. I used to placed them 1 by 1 and used uhu to temporary stick them on the garment.
looks like this is faster and neater way to do it.
will try in out next time when dealing with the rhinestone.
thanks for sharing
Ellen says
that birthday shoot is so cute! i second the tutu tutorial! P-L-E-A-S-E!!
Lori says
Can someone help figure out how to do this on a cricut. I loved both for different reasons, but decided on the cricut and love it… but would love love to do this.
Dina says
I love the personalization! Who wouldn’t want to do this? Thank you for step by step instructions. It makes projects seem so do-able!
regina says
Oh my! Ok this Silhouette is a definite must have. To think I purchased a embroidery/sewing machinge and a Cricut and thought that would be enough … to decorate young girls clothes … Please draw my name the girls will be begging for ‘bling’, transfers, and more wall art (vinyl)! I will wait to introduce the glass etching to my husband … I see his college logo’s on the french doors to his office (help!)
Carol Harlow says
I love it!
Nava says
Such a cute idea and love, love, love the birthday photoshoot (want to do something similar for DS’s bday)!!
er..did you now that rhinestones have lead?? I just came across these 2 articles: http://www.thesmartmama.com/disney-princess-pants-from-macys-have-lead-in-belt-buckle-cpsia-fail/ and http://www.rhinestoneguy.com/Lead%20Content%20in%20Rhinestones.htm So scary when you think about how many kids items have bling in them!!
ligaya says
OMG… definitely getting that machine. I love the bling bling.
God bless.
Veronnica Watson says
Have you tried the heat transfer portion of the machine? I was wondering what you thought of it. I’d consider purchasing this (it’s so cool!) but I’d like to know how this part works and if it’s good quality once it’s applied to the shirt.
Thanks!
annie says
That is such a cute idea. I did these with one of those wands you buy, with batteries, one sparkle at a time for all my grandchildren at a family reunion. We made little bags for the children to take home, but how much better would it have been with a Silhouette machine? WOW
I hate when I find something I really want, no NEED and have to either forget it, wait for Christmas or get a job. heh heh
~a
Nesleirbag says
What girl, big or little, doesn’t love sparkles! Could you girls do a tutorial on blinging sneakers?
Hani says
WOW…….. *speechless* I have GOT TO have that Sillhoutte Cutter!!!! can’t wait for March 31st;)
Jill Tirrell says
So Cute, love it! And for all of you fellow readers out there who would like a cricut to help with this and other crafts: I am having a giveaway right now. Check it out and spread the word!
Jill
womenwhodoitall.blogspot.com
Amy says
Those girls are darling! Love it – love it – love it!
Mary Ann says
What cute shirts!! What a great machine…
Danielle Huston says
I bought a silhouette for Christmas, and LOVE IT! I’m still learning too, so keep the ideas coming!!! There’s alot of tutorials for the Cricut, but not Silhouette! Personally I think the Silhouette is better! Thanks!!!!
Laney says
The girls are too cute! The shirt is too.
Jeanette H says
OMG…I am salivating! This machine is SUPER COOL!
Shelley says
Those pictures of the BFF shots melt my heart! Adorable! -Love the bling! 😉
Melanie @ Whimsical Creations says
I just LOVE it!
Callie Perkins says
L-O-V-E LOVE!!!
Mindy says
So cute!
emily says
I love these pics! Love the craft cutter. Love the post… and I guess that we could swing making another tu-tu! How about a rainbow one?
Blenda Koder says
I would totallu use this machine….I have wanted a cricut…but think this would be more suited for me! I would use it in several ways, scrapbooking, and heat transfer as well as BLING!! LOVE THAT BLING!!