*We’re proud to partner with Lowe’s in this paid collaboration to bring you a DIY that you can easily do at home!
I love spring, when the weather warms up and our family migrates to the back yard to play a game of catch, swing on the swings, or eat grilled hotdogs on the back porch. But every time I step outside to survey the damage from the rough winter months, I come back with a to-do list of things that need to be done. This year, re-staining was a huge priority and Lowe’s is always our go-to for spring projects.
My home is five years old and just needed a “refresh.” I’m a huge believer that stain can completely transform the look of your home without much time, effort, or expense. Re-staining adds immense curb-appeal and helps keep your home looking pristine. So when things just aren’t looking as spiffy, think about how a fresh coat of stain could renew a swing set, pergola, or wooden fixture.
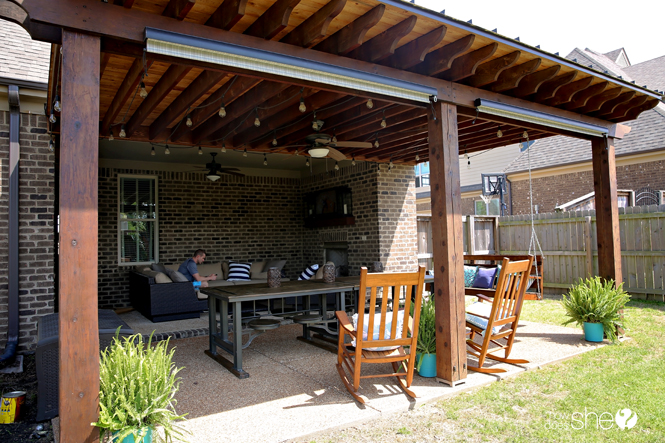
How To Re-Stain a Back Patio Covering in One Day
Time is money when you have a house full of kids and two full-time jobs – and between Brad and myself, we cover all of those bases. Our home has three pillars on the back patio that needed re-staining and we didn’t want the project to drag out more than a day. With the help of a few fancy tools, this re-stain job was a breeze. Here’s how to take your wood from drab to fab in just one day!
Tools You’ll Need
I headed to Lowe’s because they always have exactly what I need. And the Lowe’s employees are always so present and helpful. Here’s what you’ll need;
- A sander.
- Good quality stain. I chose Cabot Gold (in Sunlit Walnut)
- A stain sprayer (*This will change your life! It is 100% worth the expense and makes the job incredibly quicker. A stain sprayer is the secret to a 1-day stain project for sure.)
- A mask (to protect your nose and mouth)
Steps for Re-staining a Back Patio
Sand – If you’ve ever sanded by hand, you know it can be time consuming AND labor intensive. While I don’t mind a good arm workout, I’ll save that for the gym and and save a TON of time and money by using and electric sander.
Quick tip: Always use a face mask when sanding to avoid sawdust inhalation.
Wipe or spray down – Once everything is sanded, your raw wood will look something like this. Make sure to spray it down or wipe it with a broom, towel, or very best… a tack cloth (which is a sticky cloth that traps dust like a charm).
You don’t want to stain over dust and dirt. Start with a clean, smooth slate.
Stain & Seal – A huge time saver is making sure you have a quality stain AND sealant in one. Cuts staining time in half by using a 2 in 1 product! Again, I used Cabot Gold for beautiful color and protection from weathering.
Allow the stain to dry for a complete 24 hours. (Check the forecast and make sure there is no rain on the immediate horizon.)
And that’s it. A simple re-stain project that only takes one day and makes a noticeable difference curb appeal.

Quick Swing Set Re-Stain
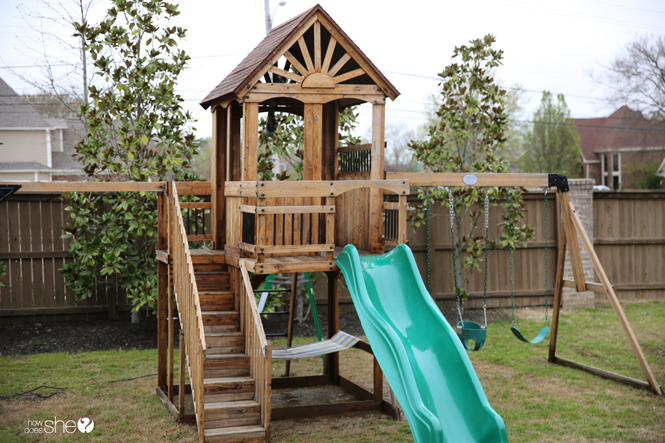
We were so inspired by our quick one-day project, that the next weekend we took on our swing set. Although it was only a few years old, daily exposure to sun and the Memphis rain takes a toll on wood.
(Pictured above: unstained swing set)
(Above: After Power-Washing Swingset)
(Pictured above: final swing set after one-day re-stain with Cabot Gold Sunlit Walnut .)
The secret to one-day re-staining success was definitely the stain sprayer on this project. Such a breeze! I kept thinking back to my first novice staining experience that took an entire week to re-stain our first hand-me-down swing set.
Time is definitely money and I like saving both.
Our family practically lives in the back yard and whether it’s my boys kicking a soccer ball back and forth or my three girls playing house, the entire family ends up there nightly to share special family moments.
Giving our wood accents a re-stain was a simple refresh that didn’t cost a lot, but made a huge difference in the appearance of our home. Chances are you have a few spaces that could use a re-stain too.


Leave a Reply