We posted these last year when we had a few followers (thanks to our moms…they were our first followers). We wanted to make sure you saw the fun things you can do with a simple block.
So on with 10 things to do with a block!

Idea #1
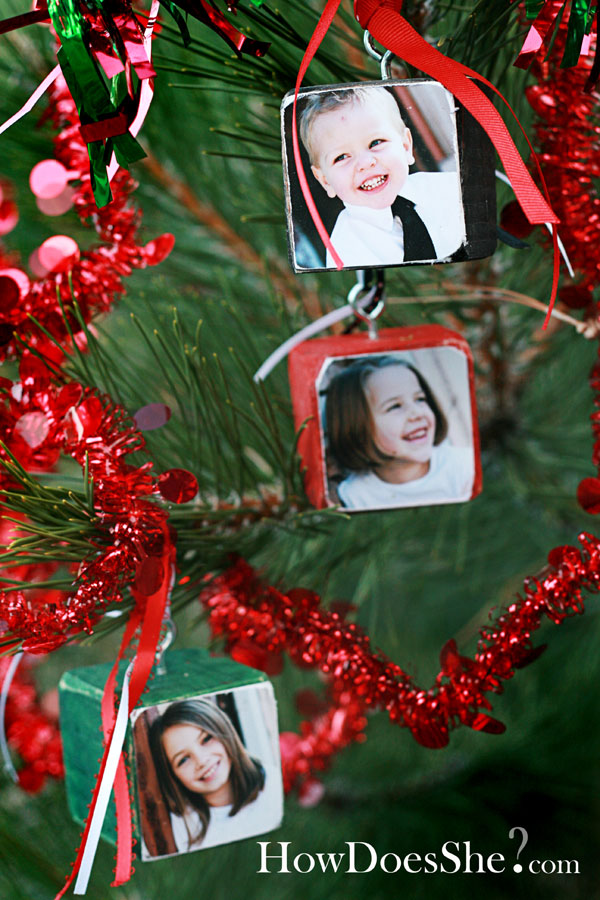
Make a Christmas Ornament
1. Paint your block (I just used craft paint).
2. Mod Podge a picture on one of the sides.
3. Sand any leftover picture paper off.
4. Screw in an ‘eye’ in the top.
5. Add ribbon
6. Admire
Idea #2
How about 9 Christmas Ornaments
1. Mod podge 5 sides of your block with scrap book paper. (For 10 steps for perfect mod podging CLICK HERE)
2. Mod Podge a picture to the 6th side.
3. Sand any leftover paper off. If you want to stain the edges to give it a shabby chic look…this would be the time:)
4. If you wanted to stain the edges now would be the time. It will give it a shabby chic look. Keep it plain for a more sleek look.
5. Make your Christmas tree a true ‘family tree’
We wanted to decorate our Christmas tree with pictures of our family and put a big fat red ribbon around the entire tree. A friend is going to do a BSU themed tree and mod podge BSU paper on the blocks and then take pics of her kids in BSU uniforms…go Amber! We want to see it when it’s done!!!
Idea #3
A Picture Holder
How cute would this be on a fire place mantel or on top of a computer at work!?!
1. Mod Podge all the sides
2. Drill a hole in the top and stick a piece of wire in it! I found the wire at Lowe’s. .
3. Cut out of vinyl the name of the ‘featured’ and put on one side of block. You can use yourcraft cutter for this project!
4. Put in your picture!
Idea #4
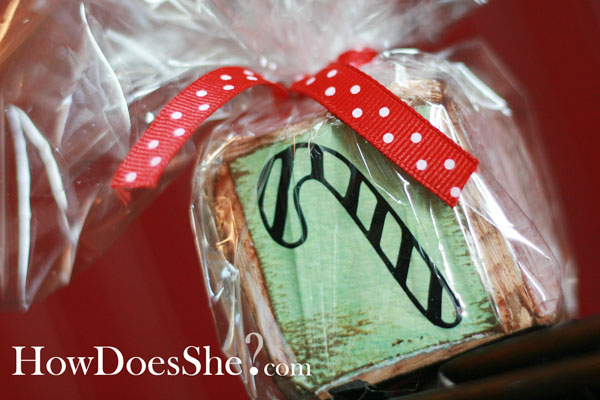
Neighbor Gift
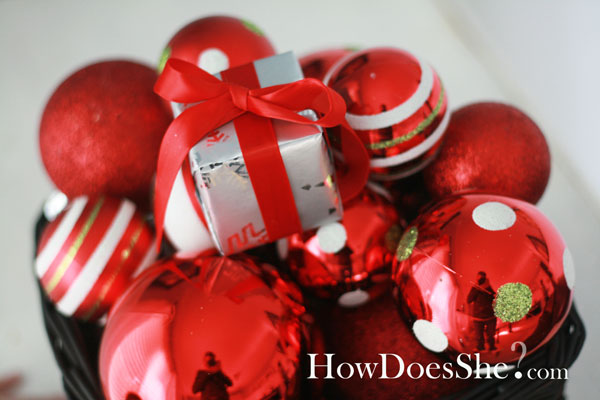
1. You think we’d let this pass with out making a neighbor christmas gift!!!
2. Mod Podge all sides with cute paper
3. Put some holiday vinyl on and wrap it like candy(no calories)!
4. Love the poka dot ribbon!
Idea #5
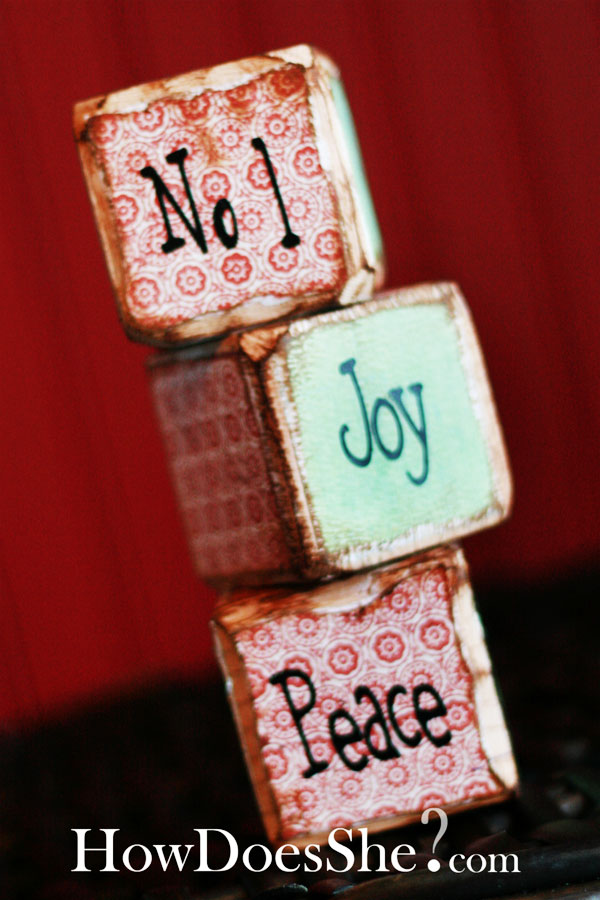
Stacking Blocks
1. Mod Podge and add vinyl
2. Don’t let your toddler play with the blocks…the first one said NOEL.
3. Display on a shelf or in front of the Christmas tree!
Idea #6
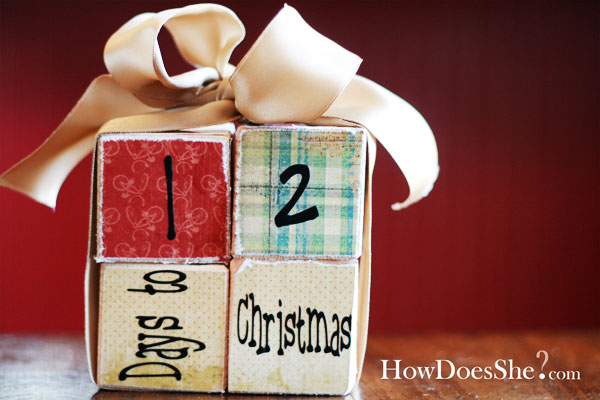
Christmas Count Down
1. Mod Podge 4 blocks
2. Add the numbers: 1,2,6or9,0,7,8 to the first block
3. Add the numbers: 1,4,3,5,2,0 to the second block
Idea #7
Blocks
1. Paint the blocks (easy) …
2. Put the ABC vinyl on them (easier)…I used the ‘Narkism’ font 1.8×1.8 in dark brown.
You can cut small vinyl letters and sayings with your Silhouette…or craft cutter.
If you are spelling out a name, make sure to put the letters of the name on the blocks first – you don’t want to put the ‘L’ and ‘U’ on the same block or you can’t spell out the name.
How fun would this be to give at a shower or to nieces and nephews for birthdays!
Idea #8
Kid Stackers
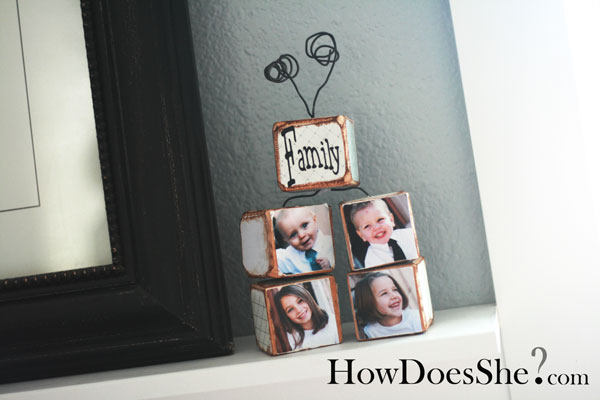
(Great for Grandparents…put all the Grandkids!)
1. Mod Podge the blocks, add the picture (just like in the ornaments #1)
2. Drill a hole all the way through the blocks.
3. Put wire though them.
4. The top block will have both wires sticking out. Curl them with wire cutters.
5. Add vinyl ‘Family’ to it (‘Black Boys on Mopeds’ Font 1.6×1.6)
Idea #9
Presents
1. Wrap the blocks and stick them around the house for decoration.
2. -OR- put an eyelet in the top and hang them from the tree…just like #1 (Click Here to see it)
…do you see Missy in the photograph?:)
Idea #10
Kid Puzzles
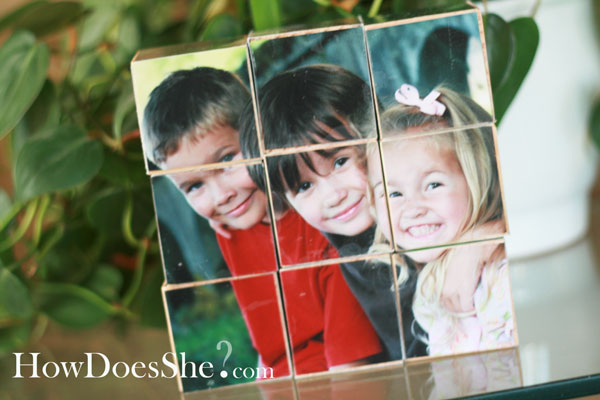
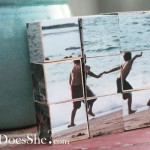
1. Take 9 blocks and put them close together. Mod Podge a 6×6 picture on them. Take an exact-o knife and cut out the individual blocks. OR cut the 6×6 picture into 2×2 squares and Mod Podge them on after you cut them.
2. Flip the blocks to a new side and do it again.
3. Mod Podge all 6 sides with different pictures.
4. You’ll have created 6 puzzles with your favorite pictures!
5. Give as a gift to family…ya right…this one is a keeper!!!
HAVE FUN!!!
{We’re linking up to these great parties!}









discours says
Un discours de mariage rédigé en bon français, foncez!
rose says
what kind of picture paper do you use for the blocks?
sarah says
When you mod podge the picture, do you mod podge over it with the foam brush, or do you put a little under neath the picture, then place It on the block? I’ve never used mod podge…. so I’m not sure of all the tricks and what not haha.
Ananasa says
SO many amazing ideas with one simple item! Truly awesome! Thank you for your inspiration and wonderful creativity!
http://www.ananasa.com = Home For Handmade
Jules says
Love these ideas! I am having my dad cut some blocks for lawn yahtzee…we all love regular yahtzee these would be a great addition to our camping games!!!
kat says
wowza ! I am so going to go get some wood blocks and do these things with my boys, that I am nanny to (they are 3 and 4/5) and I want to do lots of crafts and educational things with them . these are great ideas to have in my arsenal of “keep them busy times” in my bag of tricks I will be bringing with me.
-KAT-
Ameila says
I love all the ideas for these blocks. Can be used for every holiday. Really love girl things.
http://www.twirlygirlshop.com
Nancy says
I want to make the photo puzzle blocks but Costco does not print pictures in 6×6 size, just wondering what size did you order?
JenB says
Did anyone else have an issue with the pictures bubbling up after a week or so? I just did some picture blocks for Christmas gifts, but some of the pictures have started to bubble. Am I doing something wrong?
ISO Certification Bodies in India says
I loved this idea…made them a few weeks ago and have finally posted to my blog! So cute and super simple!!!
stefanie says
Hi just wondering how do you get a 6×6 pic? I print pics at walmart and you can’t get a 6×6 photo…HELP! Thanks,I love this idea and can’t wait to get started!
Shelley says
Just order a larger picture (8×10) and cut it down. 🙂
Gail Drahos says
Hi, I am looking for some recipes I found, but now I can’t find them. The link is letbirdzfly.blogspot.com/2012/05/fathers-day-gift-dry-rubs-@htm, however the site says there is no page. Your blog name came up, so I thought , maybe you would know how to get there!! Thank-you for any help!!
Diaen says
#7 I sanded mine just a little and it turns out white, but I didn’t go deep in with the sanding and I really like them. Turned out great. Thanks again for sharing your ideas and I look forward to the newsltr.
Anna says
I made idea #10 for my mom for Mother’s Day and she loved it. It was such a fun and easy project, I think I might have to make one for myself now! 🙂
Anna
http://www.askannamoseley.com
Bridget Burton says
Cute ideas. Thanks for sharing. I have an almost 5 year old grandson and am always looking for things we can do together
JOyce gessner says
awsome ,I love your ideas, I own a wood working shop and have lots of scraps. thanks
Anna says
LOVE LOVE LOVE all of these ideas!! So adorable and creative! I could spend hours checking out all of the wonderful craft ideas on your site!
Jen E says
So many great ideas! Can’t wait to try some!
Penny says
I love this craft idea and the puzzle picture is so sweet for a gift. Thank you for sharing.
Lindsey says
My local home improvement stores (Lowe’s or Home Depot) do not carry untreated wood larger than 2×6!! Bummer!! Anyone have success in other places?
rebecca spahr says
I am a dingbat. I want to make the photo puzzles. But, I can’t figure out how to print my photos 6×6. Any tips?
Deebi27 says
Wonderful ideas, every single one…a blog keeper! My class could do some of these for holiday gifts for parents! Thanks!
Kim Wilson says
Love your puzzle block idea with family pictures. Can’t wait to start working on our own set. Thank you for the inspiration.
Kimberly wilson
BreeAnn says
These ideas are sooo cute! I love your site…keep up the good work! 🙂
Michelle Holmes says
How would you configure the numbers with three blocks to do a 100 countdown for the 100 days of school?
Molly says
Great ideas! Check out the block project I did for my little boy at Whispers of Joy
http://www.whispersofjoy.com/1/post/2010/04/all-finished-blocks.html
laura says
i did #10 (puzzle block) about 5 yrs ago as a gift for my SIL, it was a huge hit!!!
Catherine says
I made 6 photo puzzles for Christmas this year! They turned out great! Thanks so much for that one! Check out the one for my kiddos here: http://www.facebook.com/album.php?aid=607406&id=653815343&l=5e1edba6fe
Melissa Dixon says
I made some really awesome photoblocks as gifts for all the grandparents. They came out fantastic but I was so disappointed to find out yesterday that some of the photos are bubbling. Anyone have any idea about what the problem could be?
Marci Sant says
I can’t get the link to work for the 10 perfect steps for mod podging… HELP!
Michelle says
Love all the ideas! I want to do #3 to display holiday cards with Joy, Noel, and Peace, on the blocks. Question – what gauge wire do you suggest? I used floral wire for something similar, but found it a little too flimsy.
Nancy says
My daughter made one of those puzzles for me a few years ago and I treasure it! She changed all the photos to sepia first which turned out really nice. They’re also a great idea for wedding gifts. It would be cute to wrap each block of the puzzle up like little gifts!
Ruthanne says
I finished some puzzles today. I love them! I can’t wait for my boys to open them at Christmas. they are going to love seeing their pictures on a puzzle. Thanks for the great ideas. 🙂
Katie says
I was thinking about these blocks and a great way to get a lot of these for a great price is to go shop at Home Depot or Lowes… get a 4×4 post (they usually run about $9-10) for 8′ length. This would make 22-24 blocks. You can even cut them in the cut center so you dont have to do it at home. So that would make each block about $0.45! Pretty good!!!
Jenni says
The thing you need to remember about lumber is that a 4×4 is actually a bit smaller (3 3/4 or 3 7/8 – something like that) so that you wouldn’t get TRUE 2×2 blocks when cutting it down – however – continuing with your thought – an 8 foot long 4×4 is 96″ if you cut that down into 2 inch segments you’d have 48 2x4x4 blocks and then cut those into quarters (making approximate 2×2 blocks) you would have have roughly 188 2×2 blocks – you would lose a few block to sawdust as you cut things down. Even if you spent $20 for an unpressure treated 4×4 that would make it around 11 cents per block! Oh and for ease I usually have the lumber center cut it down to 2 foot long piece so that there is less bulk for me to have to manuever on the table saw.
Heidi K says
Love the ideas! I want to do #10 for Christmas. Just wondering how you got a 6×6 picture. Did you cut a larger one? Thanks.
Deitra says
These ideas are SOOOO adorable. I especially love number 6.
kristenduke says
I LOVE all the block fun, but am having a hard time finding them in bulk. I see them at Michael’s for $1 each, but never sales. Any suggestions online? Kristen in Texas
cimly says
how do you make it look burnt?
.-= cimly´s last blog ..Schools Out! =-.
Kristen says
So…i LOVE your site!!! Like LOVE it!!!! I have never been very “crafty” because i can’t really sew and i have not so pretty handwriting and yall have now made me a crafter and i am so excited! I actually just got a Cricut to do all my vinyl! I’m so excited! Just made my first blocks. I was wondering, as a very new owner of a cricut, is there a cartridge that you can custom what word you want and have the word actually connect, not just cut individual letters? Thanks!!!
Alison says
Congrats on getting a craft cutter! We are big fans of vinyl lettering. The Circut is a awesome machine, but I just don’t have one. I have used one and think they are awesome, but I have the Silhouette. They cut the same, they just run on different programs, so I hate to say this, but I don’t know how to do that on the Cricut. I know there are a lot of U-Tube video’s on the Cricut. Someone is bound to go over that.
If you are asking because you want to keep the letters all in a straight line…One thing you can do though is after you cut it…put blue painters tape over the letters and rub over it. Then remove the vinyl backing. The letters will be stuck to the tape. Move that to your craft and put it on. Rub over the tape and the letters will stick. Pull the painters tape off slowly and the letters will stick to the craft and will be in a perfect line.
Let me know if that helps! I hope I didn’t confuse you. I am so happy you got a craft cutter! It helps to make crafts professional…that’s why I have one!!!
Lila says
Very Cute!
Nancy says
AWESOME ideas! WOW, I think I found a new blog to follow!
Leslie says
cute everything!! ~ I just have to say that the Noel block still says it – No L! 🙂
Karen says
Geez I love this site!!! Thanks so much for all the super fun ideas! I can’t wait to get started. I’m planning to do a spin on these blocks for wedding reception centerpieces. I was wondering, do you stain the blocks after you modge podge or before?
Karen says
oh! just found the answer in idea #2.
reshma says
give me a idea to do block to make design?
Angie Reeves says
I loved this idea…made them a few weeks ago and have finally posted to my blog! So cute and super simple!!!
Courtney Leibrandt says
I have also been having fun with wood blocks. Here are some sweet ones I made for Valentine’s Day: redheadscraftmorefun.blogspot.com/2010/01/l-o-v-e-blocks-x-o-x-o.html Have a great day!
Courtney
dot says
Love these ideas… Linking to this post today on Dabbled.org.
Thanks so much for sharing them!!
dot
Erin Keith says
Thanks so much for such a great idea!!! I made a little family set for my son and I love them! And so does he, but for now, I might just a little bit more. Here they are if interested. chrisanderinkeith.blogspot.com/2010/01/family-blocks.html
Thanks again!!
Amanda says
Wow these are fabulous. So glad I found you, just became a follower 🙂
M says
Question – do you use real photopaper for the pictures or print them off on cardstock?
Alison says
I use real photos! Just printed them off at Costco. 🙂
Tiffany @ Simply Complicated says
I just made the photo block ornaments. I love them! I made enough to keep for our tree & then to give them the grandparents for Christmas. I plan on making a new one each year. Thanks for the awesome idea!!!
Amy Blake says
What darling ideas!! Love them all… thanks for sharing!
kami says
love your site. thank you. i just purchased me a crickut on a black friday sale. I’m so excited!!!! anyway, i was wondering where you buy your vinyl for it?
thanks
kami
Alison says
I know Roberts has vinyl. Click here and it will take you to a post and at the bottom there is a code for 25% off.
samantha2818 says
I love these blocks – they are adorable. I’ve put a link to these on my blog. Thanks for sharing x
Brooke - in Oregon says
Great ideas, thanks so much for posting them!
Mical Johnson says
I think I’m going to try #3. That seems simple enough for me to do =P
Linda @ Craftaholics Anonymous says
love all your blocks! Thanks for sharing all the ideas!
Chelsea says
What a great post – I can’t wait to see 7-10! Wonderful ideas.
Chelsea
chelsie says
Love the blocks! Way stinking cute:) I’m makeing sure to spread the word of how awesome this site is! Thanks, you girls are the BEST!
Lee @ Thriftybeaver.com says
So cute. I love those; what a great holiday decoration idea!!
valerene matthews, malaysia says
i am SO gonna make these to give away! thinking of sticking christmas giftpaper on the non-photo side and sandpapering it to give it a decoupage kinda look. thanks so much for sharing!
Kim @ Cheap Chic Home says
Those are cute ideas–and ten of them–wow!
Katrina says
I am just curious, where you put the number 9. I don’t see it listed for either block.
Alison says
The number nine is the number six upside down. Thanks for clearifying that!
Shelley says
alison is amazing. seriously. how does she think of things to do with a block?!
Brooke says
I am SOOO amazed at the MAGNIFICENT ideas I get on this site…. THANKS SO MUCH!