
I have been so excited to share this post with all you fabulous ladies! Let’s just say I have a slight HUGE obsession with scarves. My collection grows and grows… and I don’t think I can ever have enough.
This is my very favorite scarf material ever; more like, this is my favorite fabric ever. I seriously buy yards and yards of this stuff and I keep going back for more. It is so soft and breathable. It is perfect for swaddling blankets, newborn photography props, scarves.. I could go on and on. I want to show you all how easy it is to create the beautiful hand dyed scarf that I love so much.
The supplies you will need:
Cotton Bubble Gauze Fabric
Rit Dye – there are lots of colors to choose from
Salt (non-iodized)
Rubber Gloves
Plastic Container
Water
This amazing bubble gauze fabric can be purchased online at dharmatrading.com, and it ships super fast!
 Start off by washing and drying your fabric, this will remove any finishes or fragrance. You will need to determine the size you would like your scarf. This fabric comes in 50 inches wide. I made 2 scarves at 25 inches wide from one piece of fabric. I decided on a little bit longer scarf and cut it at 90 inches. You can make it however big or small you would like. You could also make a square scarf measuring 50 x 50 inches, or smaller. I have one at that size and love it as well.
Next you will tear the selvage edge off each side of the fabric. I snipped the fabric about 1/2 inch away from the edge and tore it all the way up the length. Then clip at 25 inches and tear the fabric into 2 equal pieces. Clip and tear each of those pieces to your desired length.

I know dyes can seem scary, trust me.. It took me forever to finally try it. I was shocked to see how fast and easy it really was! There are lots of dying options available, so choose the one suited for you. I am going to show the basic “tub dye” method which is my favorite. I mixed 2 colors to create my favorite shade of Strawberry Peach. You can mix any of the Rit Dyes to create your perfect color. Check out their Color Formula Guide! I first dumped 1 packet of Tangerine and 1 packet of Petal Pink in a baggie and mixed them together. This is showing the instructions for 1/3 of the regular box dye recipe, since we aren’t dying very much fabric.
In your kitchen sink or tub fill a plastic container with 1 gallon of HOT water. Leave the container in the sink or tub and add 1/3 cup of salt and 1 1/2 teaspoons dye (for lighter shades add less). Stir the dye and salt until it is dissolved.
 Wet your fabric with hot water and wring it out. Unfold the fabric and drop it into the dye mixture. Move the fabric around and separate the wrinkles in the container. Continue for up to 30 minutes till you have reached your desired color. I dipped my fabric in the container for less than a minute and it was completely saturated and the exact color I wanted. Remove the fabric and rinse with warm water gradually turning it to cool until the water runs fairly clear.
Dump your dye down the drain, and clean any stained surfaces with a bleach formula immediately.
 Throw your fabric in the washing machine and wash separately with warm water, then tumble dry. Your fabric will come out with the gorgeous bubble gauze texture.
If you plan to wash this scarf over and over you will want to set the dye with a product such as Retayne.This will prevent your dye from bleeding out and fading over time. Follow the instructions on the bottle for best results.
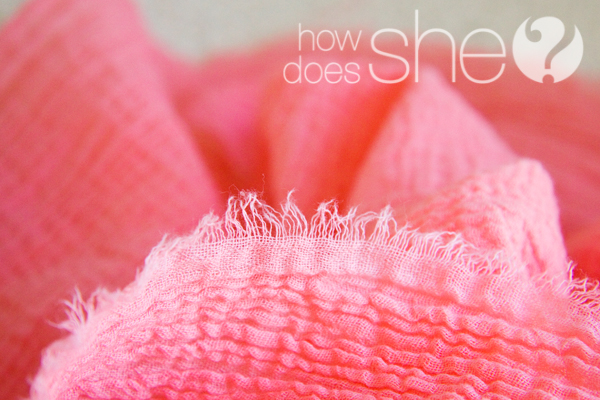
Your edges will look something like this picture below. If you like the way it looks, then you are finished! If you would like a fringe continue reading for those instructions.
 On each side of the scarf you will pull a few threads from the edge. Gently tug the strings until you have removed them from the entire length of each side.
 You will start to get a fringe as you remove strings. You can create as large or small of a fringe as you would like, just keep pulling threads until it looks right!
 And you’re done! Throw that super soft flowing scarf around your neck, and enjoy!
This makes a perfect gift for a friend or yourself 😉

Check out Sydney’s great post on 50 ways to wear a scarf!

(We’re linking up to THESE parties!)

Kelsie says
Your scarf is way cute! Is it thick enough to make a nursing scarf out of? Not like hot thick, but not see-through thick? 😉 Thanks!
Alissa says
Lara I love this! Where do you go for the fabric if Dharma is out of it? There website says out of stock, are they usually quick to get it back in?
kain batik says
If you would like to take a great deal from this post then you have to apply
such strategies to your won webpage.
janey says
Oh Wow Lara,
That has to be the easiest scarf and the most amazing color… They are both so beautiful… I love it !! Thanks for posting and for the link to where to get the fabric… janey
Alison says
This is stunning!! Love it!!
okoraf says
The scarf is really beautiful. Thanks for sharing
Jami says
Stunning! Great dye job! Would love for you to stop by The Blackberry Vine and share at the Tuesday To Do Party!
Smiles!
Jami
http://www.blackberryvine.blogspot.com
Cristi Dame says
Can’t wait to try this!! Thanks for sharing!
Katy says
Great idea. Can I suggest using iDye (also available from Dharma Trading)? It is extremely easy to use – the whole packet, including plastic wrapper, dissolves in water – cheap, and the colors are really vibrant.
Lara says
I love the dyes that dharma trading sells. I use the Fiber Reactive Procion Dyes all the time, but they are so time consuming! I will definitely have to give the idye a try! Thanks!
Maureen says
Lara-
Do you think this would work to make an “ombré scarf” where the color has gradients? Wasn’t sure if you held one end of the fabric into the dye if it would wick up the fabric??
Lara says
You most definitely could! I have never done it before, so I don’t have any expert advice.. But here is a tutorial by Rit Dye: http://www.ritdye.com/dyeing-techniques/ombr%C3%A9-dyeing
and this fabric would be perfect for an ombre look!
Penny says
I love the scarf! Now I know how to get the perfect color I want to match my outfits. Dyeing fabric doesn’t look so intimidating now. Good post Lara!
Dawn says
So fun! This would be a great project to do with my nieces. I love the gift idea too!
Michele says
Love reading your blog. Thought I would share this website with you. http://www.camlettes.com. An awesome cropped camisole that you and your readers would LOVE!
Nesleirbag says
Dyed to match . . .whatever you want! Great idea!
Missy says
Love the color! I am little afraid of the whole turning things colors process but you make it look so easy! Thanks for the great tutorial!
Shelley says
You are the queen of fabric. Everything you do turns out so darn cute.
Alison says
Lara this is darling! I have a bit of a scarf obsession too and this can feed the need.