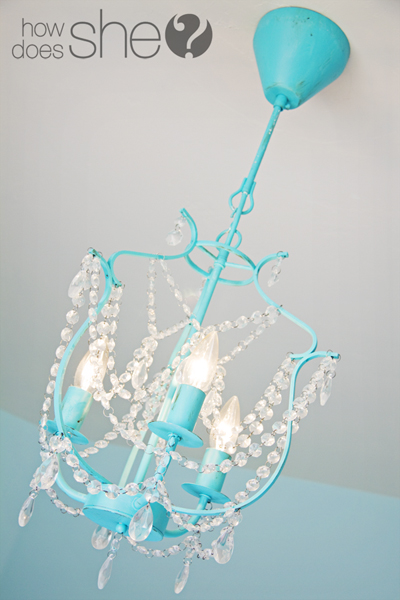
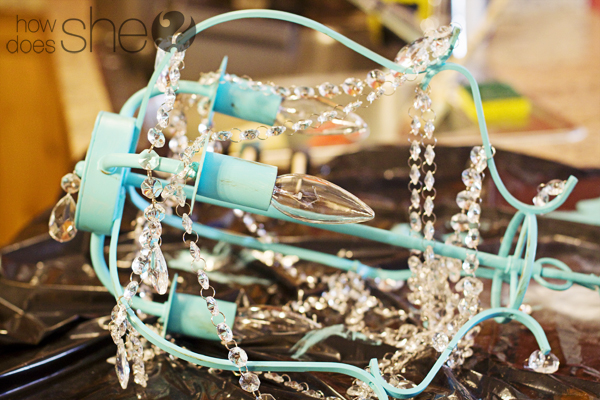
Alright. I’m gonna share the secret on how I refinished this adorable chandelier that keeps popping up in the background of my pictures.
Pay attention… its really REALLY easy 🙂 {shhh, don’t tell}.
As I dreamed about having a nice little nursery for my babies, I couldn’t help but imagine a bright little chandelier hanging from the ceiling. I searched and searched for something just right. I never realized how expensive light fixtures can be! I just so happened upon THIS very inexpensive small chandelier with crystals hanging from it, for a killer price, at IKEA. It came in a brushed nickle finish which really didn’t match my nursery in any way, but I couldn’t pass up the deal! I wasn’t expecting that a simple coat of paint would make this item the highlight of the nursery! This technique would work for just about any metal or plastic light fixture. While shopping around at yard sales and thrift stores give those dusty old light fixtures a second glance.. You might be surprised at the difference a brush and some paint can make!
Determine how long you want the chain on the light to be, then remove the links you don’t want. I used some pliers to pry the extra links off. I took out all the links since my ceiling wasn’t very tall. The crystals are all linked together with some wire rings, kind of like key chain rings. Take a good look at the chandelier so you remember where each strand connected and unwound the links from the chandelier. This makes it a lot easier to handle and paint. Take it outside on a trash bag and spray it down with indoor/outdoor, all purpose, white primer. I let it dry for about 10 min, flipped it over and sprayed the parts I missed. Then let it dry another 10 min.
On the directions it says it takes 10 min to dry to touch, but it shouldn’t be handled for an hour. Since I’m not very patient.. I disregarded this and just started painting. I decided to use an acrylic paint, it’s cheap and they sell tons of colors at just about any craft store. I didn’t pick any particular brand, just a color I really liked. Use a sponge brush to paint it on. There was no order to how I painted mine.. just slop it on there and make sure it looks kind of even.
Let the paint dry to touch. I wanted to add a little antique look to the edges. I used Folkart antiquing medium the color was “down home brown”. Lightly dip your brush in and barely brushed the edges of the fixture. Some areas I put it on thicker than others and wiped it back off to give it some depth. Just brush it on to your own personal liking.
When it looks the way you want, let it dry for about half an hour. Then comes the tricky part. Twisting the crystal strands back on the fixture. Make sure you get all the links and strands back in the right holes, and be careful not to scratch the paint too much.
Screw in the light bulbs and grab your handyman! I called my dad up to help me hang it from the ceiling. I had no idea how the wires worked inside, I probably would have been electrocuted if I had tried to put it up myself 😉
… and that’s it!
disassemble
prime
paint
antique
reassemble
hang
done.
Quick. Easy. and ADORABLE!
(We’re linking up to these parties!)


Molli says
This is adorable. Can I pay you to make me one!!? Please?
Sara says
Ahh, finally a tutorial without the use of spray paint. I have been wondering what brush to use to paint my daughter’s light!
Makes perfect sense!!!
Shanna says
Looks great and your process is easy! My little girl would love it! We are currently re-doing her room. The room is aprox. 13×13 and has a reading nook attached that is about 4×6. I need lighting for both. Would this be bright enough for her entire room or should I just stick with it for the nook?
Google says
Great article.
Sorren says
Oh wow this is soo cute its exactly what i want to do for my daughter 🙂 thankyou for the inspiration xx
Erin says
This is a great idea! Does this chandelier provide enough light for your nursery? I couldn’t tell from the display in the store. Thanks!
Lusi says
Wow! Gorgeous and Easy by the looks of it! Thanks got sharing this 🙂
Lusi x
Amy says
Wow! I love this! I want a pretty chandelier for my daughter’s room!
kate says
Love this! Just bought one. I am wondering how you got the white cord not to show that was in between the links. I know you said you took out all the links but then what about that cord? Did you pull it up into the cieling plate? Im wondering how it would all fit in there? Thanks for your help!
Lara says
I just shoved the cord up into the ceiling plate! I just coiled it up inside! I didn’t have any problems making it fit 🙂 Good luck!
Heather says
I love this!!! What a special, personal touch you gave. I am now your newest follower!
Mik says
You’d never know this was from IKEA if you hadn’t mentioned it. It’s gorgeous. Perfectly done!
Lindsay says
That makes such a difference! What a great new piece you have! Love the color!
I have a link party going on now, called Show & Share. I’d love to have you link this up!
http://southernlovely.blogspot.com/2011/08/show-share-2.html
Jo-Anna says
Oh my! How much do I LOVE this?! I’ve been on the hunt for a chandelier for my bedroom, and could never find the colour I wanted! This is genius! Pinning it!
Jo-Anna
michele says
So cute–love that turquoise! I have this same chandelier–the pop of color is so cool, it makes it really stand out. Thanks for the inspiration!
Tonya says
Love it! I made one for my dining room from an old ugly brass chandelier I picked up at a thrift store and some Christmas tree garland beads from Hobby Lobby! It’s even turquoise too! We have great taste! 🙂
Michelle {Fun On A Dime} says
What a fun color! Great job!
Amy says
It’s super cute! I love the color!
Jamielyn@iheartnaptime says
This is absolutely gorgeous!! Love it!
Alison@howdoesshe says
Super Cute! I want one!
Capel Braided Rugs says
Oh wow! That is just fabulous! So pretty! Love the funky turquoise color, too! 🙂
Penny says
It’s beautiful! Looks like it came from a swanky upper end store. Thanks for sharing.