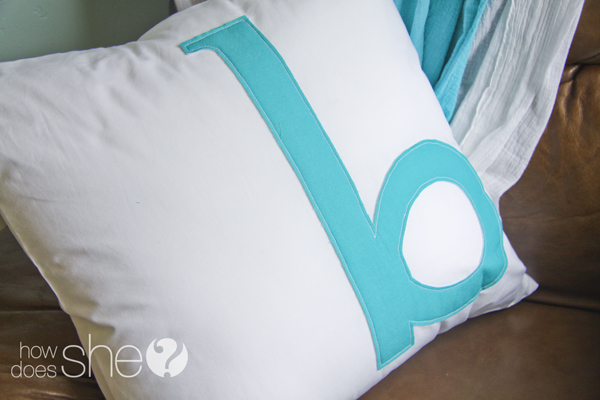
Aren’t we all searching for little ways to add a personal touch to our home? I know I am always wanting to add a little something here or there. If I could choose my #1 favorite way to spice up a room it would be in the form of pillows! They are so easy to sew, change and customize. They can add lots of color and fill in empty spaces! I have been dying to try out a monogrammed pillow cover for a while now. I see them occasionally in the store but can never find the letter or font I want! So why not make it yourself and make it 100% custom!
Add a Personal Touch to Any Room with a Monogrammed Pillow Cover

Supplies:
A Pillow
Fabric – enough to cover the pillow (I used 1 yard for a 22″ pillow)
Contrasting fabric (felt, felted wool, duck cloth..) – enough for a letter or cut out you would like
Thread
Sewing Supplies
Instructions for the Monogram Image for Your Pillow Cover
First, you will want to cut out the front and back pieces for your pillow cover.
FOR THE FRONT: Measure your pillow and cut your fabric the height +1″ and the width +1″. To make a 22-inch pillow, I cut the front to be 23″ x 23″.
FOR THE BACK: You are going to cut two pieces. Divide the width of your pillow in half + 4 inches. Cut 2 pieces to be the height + 1″ and the width divided by 2 + 4 inches. Does that make sense? So for a 22 inch pillow here is the math: 22/2= 11 + 4 = 15. So I cut the two back pieces at 23″ x 15″. These will overlap and create an opening for the pillow to be inserted.
After you have the front and backs cut out you move on to the fun part. It is best to use a thicker fabric for this part. I love the way felted wool looks or even just plain felt. I chose to use some extra duck cloth I already had lying around.
Decide on what you would like to have on the front of your pillow. I love a simple monogram pillow cover, they are totally adorable. If you wanted to go a different direction it would be simple to do an animal silhouette (I want to do a bird), a shape like a heart, headphones, or a star. I can think of so many, the options are limitless! I love to search through clip art on google images for cute ideas. Or if you are really great at free handing you don’t even need an image to copy! Print out an image or freehand an outline, pin it to your contrasting fabric and cut away!
Assembling Your Monogrammed Pillow Cover
Now you’re ready to start on the pillow cover itself. Take the two back pieces over to your ironing board. Press under 1/4 inch twice on one long side of each back piece. This will give you an easy clean finish to sew.
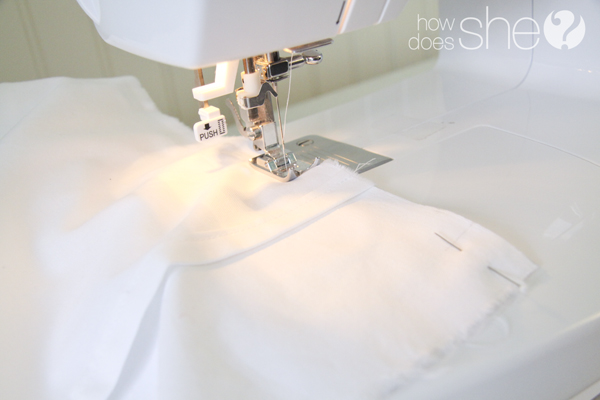
Stitch close to the folded edge of the clean finish and press it smooth. This will make up the overlapping back of the pillow.
Next take your cute cut out for the front of the pillow. Decide on where you want to place it. Be creative! Things don’t always have to go right in the center or be perfectly aligned. Have some fun! Once you have the placement you want, pin it to the front pillow piece. Don’t pin it too close to the edges. Leave a 1/2″ border for the pillow seam.

Final Steps for Your Monogrammed Pillow Cover
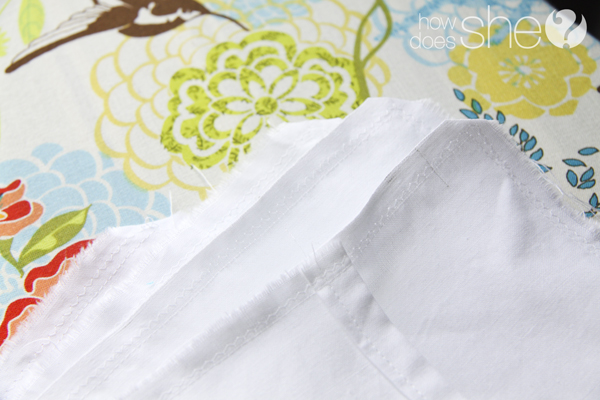
Now to make the pillow cover! Take the front of the pillow and lay it face up. Place the two back pieces overlapping on top and pin all the edges to match.
*Don’t mind the fact that my overlap is actually on the side, I ran out of fabric and had to improvise. I really prefer the overlap in the middle of the pillow.


Makes a Great Gift for Many Different Occasions
This monogrammed pillow cover would make a great baby gift, wedding gift with initials, or a cute throw pillow for your family room. You can make cute pillows for each child’s bed. You could even spell out a full word if you have the time and patience 😉
The possibilities are endless!

I can’t wait for my “little miss B” to get here! Only 1 more month!
Have fun sewing!


tracy says
where are the monogram stencils for the pillow?
Patrick says
Simply love it!
Wanted to do some vinyl lettering before Christmas, but this would be much better!
Kerajinan Barang Bekas says
awesome, so simple and cute, i like it…
Mari, hopscout.com says
Love the simple block styling and color choices. We have a brand new big girl bed that needs some pillows – this would be perfect for my girl!
Pat says
This is adorable! Looks so professional and certainly not expensive ~ a win, win! Thanks so much for sharing.
alysha says
So, SO cute! I need to get brave and get my sewing machine out of the box. 😉
Thanks for the cute post. 🙂
Nesleirbag says
How do you wonderful posters on this website keep coming up with such wonderful, easy to do ideas? I am addicted to HowDoesShe!
Lee says
I’m not much of a sewer, but this looks easy enough to do! Thanks for the great idea, yet again!
Alison says
Laua this so so great! I love the white pillow with the blue. Thanks for the post!
bonnie says
SO refreshing! I seriously need to make one of these.
jill says
Super Cute! I love the blue!
Lisa says
I am SO making some of these!
Missy says
so simple and cute! I love the blue on the white. You make it look so easy, thank you!