Making your own graphic t-shirts is so much fun, and a very inexpensive way to individualize your kids’ wardrobes. We are thrilled to bring you our brand new t-shirt transfer designs, created just for HowDoesShe by the talented Honeyhawk Design.
See all of our unique designs here!
Easy T-Shirt Transfer Tutorial
Here’s what you’ll need:
- Ink-jet printer
- Fabric transfer sheets: You can find them at Walmart, craft stores, or here (you can even buy stretchable kind that are more pliable with cotton t-shirts.)
- White or light-colored t-shirts/onesies
- An iron
*Note: don’t use ribbed tank-tops, unless you want to try the stretchable fabric transfer sheets.
Step 1: Print the design
First, get image downloads here!
These are already designed as reverse (mirror) images, so they are completely print-ready! No need to fuss with confusing settings! (Thanks Honeyhawk!)
Follow the instructions on your transfer sheets for the proper way to load the transfer paper into your printer. Usually, the shiny side with printed instructions will face upward.
Our images are already reverse (mirror) images, meaning they will read backwards when printed, but when applied to your t-shirt, they will read correctly.
*Note: If you want to make onesies, or smaller prints of these designs, you’ll have to reduce the scale % when you go to print them. See instructions below.
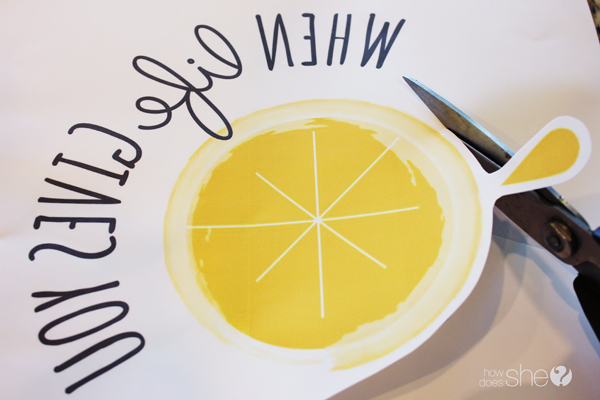
Step 2: Trim
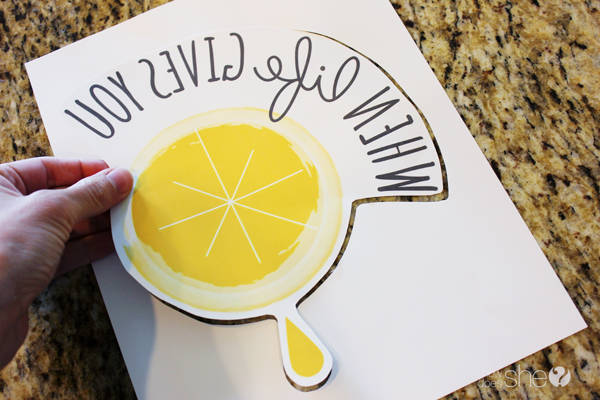
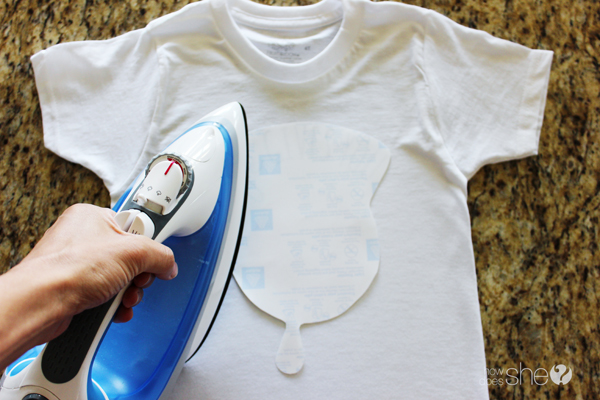
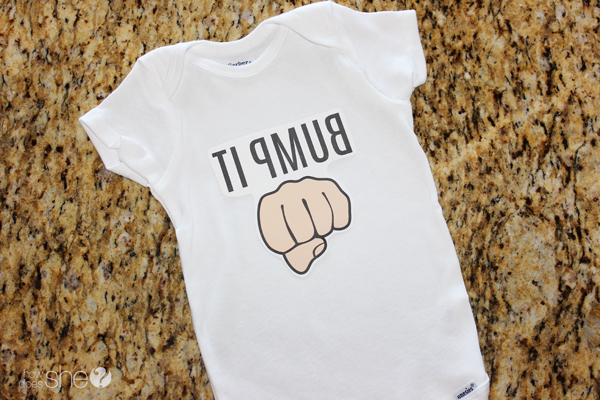
Cut around the outline of the design, leaving a narrow 1/4″ margin. Like so:
Step 3: Get surface ready
Have your iron set to the highest cotton temperature and preheat for at least 5 minutes. No steam or water! You’ll need a very dry heat. Prepare a clean, dry, waist-high area (I used my granite countertop). You’ll be applying a lot of pressure to your shirts with the iron so you’ll need a surface that’s not too high.
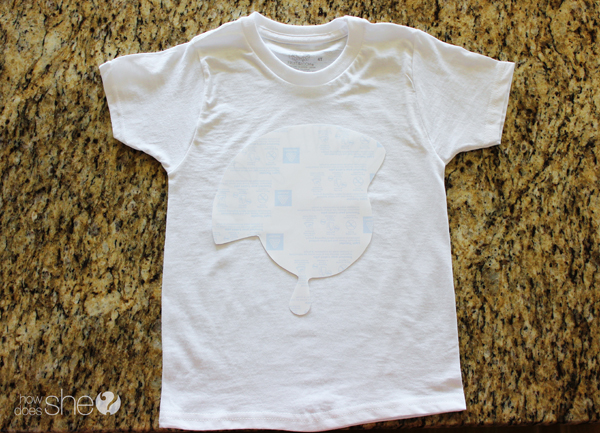
Set your cut-out transfer image on an ironed t-shirt, design side down. You’ll want to make sure it’s placed exactly where you want it.
Step 4: Iron transfer onto shirt
You’re going to be putting some muscle into this, because the more pressure you apply, the better your transfer will stick to the shirt. First take your hot iron and make slow 20-second passes over the entire area of the transfer, giving it an initial stick to the t-shirt.
Next, make continual passes across the entire transfer, applying firm, downward body pressure as you go. Cover the entire image completely and push hard! Especially focus on the corners.
You must seal the corners as firmly as you can to avoid peeling of the transfer sheet after washing!
Follow these general Ironing Time Guidelines:
Full page= 3-4 minutes
1/2 page=2 minutes
1/4 page=90 seconds
When in doubt…iron longer and harder! Really seal that image on there!
Step 5: Cool Down & Peel
Remove the tee from the hot surface and let it cool down completely. Don’t get impatient. Once it is entirely cooled down, begin carefully peeling the paper backing at the corner of the transfer. If you sealed the image correctly, the backing should pull nicely away, leaving the image sealed tightly on the t-shirt. If the image begins lifting, that means you didn’t apply enough heat or pressure. Re-iron the image, focusing mostly on the corners and edges.
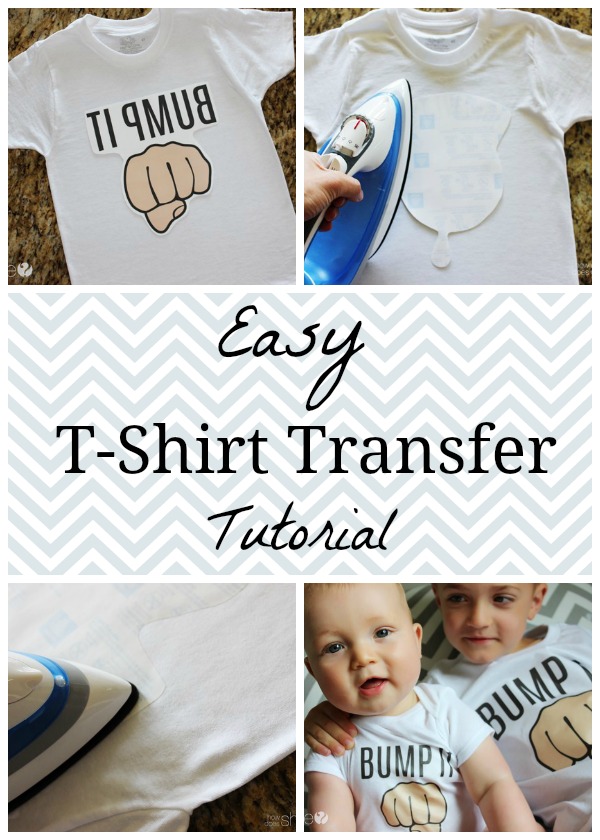
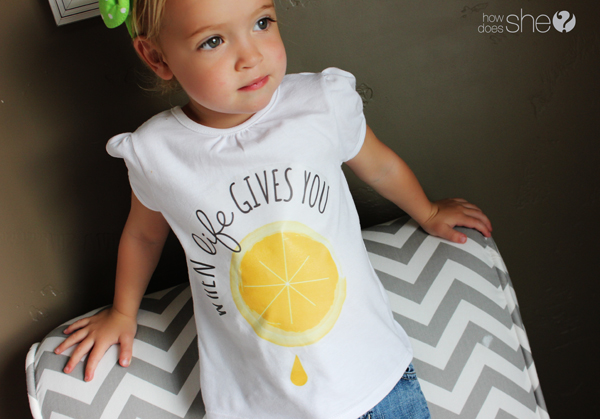
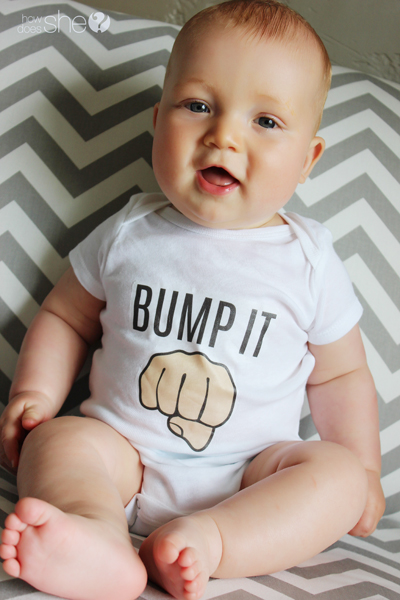
See how cute! I’ve gone a little overboard, making tees and onesies for everyone.
They are so great to throw on my baby and head out where I have gotten so many comments from on these graphic onesies! Old ladies especially love ’em…or maybe it’s all these chunky rolls;).
Reducing Size for Onesies:
If you’re making onesies or smaller t-shirts, you’ll need to scale down the image to fit your particular shirt. You also may want to print first on regular paper to test the size before you waste a transfer sheet.
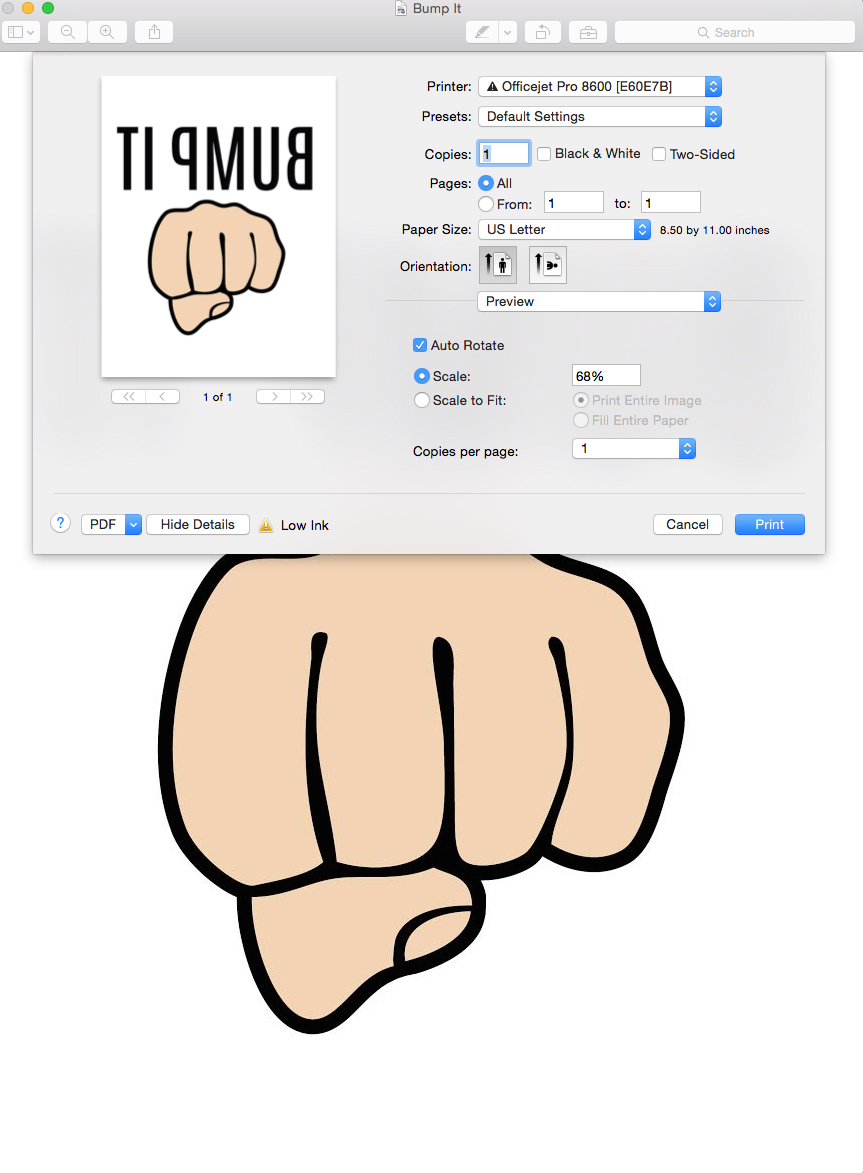
1. Click “Print” on the image you’d like to print. Your settings will pop up like this:
Notice the “Scale” is set to 68%. This is for a child and adult-sized shirt.
2. Select “Scale” and decrease the percentage to the size of your choice. I used a 40% scale for size 12 month onesies.
This is the size it will be on a 12 month onesie.
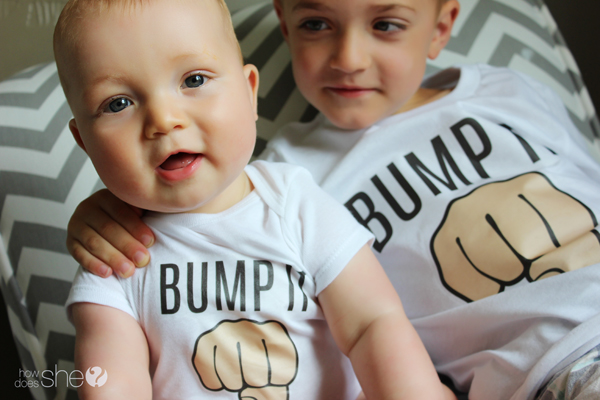
The cutie on the left is a baby-sized image, the handsome fella on the right is a regular sized image, no adjustments needed (4T t-shirt).
These are seriously the cutest to make for baby gifts, brother/sister look-a-like tees, for cousins, BFFs or family reunions. Too cute!
Get the graphics HERE and then make some of your own!









Teesprily says
baby t-shirt awesome. I like many tshirts
David says
Hey Honeyhawk, Would you tell me please what type of printer should I use for my design printing? If possible let me clear the printing part. Thanks for sharing this great tips