Way back in April I made this super fun “Rainbow Cake” for Missy’s and my daughter’s fourth Birthday party,
and today I’m going to teach you how to make a variation of it.
Don’t let the size fool you, this cake is NOT hard to make. Believe me, if I can make it, you can too! I have zero experience doing any of this professionally, and the only cooking classes I have ever taken date back to grade school.
The reason for the variation is that when my son Logan was deciding what kind of cake he wanted for his 9th Birthday he said, in an ever so “grown up” tone that made me feel OLD- “Mom I want a great big COOL cake like Layla’s, except I don’t want it to have all of those “girlie” colors! Do you think you could make that for me?” Here is what I came up with.
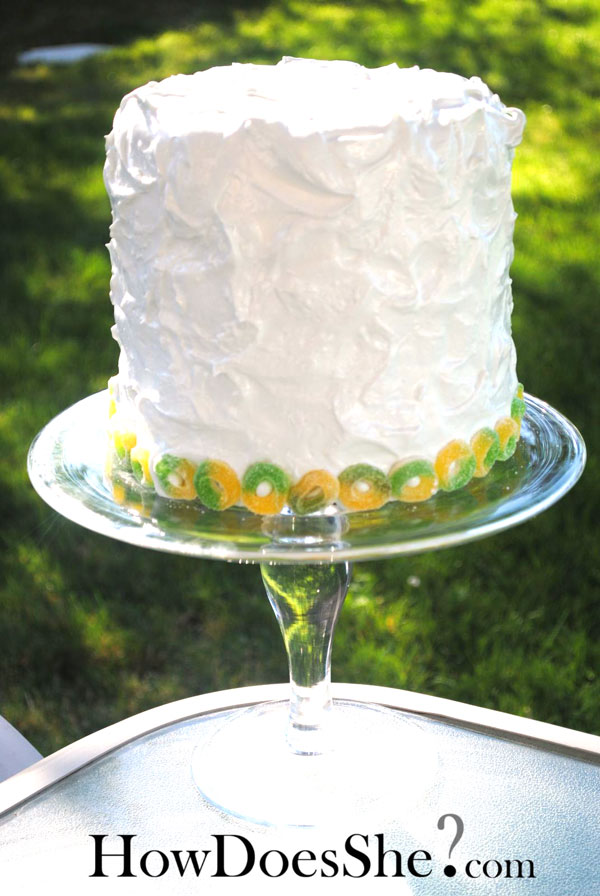
So, first things first, the coloring of the cakes is really the only difference. Logan’s cake is a “water themed” cake, so the colors gradually turn from blue to green. I figured that since we were going boating on his birthday this was a pretty good adaptation from the rainbow cake. The only other difference, is the candy on the outside. For Layla’s I used “Spree” Candy, and for Logan’s I used the little chewy circle candies that you can find everywhere. Missy had this brilliant idea b/c they look like “life preservers” on the “waves” around the cake. It’s a bit of a stretch, but I like it!
You will need:
Food Coloring (I just use the normal watery kind)
1 Jar of Marshmallow Fluff
2 WHITE Cake Mixes
Applesauce (or oil)
Eggs
Powdered Sugar
Butter
Lemon Flavoring (optional)
Candy of Your Choice
Parchment Paper (or wax paper)
Circle Cake Pans (you can try different shapes, it just makes it harder to stack)
Empty Cereal Box (or any box big enough to trace the pan)
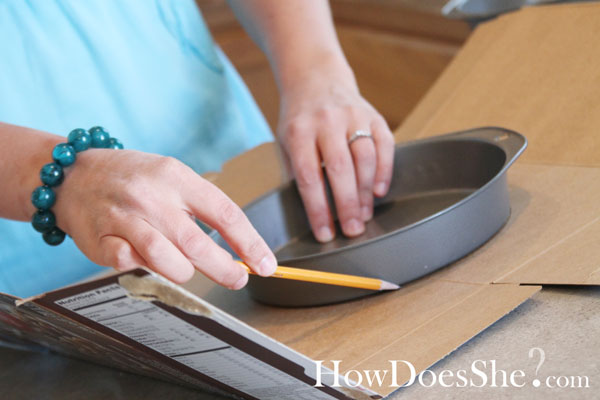
STEP 1– Use the cardboard to trace the pan once,
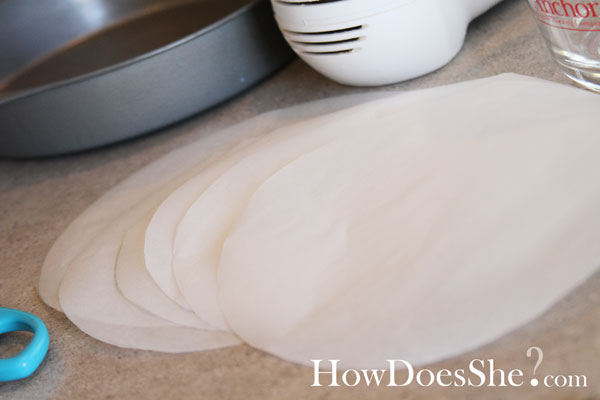
and the parchment paper, to trace it six times.
Cut out, and set aside.
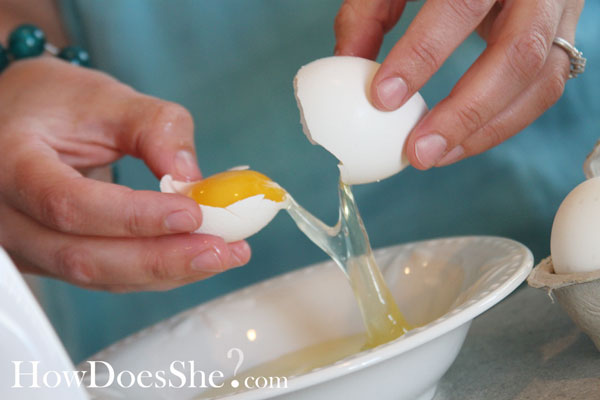
STEP2- Mix first cake, following instructions on the back of the box, making sure NOT to use yokes (it will mess up your colors).
I also substitute applesauce instead of using oil. 1cup oil = 1cup applesauce. It’s healthier, and I swear it tastes better if you use the sauce!
STEP4– Divide batter into three bowls, and add the coloring. I used 20 drops of food coloring for each cake, so for Layla’s it was 20-red(for red), 10-red&10-yellow(for orange)…! Logan’s was a little bit different b/c I wanted a gradual change, so I came up with this-(1) 20-blue, (2) 16-blue&4-green, (3) 12-blue&8green, (4) 8-blue&12green, (5) 4-blue&16green, and (6) 20-green!
Place parchment paper in bottom of pan, pour onto parchment paper, and bake.You can follow the baking instructions on the box, just remember each cake is 1/3 of the batter, and not 1/2, so it will take a little less time. Repeat this process with the second cake as well.
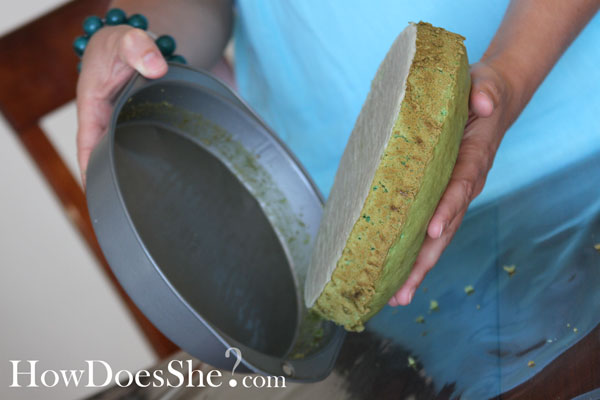
STEP5- Once they are cool enough, release the cake from the pan; run your knife around the outside,
put your hand on top of the cake, and pop it out.
Next, partially freeze the cakes, this will make them easier to level (step six). I like to put them separately onto paper plates, and let them rest in the freezer for a half hour or so. That means while you are cooking the second two cakes, the first two can be resting in the freezer, and so on, and so forth.
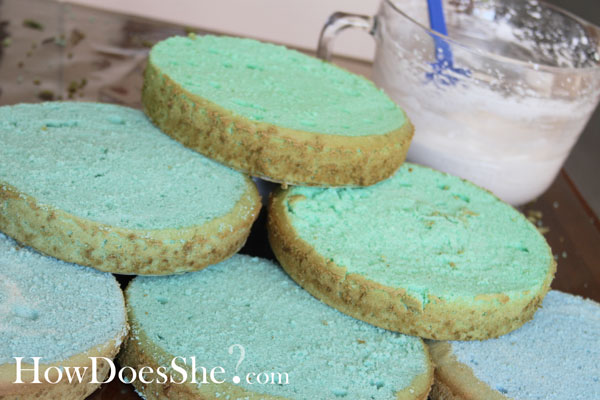
STEP6– Stacking and leveling the cakes requires a little patience, and a big knife! First take your big bread knife and cut the rounded part of each cake off.
Once you have all six tops off, make sure they are level, and trim off a little more if necessary.
Then lay your cardboard circle down on a big plate. (you will want to freeze the stacked cake before you finish frosting it, so don’t use your cake plate yet).
SIDE NOTE– Please do not let the following information deter you from making this cake. I promise it only takes a little extra time, and hardly any skill. O.k., so I’m just going to come right out and say it, I use three different kinds of frosting for this cake. I know it sounds a smidgen ridiculous, but I promise it’s worth it! To make it sound better it’s actually only two, the second is the first one watered down. So that’s not too crazy is it? I love how we all have set in our minds the things we will do, and the things we won’t do to decorate, or bake, or clean, or yada, yada, yada! So all I really have to say is if you are willing to make this cake, then you should be willing to make three different frosting’s right? I even named them to make it more fun.
#1- Lemonytastic Frosting
1 lb Powdered Sugar
1 stick of Butter
1 tsp Vanilla
1 tsp Lemon Flavoring
1/4 cup water
—Mix Well—
#2.- Crummy Lemon Frosting
same as #1., just cut the recipe in half, and add some water to make it runny enough for your crum coat (step7 ).
#3.-Marshmallow Fluffy Perfection
(recipe on STEP8)
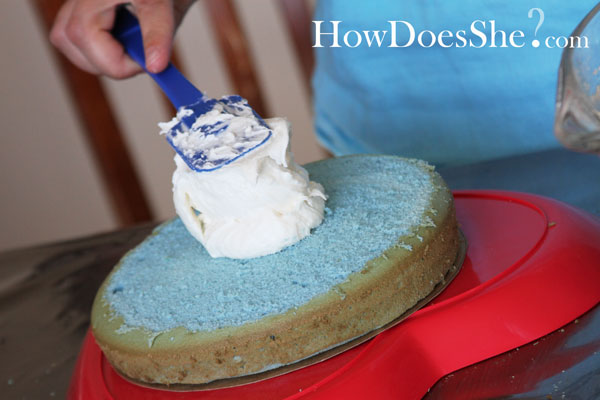
O.k. back to STEP 6– Spread a little smidgen of the Lemonytastic Frosting on the cardboard round, then place your first cake down (don’t forget to take the parchment paper off).
Next, spread a generous 1/4’ish inch layer of the same frosting on the first layer, then place the next cake round down.
Repeat these steps till the cake is stacked. Be sure to frost the top of the cake with your Lemonytastic Frosting cause it tastes so yummy!!!
Once you have your cake to this point, just pop it in the freezer for a half hour while you make frosting #2.
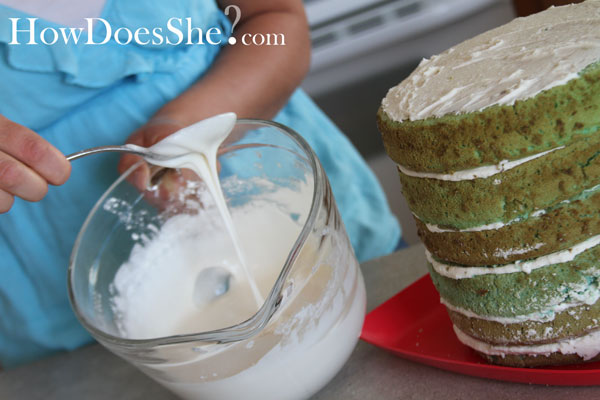
STEP 7- Coating the cake with Crummy Lemon Frosting. Depending on the day, you will need to add more or less water, so we took a pic of what it should look like. Don’t worry, if it gets too runny just add some more powdered sugar.
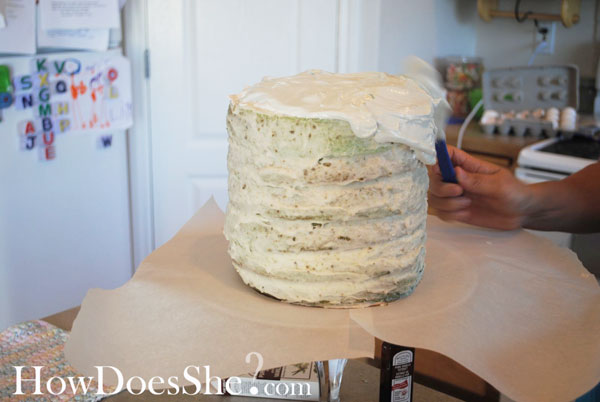
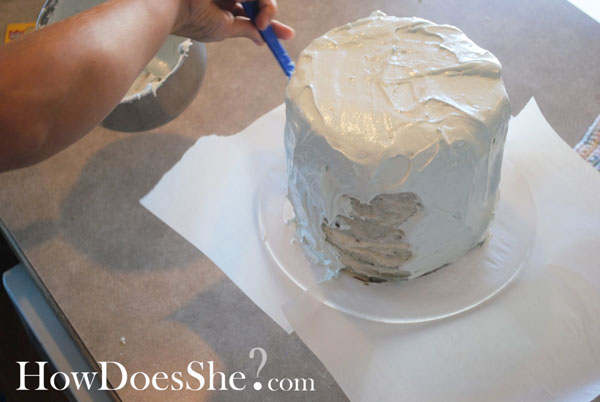
Next, spread #2. frosting over the whole cake.
The frosting will get all crummy by the time you’re finished with the crumb coat, which is the whole point. So, to sum things up,
the “crumb coat” stops the “crummy cake” from ruining the “real frosting,”
which is the Marshmallow Fluffy Perfection!
Once it is all covered, (yes it will look that ugly), pop it in the freezer overnight, or for a few hrs till the crumb coat hardens.
STEP 8- Here is how you make Marshmallow Fluffy Perfection. 1.- Pour 1/2 cup Sugar, 2Tbsp Water, and 2 Egg Whites in medium saucepan.
Cook over low heat, beating continuously with electric mixer on high speed until soft peaks form.


Pull the cake out of the freezer, and transfer it onto the cake plate. Oh wait, put two pieces of parchment paper down on the cake plate before you transfer the cake. This way you can do your decorating without messing up the cake plate. Next you will want to smear dollops of frosting onto the cake.
Once the entire cake is covered,
take the spatula and make the frosting swirl around in random circles.

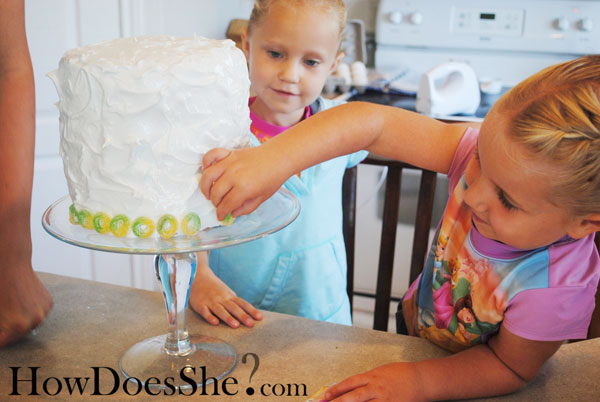
Slowly pull out the parchment paper, and now you get to decorate! Lays, and her friend Macey, couldn’t just watch anymore and insisted on helping.
And here is my beaming Birthday Boy, with his little bro, and his “non-girlie” cake.
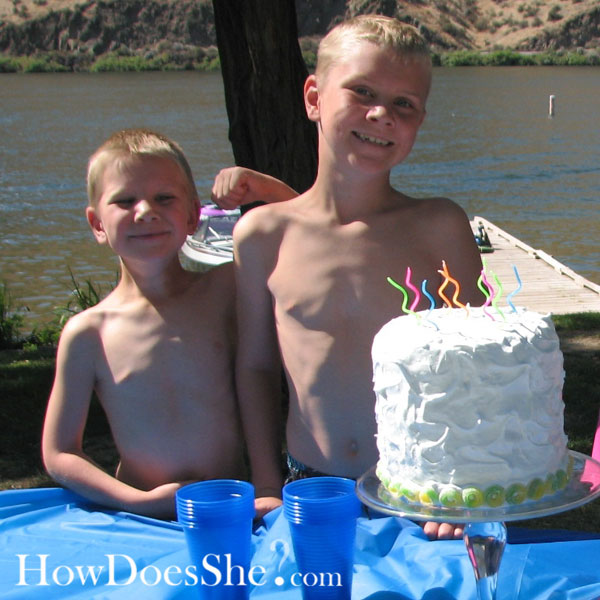
Making this cake takes a bit more time than a single layer cake, but Logan loved it, and that’s what makes it all worth while. My only caution is that you invite enough people to eat the whole thing, or it will call to you at all hours of the day and night!
P.S. My friend told me that the “HowDoesShe” readers might just be thinking,”Who is this new writer named Em?” If you thought that, I’m sorry, I probably should have introduced myself a little better. I’m the Emily that Missy introduced in her “3 FUN First Day of School Traditions” post. She is one of my bestest friends, and I somehow managed to worm my way into getting her to let me write for this site. I consider myself super lucky to know the “HowDoesShe” girls in “REAL LIFE!” All three of them are great, darling, kind, spunky, and just plain fabulous Women! Thanks so much for letting me share a little bit of what I do on your site ladies.











Karen MCDONALD says
Hello!!!
I love this cake!! One question are your layers 2″ high??
xou says
Hi 🙂
I made a 6 layers rainbow cake, 1″ thick each layer.
so the whole cake with filling will stack to 19cm high (8″ wide).
Do I need dowels support?
And how long ahead can I stack the cake?
(Is one night ahead ok or I risk it sinking?)
Thank you! 🙂
Mae says
Hi. I’m going to make this cake for Saturday’s birthday party. I wondered how far in advance I can make the frosting and cake? Thanks
Gina @ LifetotheFdegree says
I just found your site and am visiting a bunch of your old posts for ideas. I love how striking this tall, layer cake looks and would make a great addition to any celebration! Your positive attitude in the way you post your experiences and directions makes me feel like I might have a chance at successfully completing some of your beautiful recipes!
alyssandra says
Its amazing!ive never seen anything like it its great for kids and adults it looks difficult but i cant wait to try it good job 🙂
Melissa says
Thanks for this. I was nervous about making such a tall cake, but splitting by three instead of baking three cakes was so much less daunting. 🙂
Erica says
I love how your cakes turned out! I’m hoping to make a 6″ layer cake this week and I’m hoping you can help me with something. I have a recipe for a 9×13 cake, any idea how I might split that up to make a 6″ layer cake? I’m just concerned with how much batter to put in each pan and how many pans it will fill.
Sylvia McKoy says
Love this….me and the kids are gonna do it for their Dad’s birthday March 2nd…can’t wait to get them going…..:-)Sylvia
Shannon J says
I made the rainbow cake this morning, as a trial run for my soon to be 4 year olds birthday party. The colors are perfect, but each layer is so thin. I think I’m going to add another box of cake mix. Pehaps it’s due to the high altitude in CO.
Peta says
Could you please let me know how much a ‘stick’ of butter is in grams, or another measurement I can convert? I am guessing your American ‘sticks’ of butter are different to ours.
Thanks 🙂
Meagan says
I made this cake for my daughter’s 1st birthday party over the past weekend. I used lemon cake and tinted the icing pink for her pink lemonade party. Tons of compliments!! I could not have done it without the step by step guide you provided!! Thanks so much!
fitness girl says
hi,
Thanks for these incredible tips…..
I will try on this one for my niece’s birthday…..
It’s really a great tip….
Visty says
Making this cake today for my 4 year old’s party tomorrow! I’m excited! Thanks for your tutorial.
Jasmine says
I am wondering like Tracu if you have any tricks for serving the cake without it making a mess and falling apart. I made a six-layer cake about a year ago. Since it was so tall, everyone said they only wanted very thin slices. The slices just didn’t hold together when I cut them.
Missy says
Mine has done the same thing a time or two, I wish I had some tricks for you:) – let me know if you find out anything!
Tonya says
I made this cake for my daughter’s 3rd birthday. It was a big hit! It’s not as hard as it looks, but it did take some “quality” time with my family making it. 🙂 Thanks so much for sharing this idea. I looked like a superstar presenting this cake. LOL
Myrtle says
I love the cake! I plan on making a rainbow cake for my son’s birthday. Thanks for the great tip.
.-= Myrtle´s last blog ..Weekend Wrap Up =-.
Sandy says
My mother made a nine layer cake for my first communion. I still remember that cake as being magnificent nearly 50 years later. You are making special memories here.
Gale says
Wow…I’ve made cakes before (only two layer). I never thought to scrape off the top. And do you put it in the freezer so it’s easier to frost?
notyet100 says
wow such a cute tutorial,..
Bobbie says
Very impressive looking cake but do-able with your instructions!
Kristy ~ Posh Pixels Design Studio says
Wow that is suuuuper awesome!
.-= Kristy ~ Posh Pixels Design Studio´s last blog ..giveaway – cake pops by bakerella & cake pop kit =-.
Jenifer says
I made this cake! It was delicious but difficult to cut. My son loved having six layers for his 6th birthday! The lemon icing was my favorite and the “crumb” layer of icing was brilliant! Thanks for an awesome tutorial
Desiree says
Can you please tell me if I need lemon extract or lemon juice for the lemon flavoring in the frosting? Thank You!
Tracu says
I’m wondering how hard it is to cut and serve without losing it to the floor!?! Do you have any tricks for making sure that doesn’t happen? THanks for sharing, I can’t wait to try it!
.-= Tracu´s last blog ..Caramel Apple Cupcakes-YUMMMM =-.
Michelle says
Fabulous! Thanks SO much for the instructions!
.-= Michelle´s last blog ..for the love of smores =-.
Su-sieee! Mac says
I like your instructions. They’re easy to understand and follow. I almost want to make a cake a “mile” high as yours. Thank you.
Jennie Larsen says
Love them all, but that rainbow one… WHAT A SUPER FUN surprise to cut into. Amazing tutorial. When i get brave enough to make one…. I know where to come too… for all the great tips. Thanks Jen
.-= Jennie Larsen´s last blog ..Craft-O-Maniac Monday Link party Join in! =-.
Julie B says
Thanks for the great tutorial!
I’m trying to decide which cake to bake for my son’s 3rd birthday this year, and this is one of the contenders! It’s going to be a rocket themed birthday party, but I really like how this is such a BIRTHDAY birthday cake, if that makes any sense. 🙂
Julie – Lil’ C’s Mommie
Shannon J. says
Love this cake! I would love to make it, you make it seem so doable.
Brandy F. says
Em you’ve inspired me to make one… TONIGHT! 🙂 My niece’s birthday is tomorrow and I’m suprising her with a rainbow cake! YUM YUM!
Jade says
These cakes are fabulous I need to make one ASAP!!
stacy says
what darling cakes…thanks for all the tips!
Aubrey says
Thanks Em! This post TOTALLY is helpful for when I am ready to do this cake…or ANY birthday cake for that matter! Do you know how much time I have wasted trying to get a cake out of a pan without crumbling?!…or frosted without making a mess! (unsuccessfully I might add) :0) Parchment paper and “crummy frosting” is obviously the trick! :0) THANKS A BUNCH!
Tabitha Blue says
Love the step by step tutorial of this… it looks so easy! It may take some time, but at least it’s something I feel like I can do now. I love all the photos and the detail. Thanks for sharing!
.-= Tabitha Blue´s last blog ..Exposing the Past =-.
Claudia Bridge says
Hey Em, your instructions and photographs are so clear that I think even I could make that cake. However, I would rather have one from the maestro. Even though we just had supper I am definitely salivating, with no relief in sight.
Grayden
shelly (cookies and cups) says
Great how-to!!
That’s one big cake 🙂
.-= shelly (cookies and cups)´s last blog ..Pizza- Football & a Giveaway =-.
Dana says
I would love to make this for my daughters second birthday- How long does it take for the cake to defrost after it has been in the freezer overnight? I would be worried that it would still be frozen in the center. Thank you!
em says
It actually doesn’t take all that long. I took it out at 9:00am, and we ate it at 1:00pm and it was delicious!
Alison says
YAY Em…we love having you on our site! Thank you for posting and I wish I was closer because I would have invited my self over for a slice of cake! Happy Birthday Logan
Shelley says
Holy MEGA tutorial Emily! This is such a fabulous step by step. I love it. I’m going to try this soon. –We need a cute little gravatar by your face so people recognize you on the site. 🙂
Jen says
Thanks for doing this post! I have been wondering how to make that rainbow cake!
Erica says
I love this cake! Great tutorial! I can’t wait to make it.
jacklyn says
Super cute Em and you do make things easy to understand, How about you just come to my house and make this for me! Ok Ok I’ll try it
Jacque Charwood says
You guys are SO talented! I LOVE this! I wish I had the talent of your pinky finger! * starry eyed sigh*
.-= Jacque Charwood´s last blog ..Thursday 5 =-.
Claudia Bridge says
Em, this is remarkable!! I love the crazy frostings and all of the pictures. When I got to the candles I just said to myself those are a little girlie before I read the message from you. Handsome pic of the boys. Love How Does She!!!!! Keep them coming.
Nikki says
Emily, thanks for sharing this cake, I’ve seen it twice now on your blog and I think it looks super cute! Maybe for Lily’s birthday next year.
Heather Lynne says
What a great post! I’m sure there will come a day that I want to make this- I’ll be bookmarking this for future use 🙂
.-= Heather Lynne´s last blog ..Photography Tip Wheres Your Light =-.
Lindsey says
I LOVE these huge colored cakes! We’ve done one but colored it with jello powder so each layer tasted different!
Amber says
What a great idea, I recently made Tye-Dye cupcakes with the same basic concept we just layered the different color batters in the same cupcake..cup (would that be the right word?)
.-= Amber´s last blog ..I don’t just talk the talk =-.
Amy @ Blowout Party! says
Another incredible tutorial- thanks! You make everything seem so doable!
.-= Amy @ Blowout Party!´s last blog ..Beer Tasting Party =-.