
If you’re like me, you have baskets and bins galore that are overflowing with scrap fabric. In an effort to calm the craziness down in my craft room, I decide to take action and do something with all these scraps.

So, without further ado….I give you – 3 EASY mini banners that will take just minutes to make! They’re scrappy and oh so cute!
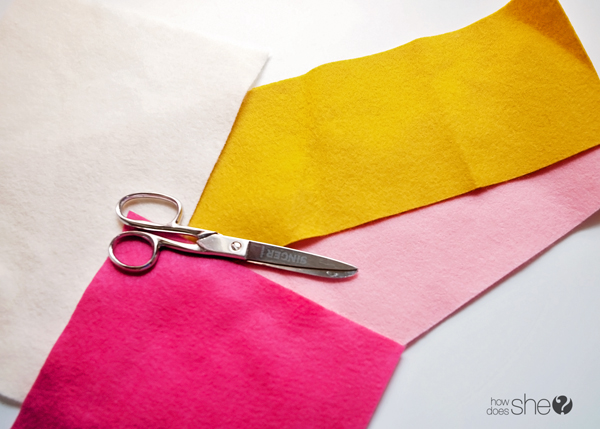
First up is the Felt Flag Banner.
I grabbed some felt scraps that I thought coordinated well together.
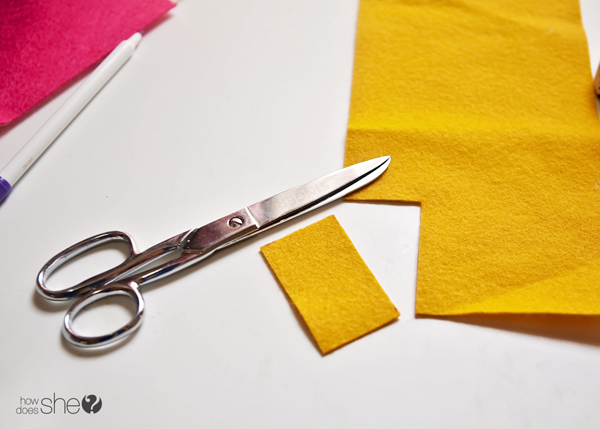
Grab a marker and mark off blocks of 2.5″X1″

Simply cut out the blocks.
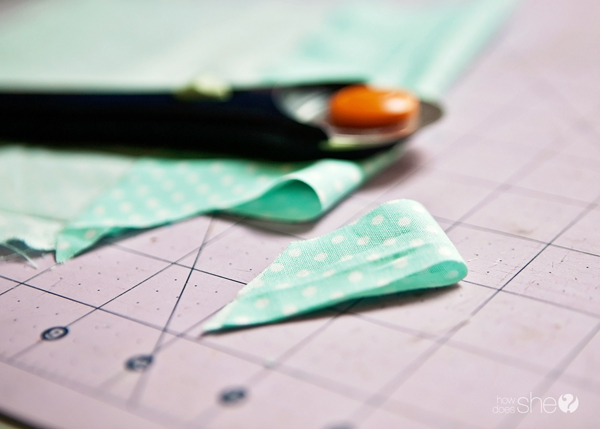
Fold width wise, then length wise. Or to simplify…fold it hamburger style then hot dog style. (please tell me you remember your teacher calling it this in grade school?!!)

Grab your scissors and cut from the open edges into the fold, just taking a right triangle off the bottom.

It will look like this once it’s cut.

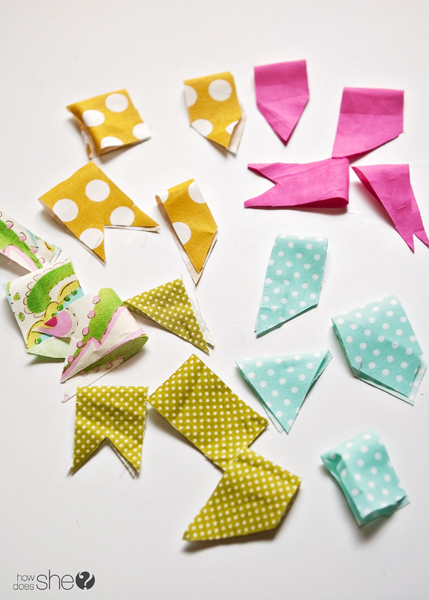
Repeat the process. I made 4 flags from each of the 4 colors of felt I had.

Grab some twine and fold your felt flag and sandwich the twine in between. (anyone else catching on to all these food references?!)

Now, take it to your sewing machine and sew a straight stick from right below the twine to the middle of your flag. Make sure to back stitch! Since you’re only putting a couple stitches in, your thread will pull right out if you don’t back stitch.

Repeat the process for all the felt flags. I spaced mine 2″ apart but totally use your personal judgement on spacing.
And there you have it – a mini felt flag banner! So cute! I am seriously surprised at how many times I’ve used this little guy to decorate around the house or for showers/parties. Definitely a good little banner to have in your stash.

Ok! Now, let’s move on to the Scrappy Banner. This one is probably my favorite out of all 3 mini banners because it doesn’t take much of a scrap to make these.
Grab a scrap piece of fabric and fold it down about 2 1/2″ so that you have a double layer of fabric.

Now, here’s the fun part! Cut out some banner flags. They can all be different! I tried to make sure all my flags were about 2″ long but don’t worry if it’s not exact. That’s the beauty of this banner – they can be different sizes and it will still look perfectly fine when you go to making your banner!

Here’s some of the flags I ended up with for my scrappy banner:
Now, stitch the banner together. Simply straight stitch the top of your folded banner pieces. I left a little 1/4″ gap between each flag in the banner.

And here’s the finished product! Scrappy and oh so lovely. ;0

Now for the final banner – the Strip No-Sew Banner. Don’t ya love a good no-sew project?! I know I do.
I chose 3 coordinating fabrics out of my scrap collection. I measured it out where each strip is 6″ long x 1″ wide.

And to give it a shabby look, I chose to tear my fabric. Simply cut a little slit and rip away!

I ended up with approximately 6 strips of each fabric.

Grab some twine and one of your strips. Fold in half and place behind your twine. Make sure there’s a little opening at the top.
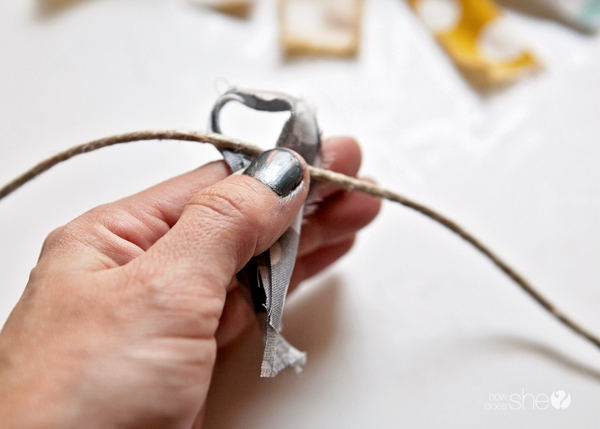
Feed the tails of your strip through the opening at the top and pull tight.
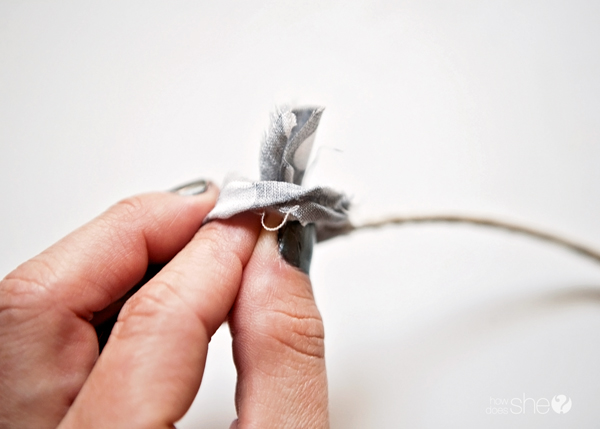
You will end up with the strip looking like this:

Repeat the process with each of your strips. I spaced the strips out on the twine about 2″ apart.

And there you have it – 3 simple mini banners that took only minutes to make. Have fun creating your own!


Nicolette says
Cute Kerri! Where would you put these? I need some creative inspiration to spruce up some spaces:)
Kerri King says
I used one of the banners on a old crate box that sits on my foyer table. And other one, I attached to a wreath. I want to make some fall banners and Christmas, too to use on my fireplace. Really any area of my house that needs some quick, happy decor. 🙂